
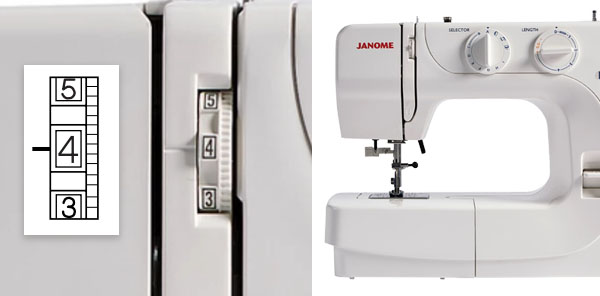
Janome sewing machine tension problems often show up as loops underneath the fabric, bobbin thread appearing on top, puckered seams or stitching that changes halfway through a project. The important first step is to identify which thread is misbehaving and whether the machine is actually threaded correctly. Turning the tension dial repeatedly can conceal the original problem and make the next test harder to interpret.

A good repair starts with a controlled sample, correct threading and a needle suited to the job. Only then does a tension adjustment tell you something useful. This guide covers ordinary two-thread lockstitch sewing on Janome domestic machines, with separate notes for embroidery and quilting. Overlockers and coverstitch machines have different thread paths and balancing procedures; their looper settings should come from their own manuals.
What Balanced Tension Should Look Like
For a normal straight seam, the needle and bobbin threads should meet within the fabric layers. The top should show a continuous line of needle thread, while the underside shows the bobbin thread. Neither side should have loose loops. A seam can look reasonably neat and still be unsuitable if it draws the fabric together or opens too easily when gently pulled across the stitching.
Do not judge every stitch by the straight-seam standard. A zigzag may show a little needle thread on the underside while remaining properly balanced. Janome illustrates this difference in its Sewist 709 instruction manual. The acceptable appearance also depends on the fabric thickness and stitch being used; a very thin layer gives the interlocking threads less space to hide.
Use two contrasting colours of the same type and weight of ordinary sewing thread for diagnosis. That makes it easier to distinguish the needle thread from the bobbin thread without changing several material properties at once. Label the top of the sample before sewing. Otherwise, turning a scrap over repeatedly can lead to a mistaken diagnosis about which thread is being pulled through.
Start With the Model and the Sewing Setup
Find the model number on the machine and use its own threading diagram. Janome machines differ in bobbin loading, needle orientation, tension controls and special-purpose accessories. A front-loading removable bobbin case is not threaded like every top-loading holder. A machine with automatic needle-thread tension still depends on the operator installing the thread, bobbin and needle correctly.
Make a note of the selected stitch, tension setting, needle type, thread, fabric and presser foot before changing anything. If the machine was sewing well yesterday, record what changed today. A fresh bobbin, a different spool, a heavier seam or a decorative stitch can be a more useful clue than the fact that the tension dial has always been set to the same number.
For the initial comparison, use two layers of stable woven scrap, a suitable fresh needle and ordinary matching-weight threads. Choose a basic straight stitch and the starting setting specified for that operation in the manual. This establishes whether the machine can form a normal seam. It does not establish the final settings for stretch fabric, embroidery, a quilt sandwich or very fine material.
Quick Symptom Guide
| What you see | What it may indicate | Best first check |
|---|---|---|
| Large loops of needle thread underneath | Upper thread not controlled through its path | Rethread completely with the presser foot raised |
| Bobbin colour pulled onto the top | Upper pull too strong or lower thread not properly controlled | Check both thread paths before reducing upper tension |
| Small loose loops along the underside | Upper setting too low, or intermittent thread-path trouble | Compare a correctly threaded baseline sample |
| Fabric gathers along a straight seam | Tension, needle, stitch or fabric-support problem | Test the actual fabric layers and a suitable needle |
| Occasional missing stitches | Needle or stitch-formation issue | Check needle condition, installation and suitability |
| Thread frays before breaking | Abrasion, needle mismatch or a snag | Inspect where the fraying begins |
| A nest appears only at the start | Starting technique or thread-tail problem | Follow the model’s starting instructions |
| Stitch quality changes halfway through | Variable thread delivery or a changing fabric stack | Watch the spool, bobbin and seam transitions |
| Needle strikes or machine locks | Mechanical interference or trapped thread | Stop sewing and inspect before restarting |
These are starting points, not proof that a particular part has failed. The same visible symptom can have several causes. Work through one branch, sew another labelled sample, and keep the changes that produce a repeatable improvement.
Reset the Threading Before Adjusting Tension
Switch the machine off while working around the needle and follow its manual for positioning the needle and take-up lever. Remove the upper thread from its path and start again from the spool. Raising the presser foot is particularly important because it releases the tension discs on the usual domestic arrangement, allowing the thread to seat properly instead of riding outside them.
Janome’s official tension troubleshooting guidance prioritises cleaning, correct consumables and rethreading both paths. Make sure the take-up lever and every required guide are included. A missed guide can leave the thread apparently threaded through the needle while preventing the machine from controlling it during stitch formation.
Check the spool arrangement against the diagram as well. Thread should unwind without catching a spool notch, wrapping around a pin or being trapped by an unsuitable cap. A spool that feeds normally for several turns and then catches can produce a short patch of tight stitching followed by a break. Changing the tension setting will not remove that obstruction.
Next, remove and reload the bobbin using the direction and slots shown for your model. Do not assume that every Janome bobbin unwinds clockwise or anticlockwise. Confirm that the thread follows the actual tensioning path rather than simply coming out beneath the cover. Replace the cover and return the presser foot to the sewing position before testing.
Why a Complete Rethread Is Better Than Pulling One Section
If the original path is uncertain, tugging at one visible section gives little information. You may seat the thread temporarily while leaving another missed guide untouched. A full rethread establishes a known starting point. It also lets you inspect the spool and needle area without trying to infer where the thread disappears inside the covers.
Once the machine is correctly threaded, keep the first sample unchanged. If it now sews normally at the original setting, the evidence supports a threading problem rather than a need to recalibrate the machine. Keep that sample beside any later tests so you can see whether an adjustment actually improves the result.
Loops or Bird’s Nests Under the Fabric
A mass of thread beneath the work often makes the bobbin look guilty. However, the loose material may be needle thread that has not been taken up correctly. Use the contrasting colours to identify it. If the loops are the upper colour, investigate the upper path before touching the bobbin-case screw.
Stop as soon as a nest forms. Continuing to sew can pack more thread into the hook area and make removal harder. Switch off and unplug before accessing the needle plate or bobbin area. Follow the manual to free the work, cutting trapped thread where necessary instead of pulling hard on the fabric or forcing the handwheel through resistance.
After clearing the obstruction, inspect the needle and the accessible bobbin holder for damage or remaining thread. Reassemble only as the manual describes. Then rethread and test on a fresh area of the sample. Reusing the heavily punctured, distorted patch can make a successful repair look unsuccessful because the fabric itself no longer behaves normally.
If the Nest Only Happens at the Beginning
Compare the first few stitches with the rest of the seam. A problem restricted to starting deserves a different test from loops that continue for the entire seam. Check the model’s instructions for positioning the thread tails, placing fabric under the foot and beginning with the correct needle position. Automatic thread-cutting models may have different starting routines from a basic mechanical machine.
Begin on a supported scrap rather than at a tiny unsupported corner. Do not pull on the thread tails so hard that they bend the needle or interfere with feeding. If the beginning improves but the rest of the seam remains unchanged, record that result: it points toward the starting setup rather than a general tension imbalance.
Bobbin Thread Appears on the Top
If the lower colour is being pulled onto the upper surface, first check that the bobbin thread is actually routed through its intended tensioning slot or spring. A missed lower thread path can produce the same appearance as excessive upper tension. Reducing the upper dial dramatically may make one sample look better while leaving the underlying loading error unresolved.
Once threading is confirmed, reduce the upper tension in a small step and sew another comparable line. Keep the stitch, speed and fabric layers unchanged. Stop adjusting when the seam balances; the lowest possible number is not the target. If a large reduction is required just to make basic sewing possible, return to setup checks rather than treating the extreme setting as normal.
Look at where the spots appear. Consistent lower-colour dots throughout a uniform seam suggest a different problem from an isolated dot at a bulky crossing. A change limited to thick intersections may involve uneven feeding, needle deflection or the abrupt change in material. Compare the flat sections before deciding that the whole machine needs adjustment.
Small Loose Loops Beneath an Otherwise Regular Seam
After correct threading, a genuinely loose upper setting may leave small loops of needle thread below the fabric. Increase the upper tension gradually, using a fresh line on the same sample after each change. Mark the setting beside that line. This creates a visible progression instead of relying on memory while the sample fills with similar-looking seams.
There is no single correct number for every Janome, thread and fabric. A setting copied from another model may not describe the same amount of tension. Even on one machine, a satisfactory ordinary straight-stitch setting may be unsuitable for a special thread or decorative stitch. Start with the relevant manual recommendation, then judge the actual seam.
If the loops disappear for a few centimetres and return, stop treating the problem as a simple low setting. Inspect the thread delivery and repeat a short test with a known good spool and correctly wound bobbin. An intermittent restriction or a thread slipping out of a guide can create changing results that no fixed dial position will reliably cure.
Puckered Seams and Fabric That Draws Up
Puckering is not always a tension fault. A fabric can ripple because the needle and thread are too heavy for it, because it needs support, or because the layers are not feeding evenly. Examine the seam before and after pressing according to the fabric’s requirements. Avoid stretching it flat by hand and then assuming the stitch quality is satisfactory.
Test the same number of layers as the project, including interfacing or stabiliser where appropriate. A seam that looks good on two layers of cotton may still distort a lightweight lining. Reduce upper tension only after the thread path and needle are suitable, and compare the result with a sample using a more appropriate stitch length or support. Change one variable at a time.
Distinguish Tight Stitches From Uneven Feeding
Place two equal scraps together with their ends aligned and sew a controlled sample. If one layer finishes noticeably ahead of the other, feeding deserves attention. The tension dial cannot compensate reliably for two layers travelling at different rates. Check the foot, pressure adjustment if fitted, and the technique recommended for that material.
Support the work so its weight does not pull it away from the needle. This matters particularly with curtains, quilts and long garment panels. Let the feed mechanism move the fabric; pulling from behind can disturb stitch formation and deflect the needle. When the material needs specialised feeding equipment, use an accessory approved for the model and operation.
Thread Breakage, Skipped Stitches and Needle Breakage
These symptoms belong in the investigation, but they should not all be labelled tension failures. Janome’s troubleshooting charts distinguish them because the corrective action can be different. For example, skipped stitches may remain even after the visible balance improves if the needle is unsuitable for the fabric. An overly tight setting is only one possible reason for upper-thread breakage.
Inspect a broken thread end and the location of the failure. Repeated shredding at the needle suggests a different path from a spool that suddenly snags above the machine. Replace a suspect needle with the correct system, size and point for the work. Fit it fully and in the orientation specified by the manual, with the clamp secure.
Do not solve needle breakage by choosing the thickest needle available. An unsuitable larger needle can damage fine fabric without correcting the cause. Check foot and needle-plate compatibility, especially after switching between straight and zigzag stitches. A straight-stitch plate must not be used with a stitch that swings the needle beyond its opening.
Stop if the needle strikes the plate, foot or bobbin holder, or if a new needle immediately breaks again. Look for trapped fragments before continuing. If there is visible damage or unexplained interference, have the machine assessed. Turning the tension dial cannot correct a misaligned or damaged stitch-forming mechanism.
Bobbin Problems That Mimic Bad Tension
A bobbin that fits into the compartment is not necessarily the correct bobbin. Height, flange shape and material can matter. Janome’s bobbin guide identifies different families, including specialist metal bobbins. The safest reference is the exact model’s specification, not a packet described merely as universal or compatible with most machines.
Inspect for cracks, distorted flanges, rough edges and uneven winding. If a suspect bobbin is replaced, use a known correct bobbin wound normally on the machine or by the approved method. Do not overfill it. A problem that follows one bobbin but disappears with another is valuable evidence; it does not automatically justify replacing the entire holder.
Keep similar-looking bobbins separated when you own several machines. Put the model or part reference on the storage box rather than relying on colour. During diagnosis, use one known correct type throughout. Mixing bobbins between tests can make a mechanical problem appear random and can undo a successful threading reset.
Should You Turn the Bobbin-Case Screw?
Bobbin tension is adjustable on some Janome designs and in some specified procedures. It is therefore inaccurate to say it can never be adjusted. It is equally misleading to present screw adjustment as the universal first fix for domestic tension complaints. The intended procedure, access and appropriate setting depend on the machine and application.
For ordinary sewing, complete the upper-thread, needle, bobbin and cleaning checks first. If your manual does not instruct you to adjust the lower tension, have a Janome technician assess it. Avoid generic hanging-bobbin tests or screw-turn counts intended for a different case design. They do not establish the correct setting for every machine.
If a previous owner has altered the screw, tell the technician. Record what is known rather than continuing to turn it until the seam happens to look acceptable. Several compensating adjustments can leave the machine working on one scrap but failing as soon as the thread or fabric changes.
When Tension Changes During the Same Seam
Intermittent trouble is easiest to diagnose by recording the point where it begins. Does it coincide with a thick seam, a faster sewing speed, the spool reaching a particular position or the bobbin nearing empty? Repeat the same simple sample slowly and observe whether the fault happens at the same material transition or after a similar amount of thread has been used.
A snag at the spool can temporarily increase resistance. A poorly wound bobbin can deliver thread unevenly. A large piece of fabric dragging off the table can change feeding as its weight shifts. These are different causes, so replacing the tension assembly before reproducing the fault is an expensive guess.
Try a known good spool of comparable thread and a correctly wound bobbin while leaving the other settings alone. If the problem disappears, repeat enough stitching to make sure it has not merely paused. Save the suspect spool and sample for comparison. If it persists across simple materials and verified supplies, professional inspection becomes more reasonable.
Automatic Tension, Embroidery and Free-Motion Quilting
Automatic tension does not mean the machine can correct a missed guide, an incorrect bobbin or a damaged needle. It provides a starting control appropriate to the machine’s system and selected operation. Check whether you have selected an automatic setting, a manual override or a stored custom setting before assuming that the machine is choosing everything itself.
For machine embroidery, evaluate a suitable test design with the intended thread, bobbin thread, stabiliser and fabric. The underside of embroidery need not look like a utility straight seam. Different thread weights and design densities change the comparison. Use the embroidery manual’s balancing guidance rather than forcing the appearance to match a garment seam.
For free-motion quilting, hand movement and machine speed also affect the result. First confirm that ordinary sewing works, then test the actual quilt sandwich with the recommended foot and settings. If the straight-sewing baseline is sound but trouble appears only during free motion, investigate that setup and movement before changing the machine’s general calibration.
A useful comparison is a short practice shape sewn at a comfortable, consistent pace. Mark the direction in which loops or distortion occur. If the trouble appears mainly during abrupt turns or fast changes of direction, that pattern provides more information than a single tension number written on the machine. Keep the test small enough that you can compare each adjustment clearly.
Clean the Accessible Areas Properly
Unplug the machine and follow its instructions for removing the bobbin, holder or needle plate. Brush out accessible lint and loose thread without pushing debris farther into the mechanism. Refit each part in the specified position. A holder that is not seated correctly can introduce a new problem immediately after a well-intentioned cleaning session.
Do not spray penetrant, general-purpose lubricant or household cleaner into the tension mechanism or bobbin area. Cleaning and lubrication are separate tasks. Some machines have specific oiling requirements, while others have no routine user-oiling instruction for that area. Apply only the product and quantity specified for your exact model; do not infer that all Janomes need the same treatment.
Cleaning frequency should reflect use and lint accumulation. A machine sewing fluffy fabrics for long periods needs attention sooner than one used occasionally for a short repair. Examine the accessible area when stitch quality changes or after a thread jam. Stop dismantling at the limit described in the user manual rather than removing covers to search for an unseen fault.
A Controlled Test Sequence That Prevents Guesswork
The following sequence keeps the investigation manageable. Complete the basic setup first, then record a short sample after each meaningful change. If a change makes no improvement, restore the previous known setting before trying another variable. That keeps an unsuccessful experiment from influencing every later test.
| Test | What to keep consistent | What the result tells you |
|---|---|---|
| Full rethread at the starting setting | Fabric, stitch and thread | Improvement points toward thread-path setup |
| Fresh correctly specified needle | Thread paths and settings | Improvement implicates needle condition or suitability |
| Known correct bobbin | Upper thread and sample | Improvement narrows the lower supply or loading issue |
| Small upper-tension adjustment | Needle, layers, speed and stitch | A regular response supports an actual balance adjustment |
| Known good comparable spool | Bobbin, fabric and settings | Improvement suggests a thread-delivery or thread-quality issue |
| Actual project-layer sample | Successful basic setup | Failure only here points toward project-specific requirements |
| Repeat after cleaning and correct reassembly | Same controlled sample | Persistent trouble warrants closer mechanical assessment |
Keep the samples in order rather than unpicking them immediately. Write a short note beside each seam: what changed, what improved and what remained wrong. The aim is a repeatable good result, not one attractive centimetre between two poor sections. Sew enough to include starting, steady stitching and the type of seam transition your project requires.
Practical Examples
The Machine Worked Until the Bobbin Was Changed
Return to the change that preceded the fault. Confirm that the replacement is the correct bobbin, then reload it using the diagram. Keep the upper setting where it was when sewing worked. If the original bobbin remains available and undamaged, a controlled comparison can help separate an incorrect replacement from a problem introduced during loading.
If both bobbins now produce the same fault, check whether the upper thread was disturbed while changing the lower supply. This prevents a false conclusion that two bobbins are defective. A recent change is a useful clue, but it still needs a repeatable test rather than an assumption.
Cotton Sews Well but Stretch Fabric Skips
Keep the successful cotton sample as evidence that the machine can form stitches. Check the needle and stitch recommended for the stretch fabric, along with any needed support. A dial adjustment intended to remove visible loops will not necessarily solve missed stitch formation. Compare suitable needles and the actual fabric stack before requesting a general tension recalibration.
Every Setting Seems to Produce the Same Loose Seam
Stop sweeping the dial from minimum to maximum. Confirm the upper thread is correctly seated and that the presser foot is lowered for sewing. Check whether the control being changed is actually the active tension adjustment for the selected mode. If a correctly threaded machine shows no sensible response across a controlled test, document it for a technician.
Check the Finished Seam Before Returning to the Project
A neat-looking test is only the first check. Open the fabric layers gently across the seam and examine whether the stitches hold without conspicuous loops or excessive drawing. Use the handling appropriate to the project: a stretch seam must accommodate the intended movement, while a decorative seam may have a different purpose. Do not apply a destructive pull to a delicate sample and call the resulting damage a tension failure.
Next, sew a representative transition. For a garment, that might be a seam crossing; for a quilt, it might be the actual batting and backing combination. Keep this separate from the simple baseline test. If the ordinary sample passes and the representative transition fails, you have narrowed the problem to a practical condition instead of losing the successful setup entirely.
Check several starts and stops, not just one uninterrupted line. A machine that produces balanced stitching once moving may still need a different starting technique for the project. Conversely, a clean start does not establish that the spool will feed smoothly through a longer seam. Choose a sample long enough to reproduce the complaint without risking the finished work.
Finally, write down the successful combination and keep the sample with the project notes. Record the stitch and its settings as well as the thread and needle, because a tension number alone is incomplete. When you later switch back to ordinary sewing, restore the appropriate baseline rather than carrying a special-purpose adjustment into the next job. This makes future troubleshooting faster and prevents a useful project-specific setting from being mistaken for the machine’s universal default.
When to Have the Machine Serviced
Arrange an assessment when a verified basic setup still cannot sew a balanced seam, when the tension response is erratic, or when there is repeated needle contact, unusual resistance or visible damage. Take the machine’s correct accessories and the troublesome sample if the dealer requests them. The more precisely you describe the conditions, the less time is spent reproducing the fault.
Provide these details:
- The exact model, stitch and settings used when the problem occurs.
- The needle, upper thread, bobbin type and fabric layers tested.
- Whether ordinary straight sewing works and which operation fails.
- The samples showing each change, plus any history of jams or screw adjustments.
The most useful endpoint is a machine that repeatedly produces an appropriate seam on the intended material. Begin with correct threading and a controlled sample, make small justified adjustments, and stop adjusting when the evidence points to a different problem. That approach fixes many apparent tension faults while making the genuine mechanical ones easier to identify.