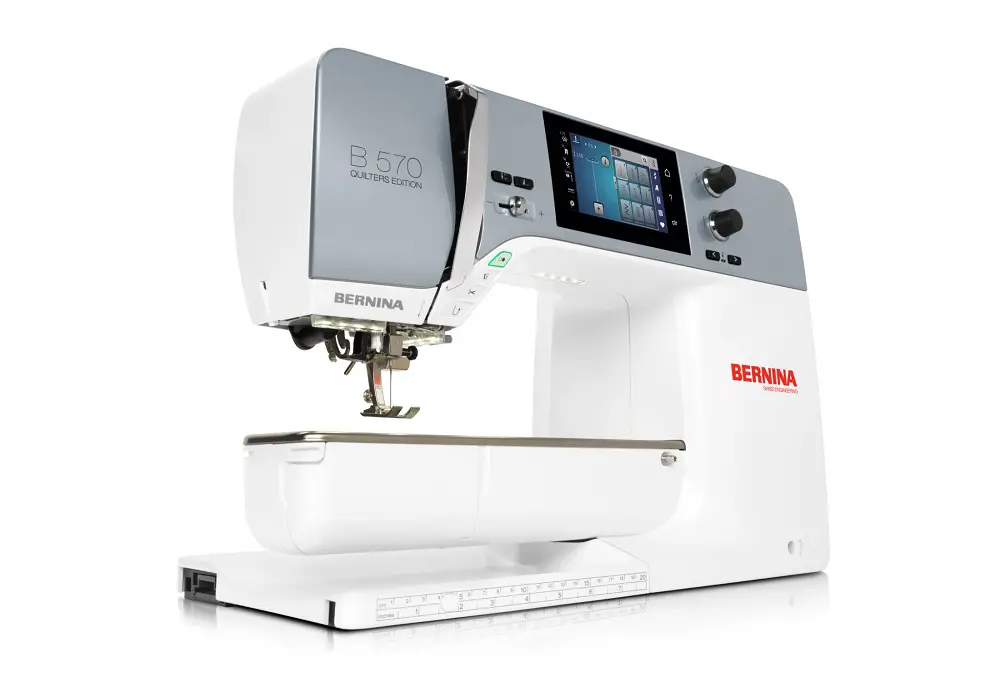
The Bernina 570 QE (Quilters Edition) is one of the most popular machines in the Bernina 5 Series, prized by U.S. quilters and garment sewists for its 8.5-inch harp space, built-in BERNINA Dual Feed, BERNINA Stitch Regulator (BSR), and 4.3-inch capacitive touchscreen. Despite its reputation for Swiss-engineered durability, the 570 QE is a heavily computerized machine, and like every electronic sewing computer it is prone to a recognizable family of problems—thread nests, sensor errors, “gears of death” warnings, BSR connection failures, dual-feed inconsistencies, and the occasional locked handwheel. The good news is that the overwhelming majority of these issues are user-correctable when properly diagnosed. The remainder require a visit to an authorized U.S. Bernina dealer.

This Bernina 570 QE troubleshooting guide synthesizes information from Bernina’s official user manual and service documentation, the company’s WeAllSew blog, U.S. dealer technicians, the Quiltingboard and PatternReview communities, JustAnswer technician threads, independent Bernina blogs, and YouTube repair tutorials. It is organized by problem category, with symptoms, causes, troubleshooting steps, and solutions for each, followed by a section on preventive maintenance and recommended servicing schedules.
Table of Contents
Understanding the 570 QE and Its Variants
Before diagnosing problems, it is important to recognize that “Bernina 570 QE” refers to several distinct machines whose internal components differ significantly:
- Original 570 QE (pre-2017) — a 5.5 mm stitch-width machine equipped with the CB (oscillating) hook, which uses the smaller traditional bobbin and bobbin case. Bernina maintains a dedicated support page for the BERNINA 570 QE before 2017 with documentation and firmware downloads.
- New 570 QE (2017 and later) — a 9 mm stitch-width machine fitted with the BERNINA Hook and the larger jumbo bobbin (70 percent more thread capacity). Bernina hosts an updated support page for the 2017-and-later 570 QE. This is the current production model and the one most U.S. owners purchased after 2017.
- 570 QE E — the embroidery-equipped variant of the 2017+ 570 QE, sold with the embroidery module standard.
- 570 QE Kaffe Edition — a 2022 limited edition (Kaffe Fassett Big Blooms faceplate, with Kaffe-designed decorative stitches and embroidery designs built in). Mechanically and electronically identical to the standard 2017+ 570 QE; full specifications are documented on Bernina’s 570 QE Kaffe Edition product page.
- 570 QE Tula Pink Edition — a similar limited cosmetic edition referenced by reviewers on PatternReview.com.
For comparison, the 535 and 540 are sister 5 Series machines without the BSR or BERNINA Dual Feed standard (BSR-ready but sold without the foot), while the 590 is the top-tier 5 Series machine with extended throat space. The 570 QE is one of the few model designations that appears on both CB-hook and BERNINA-Hook accessory compatibility lists, reflecting the generational split. When troubleshooting, owners should always confirm which generation they own by checking the data plate at the rear of the machine.
The Service and Maintenance Manual covering the 4 and 5 Series, including all 570 QE variants, is publicly accessible through the BERNINA 5 Series Service and Maintenance Manual on ManualsLib and provides authoritative information on internal components.
Thread Nesting and Bobbin Problems
Thread nesting—commonly called “bird’s nesting”—is by a wide margin the single most frequently reported complaint about the 570 QE. One owner who documented her Bernina 570 review on PatternReview described how her brand-new machine nested so consistently that she eventually obtained a refund, and a contributor in this widely cited Quiltingboard 570 QE jamming thread reported that her 570 “kept jamming out of the blue and would make a big mess in the bobbin area, had it in several times, tech thought he fixed…then it would do it again.”
Symptoms
- A tangled mass of upper thread accumulating beneath the fabric at the start of a seam.
- The machine alarming and halting after only a few stitches, often displaying a cotton-reel icon.
- Thread snarls forming around the hook, the needle locking, and the handwheel becoming difficult or impossible to turn.
- The bobbin case occasionally being ejected from the hook race when stitching resumes.
Causes
- Improper threading of the upper thread with the presser foot lowered. With the presser foot down, the tension discs are closed and thread cannot seat properly between them, resulting in a slack upper thread that loops under the fabric.
- Thread tails not held at the start of stitching. Multiple Bernina owners on PatternReview note that the 570 QE is more sensitive to this than other brands; Bernina’s own Top 10 BERNINA Sewing Machine Questions FAQ on Sewing Mastery insists holding tails is unnecessary on a properly maintained Bernina, but the field reality, as one user put it, is that “you have to be sure the needle hits the fabric with the first stitch or it will nest.”
- A 9 mm stitch plate paired with thin or unstable fabrics. The wide slot of the 9 mm plate allows lightweight cotton or batting layers to be pushed downward by the needle, dragging upper thread into the hook area. Numerous reviewers note this disappeared when they switched to the optional straight-stitch plate.
- Lint accumulation in the tension assembly that prevents the discs from closing fully on the upper thread.
- A pre-update firmware bug. A widely discussed firmware issue on early 570 QE units caused the upper-thread tension to engage too slowly at the start of stitching, allowing slack thread to be pulled into the hook. As one Quiltingboard contributor explained, “there was apparently a ‘bug’ in the firmware where the tension did not engage quickly enough when starting to stitch which was fixed in an update.”
- Incorrect bobbin insertion or a bobbin wound on a non-Bernina spool. Bernina explicitly recommends only genuine Bernina bobbins to ensure consistent tension.
Troubleshooting Steps
- Raise the presser foot and rethread the upper thread completely from spool to needle, ensuring the thread seats deeply into the tension disc slot, passes correctly around the take-up lever, and exits the threader from front to back through the needle eye.
- Remove the bobbin and bobbin case, take off the stitch plate, and brush all lint from the hook race, feed dog teeth, and thread catcher.
- With a strip of clean, lint-free fabric (lycra or muslin) lightly dampened with isopropyl alcohol, “floss” between the upper tension discs to remove any film of lint or thread oil.
- Reinstall the bobbin so that the silver sensor surface faces the rear of the bobbin housing—a step Bernina explicitly calls out in the Bernina 570 QE user manual. Pull the thread through the slot, under the spring, then under the two thread guides and up.
- Hold the upper and bobbin thread tails to the rear of the presser foot for the first three to four stitches.
- Sew a test seam on stable scrap fabric. If nesting persists, switch to the optional straight-stitch needle plate.
Solutions
If basic threading and cleaning do not resolve the problem, verify that the machine has the most current firmware (see the Electronic / Firmware section below). The firmware update that addressed the early-engagement tension bug is essential for any 570 QE produced in the first two years of the model run. As a longer-term solution, owners who primarily piece quilt blocks should keep both the 9 mm and the straight-stitch plate on hand and switch as the project requires. Persistent nesting after firmware update, cleaning, and stitch plate change indicates either a worn upper-tension assembly or a hook timing issue, both of which require dealer service.
Stitch Quality and Tension Issues
The 570 QE features an automatic upper-thread tension system that adjusts to the stitch and fabric, but tension can still be thrown off by lint, threading errors, or component wear.
Symptoms
- Looping on the underside of fabric (upper tension too loose).
- Puckering or thread breakage (upper tension too tight).
- The cotton-reel icon appears every 13 to 15 stitches and the machine stops, even though the upper thread appears unbroken.
- Skipped stitches, particularly at high speeds, on knits, or when sewing across thick seam intersections.
- Uneven stitch formation caused by upper thread that is too tight or too loose, or a blunt or bent needle.
Causes
The 570 QE uses a closed-loop tension system in which the PCBA-CPU module reads thread movement through a thread sensor and modulates a tensioning solenoid. Failures arise from:
- Lint between the upper-tension discs preventing them from closing fully.
- Burrs on the needle plate, the presser foot, or the tension wires (especially after a needle strike).
- A mismatched needle and thread for the fabric being sewn—Bernina’s needle chart specifies, for example, a 75/11 quilting needle for piecing cotton.
- Use of low-quality or off-brand bobbins, which Bernina warns can cause unsatisfying thread tension and other problems.
- A failed thread sensor that triggers false “check upper thread” warnings.
- A damaged or worn tension solenoid (a less common but real failure documented by independent Bernina repair technicians).
Troubleshooting Steps
- Replace the needle. Bernina’s official guidance is to change the needle as soon as any type of thread break, frayed thread, a skipped stitch, or thread looping occurs—not on a fixed schedule.
- Floss the upper tension discs as described in the previous section.
- Inspect every thread-contact surface for burrs. Run a Q-tip over the needle plate’s needle hole, the bobbin case lip, the thread catcher, and the presser foot bottom; any catching cotton fibers indicate a burr that must be smoothed with a fine emery board.
- Switch to a name-brand thread (Aurifil, Mettler, Gutermann) of appropriate weight for the project, and a fresh genuine Bernina bobbin.
- Reset the tension to the default (5.0 on the touchscreen) and test on a sample.
- Power-cycle the machine and run a stitch sample with default settings to determine whether the issue is mechanical or electronic.
Solutions
Most stitch-quality problems are resolved by cleaning, rethreading, replacing the needle, and changing thread. If the cotton-reel icon continues to trigger after these steps, the most likely culprit is a dirty or marginal thread-take-up sensor; canned air around the take-up lever assembly and a firmware update often clear the fault. A persistently misbehaving sensor or solenoid is a dealer repair.
Feed Dog and Fabric Feeding Problems
The 570 QE is equipped with a 9 mm-wide feed dog assembly and the BERNINA Dual Feed (BDF) mechanism, which feeds fabric simultaneously from above and below using a coded D-suffix presser foot. The dual feed is engaged by pulling the lever at the back of the presser foot bar downward and forward; it is disengaged by pushing the lever to the left.
Symptoms
- Fabric is not advanced under the foot, producing zero-length stitches stacked on top of one another.
- Fabric is fed unevenly, especially on the left side, leading to drift away from a quarter-inch seam line.
- Lightweight fabric is pulled down through the wide 9 mm needle plate slot.
- Dual feed gathers or puckers fabric during piecing.
- The dual-feed lever fails to engage or remains stuck in the “engaged” position.
Causes
- The feed dogs are dropped (lowered) for free-motion sewing and were not raised when returning to regular sewing.
- Presser-foot pressure is set too low for the fabric weight (default 50 on the touchscreen; should be reduced for lightweight knits and increased for thick layers).
- Fabric is being pulled by the operator faster than the feed dogs can advance.
- The dual-feed mechanism is engaged but the presser foot in use is not a “D” foot—the D designation indicates the foot has the receiving channel for the upper feed bar.
- Wear or damage to the feed dog drive cam or its associated stepper motor.
- Lint compaction beneath the feed dogs blocking their range of vertical travel.
Troubleshooting Steps
- Verify the feed dogs are in the up position via the touchscreen.
- Check that the presser foot in use matches the dual-feed engagement state. If the dual feed is engaged, the foot must have the “D” designation (e.g., #1D, #34D, #97D).
- Lower the presser-foot pressure on lightweight fabric; raise it for batting and quilt sandwiches. The blogger behind Texas Quilt Girl’s second look at the Bernina 570 QE reported that her dual-feed problems disappeared once she purchased the 97D foot (replacing a 97), engaged the dual feed every time, and ceased fighting the machine.
- Remove the stitch plate and clear lint from beneath the feed dog teeth with the supplied red brush.
- For thin fabrics that get pulled down through the 9 mm plate, install the optional straight-stitch needle plate.
Solutions
Owners doing primarily quilt piecing on the 9 mm 570 QE should plan to use the 97D foot with dual feed engaged and the needle position moved 3 to 4 positions to the right so both feed dog rails contact the fabric—a workaround widely shared in the Bernina community to compensate for the wide feed-dog footprint. If the feed dogs visually fail to drop or rise, or if the dual-feed lever cannot be moved into either position, internal lubrication or a broken timing belt is likely; the BDF assembly is documented in section 4.3.14.2 of the service manual and is not user-serviceable.
Electronic, Firmware, and Sensor Problems
The 570 QE is governed by a PCBA-CPU module running Bernina’s proprietary firmware. The 5 Series uses a capacitive touchscreen that, per the service manual, no longer requires the calibration step that older 5 Series VIO machines needed.
Symptoms
- The “two-gear” warning—colloquially called the “gears of death”—appears on the touchscreen and the machine refuses to stitch.
- The cotton-reel “check upper thread” icon appears repeatedly even with thread intact.
- The screen flashes a red cross or freezes (“1010 main-sync error”).
- Decorative stitches are produced backwards, mirrored, or with wrong stitch widths.
- The machine refuses to recognize a USB stick during firmware update.
- The BSR foot, when plugged in, fails to display its dedicated screen.
Causes
- Sensor obstruction. A widely viewed BERNINA Gear Error Message tutorial on YouTube explains that the gears icon “has nothing to do with the machine—pretty much everything to do with the threading channel.” Lint or a thread strand triggering the optical thread sensor will produce a false motor-fault warning.
- Outdated firmware. Bernina periodically issues firmware corrections; one widely discussed update fixed the early-engagement upper-tension bug.
- Improperly prepared USB stick during firmware updates. Bernina specifies a FAT32-formatted USB stick of at least 256 MB, with the unzipped firmware files in the root directory, not in a subfolder.
- A genuine motor overload. A jam under the stitch plate or a needle struck against the bobbin case can stall the main motor, in which case the gear icon is reporting an actual fault.
- Faulty thread sensor. Service technicians repeatedly attribute persistent “check upper thread” alerts to a failing optical thread sensor.
Troubleshooting Steps
- Power the machine off, unplug it from the wall, and wait 30 seconds before powering on again. This clears the cache and resets sensors.
- Remove the bobbin case, the stitch plate, and the hook (per the procedure on page 164 of the manual). Brush out all lint, paying particular attention to the thread catcher area and the take-up lever shaft.
- Cycle the handwheel forward (clockwise toward you) to verify there is no mechanical obstruction. A common discovery is a thread fragment jammed between the take-up shaft and its armature.
- Use canned air sparingly around the thread sensor and the bobbin sensor; Bernina officially warns against compressed air at the hook race in its Machine Maintenance FAQ on WeAllSew but a brief burst around external sensor windows is acceptable per dealer technicians.
- Confirm the firmware version through the touchscreen Setup menu and download the current version from the official BERNINA Firmware Update page.
- To update firmware, format a USB stick as FAT32, extract the .zip contents directly to the root of the stick (no subfolder), insert into the machine while powered off, then power on and follow the on-screen prompts.
Solutions
If the gears icon clears after cleaning and a power cycle, the cause was sensor obstruction or a transient fault. If it persists, check for a needle stuck inside the hook, and follow the manual’s procedure (page 164) for removing the hook to inspect the magnetic backing for needle fragments. A failed PCBA-CPU module, a defective tension solenoid, or a damaged thread sensor are dealer-only repairs and may require shipment to Bernina of America in Aurora, Illinois.
Needle Movement and Alignment Issues
The 570 QE’s needle bar is driven by a needle-bar support assembly documented in the service manual sections 4.3.15.1 and 4.3.15.2. Needle position is selectable on the touchscreen and is implemented through a stepper-driven zigzag mechanism.
Symptoms
- The needle will not move left or right when needle position is changed on the touchscreen.
- A noisy zigzag stroke or visible needle wobble.
- A bent needle or repeated needle breakage, particularly when sewing decorative stitches across thick seams.
- The machine reports “selected needle and stitch plate combination is not allowed.”
- The needle drops into the hook area, with the tip breaking off and disappearing.
Causes
- The straight-stitch plate is installed but a zigzag stitch is selected, triggering the safety lockout.
- A loose needle clamp screw, allowing the needle to slip downward and strike the hook.
- The needle is inserted with the flat side of the shank facing the wrong direction; on the 570 QE the flat side must face the rear of the machine.
- The needle bar has been knocked out of alignment (one PatternReview owner noted, “I knocked the needle position gauge out of alignment, but it doesn’t cause much trouble. It is just a bit loud when I try to do zig-zag stitches”).
- Wrong needle system or wrong needle for the fabric (the 570 QE uses 130/705 H system needles).
Troubleshooting Steps
- Confirm via the touchscreen which stitch plate is selected; the machine cross-checks plate selection against stitch type.
- Remove the needle and reinsert it fully into the clamp with the flat side of the shank facing the back of the machine. Tighten the clamp screw firmly with the supplied screwdriver.
- Replace the needle with a new one of the correct size and type.
- Manually rotate the handwheel slowly to verify the needle clears the throat plate hole at all programmed needle positions for the chosen stitch. If the needle catches the plate edge at any position, the needle bar has shifted.
- If a needle tip has broken off in the machine, immediately stop sewing, remove the bobbin case and hook, and use a strong neodymium magnet to recover the fragment from the hook race and feed dog area. Do not resume sewing until the fragment is found.
Solutions
Misalignment of the needle bar requires dealer recalibration; the procedure is in the service manual but specifies factory tooling. If a single 570 QE needle change loosens repeatedly, the clamp screw may be stripped, in which case dealer replacement of the needle clamp is required. Persistent breakage on decorative stitches usually indicates the wrong needle/thread/fabric combination rather than a machine fault.
Machine Jamming and Hook System Failures
The hook is the heart of the 570 QE. Owners must understand that the original 570 QE (pre-2017) uses the Bernina CB hook with a 5.5 mm zigzag width, whereas the 2017+ 570 QE and the Kaffe Edition use the BERNINA Hook with a 9 mm zigzag width and the larger jumbo bobbin. Always confirm by looking inside the hook race: the BERNINA Hook is centrally driven and accepts a notably larger bobbin.
Symptoms
- The handwheel becomes impossible to turn; on the touchscreen, the machine instructs the user to “raise the needle to the highest position” but the handwheel is locked.
- Audible thread-jamming or grinding sound, followed by the gears icon and a stop.
- The bobbin case is ejected from the hook during stitching.
- The bobbin case will not release when the release lever is pressed.
- The machine lights remain off after a jam (suggests a tripped overload or a power-supply protective shutdown).
Causes
- Thread jam wrapping around the hook drive shaft.
- Needle fragment lodged on the magnetic surface of the hook.
- Heavy batting (e.g., Warm & Natural plus Insul-Bright) too thick for the foot pressure setting.
- Improperly seated bobbin case—after cleaning, the bobbin case must be reinstalled with the thread guide pointing up and pressed firmly until it clicks.
- Insufficient lubrication of the hook race—an extremely common cause of intermittent jamming in machines with the BERNINA Hook.
- A worn hook driver (Bernina issued an update to the cam shape on B4, B5, and B7 series hooks per service-bulletin reference 100536 in the maintenance manual).
Troubleshooting Steps
- Power the machine off and unplug it. Lift the presser foot.
- Cut the upper thread above the needle and gently pull all upper thread out of the take-up lever and tension assembly.
- Turn the handwheel slowly clockwise (toward yourself) until the needle reaches its highest point. If it will not budge, do not force it.
- Open the hook cover, remove the bobbin and bobbin case, then remove the stitch plate.
- Following the manual’s procedure on page 164, release the hook fastening bracket and remove the hook itself. Inspect the magnetic backing for needle fragments and remove all visible thread.
- Place one drop of genuine Bernina oil on the hook race, reinstall the hook, and close the fastening bracket until it clicks.
- Reinsert the bobbin case so the thread guide is pointing up; press the center of the case until it clicks.
- Manually rotate the handwheel a full revolution to confirm free movement before powering on.
Solutions
A handwheel that remains locked after a thorough hook clean-out and inspection indicates internal binding—either a broken timing belt, a stalled main motor, or, very rarely, a fractured internal cam. These failures require dealer service. Owners whose 570 QE handwheel has locked have, in some cases, had to ship machines to Bernina of America for repair. Persistent bobbin-case ejection during normal sewing typically traces to a bobbin case that is not seating properly because of a damaged latch, a worn case-positioning finger inside the hook race, or a hook bracket that has been bent by a previous needle strike. Replacement bobbin cases for the BERNINA Hook are widely available through U.S. dealers.
BSR (BERNINA Stitch Regulator) Problems
The BSR is included as a standard accessory with most 570 QE shipments (note that machines delivered in 2024 may not include the BSR as standard—always verify at purchase). The BSR foot uses an optical sensor on its underside that reads fabric movement and feeds that data to the machine, which then varies stitching speed to maintain a consistent stitch length during free-motion quilting.
Symptoms
- The BSR is plugged in but the dedicated BSR screen does not appear.
- The BSR screen appears but stitches are inconsistent.
- An audible BSR beep but no needle motion.
- Error message indicating BSR foot not recognized.
Causes
- The BSR connector is not fully seated in the dedicated socket; the manual specifies inserting “vertically until you feel it click into place.”
- A dirty or scratched optical lens on the underside of the BSR foot.
- A different presser foot is selected on the touchscreen, overriding the BSR.
- Mismatched firmware versions between the machine and the BSR foot.
- Damaged BSR cable.
Troubleshooting Steps
- Power off the machine, unplug the BSR, wait 30 seconds, plug the BSR in first, then power on. This sequence often re-establishes recognition.
- Inspect the BSR socket for bent pins or debris; clean gently with a soft dry brush.
- Turn the BSR foot over and inspect the small clear sensor lens on the underside. If lint, oil, or fabric residue is visible, wipe with a microfiber cloth lightly dampened with water or isopropyl alcohol; allow to dry fully before reinstalling.
- Confirm on the touchscreen that no other specialty foot is selected.
- Check for firmware updates on both the machine and BSR through the dealer.
Solutions
Most BSR problems are resolved by lens cleaning and a power-cycle reseating. If the BSR is recognized but produces inconsistent stitches, verify the user is moving the fabric continuously in BSR1 mode (which stitches whether or not the fabric is moving) versus BSR2 mode (which only stitches when fabric is moving). Hardware failure of the BSR foot is rare but does occur; the foot is replaceable independently of the machine. A BSR that has been dropped should be tested at a dealer because the internal sensor alignment can be disturbed.
Touchscreen, Foot Control, and Power Issues
Symptoms
- The 4.3-inch touchscreen is unresponsive, registers ghost touches, or freezes on a single screen.
- A red cross flashes (“1010 main-sync error”).
- The foot pedal stops responding even though the machine is otherwise operational.
- Thread cutter button stops responding.
Causes
- Static or transient firmware fault from an interrupted sequence (e.g., user pressed the Start/Stop button while a stitch was being selected).
- Foot-control cord partially unseated.
- A surge or low-voltage event from the wall outlet.
- Touchscreen overlay damaged or cracked; replacement of the faceplate is documented in section 4.2.7 of the service manual.
Troubleshooting Steps
- Power off, unplug the machine and the foot control, wait 30 seconds, reconnect, and power on.
- Inspect the foot-control cable connector at the rear of the machine for bent pins or debris.
- Plug the machine into a known-good surge-protected outlet.
- If the touchscreen registers ghost touches or stays frozen, perform a firmware update or factory-reset through the Setup menu (after backing up customer data to a USB stick).
Solutions
A persistent unresponsive touchscreen or a foot control that cannot be revived requires replacement of the screen faceplate or the foot control, respectively. Both parts are stocked by Bernina USA dealers. A 570 QE that reports a 1010 main-sync error after multiple firmware updates and resets has a hardware-level board failure and must be returned to the dealer.
Bobbin Winder and Spool Holder Problems
Symptoms
- Bobbin winds unevenly, with thread piling on one side of the bobbin.
- Bobbin winder will not engage when the bobbin is pushed onto the spindle.
- Spool holder does not rotate freely, causing thread snagging at the spool cap.
Causes
- The pre-tension thread guide for the winder is not used or is improperly threaded.
- Bobbin is not pushed fully onto the winder spindle.
- The winder spindle’s small rubber or plastic engagement element has worn or hardened (a known wear point on multiple Bernina generations).
- A foreign thread fragment wrapped around the winder shaft.
- Spool cap is the wrong size for the spool, causing the spool to stick to the holder.
Troubleshooting Steps
- Re-thread the bobbin-winder thread path from the spool through the dedicated pre-tensioner; the thread should make a full clockwise wrap around the pre-tensioner before going to the bobbin.
- Inspect the winder spindle and remove any thread debris.
- Confirm the bobbin is a genuine Bernina bobbin (not an off-brand visually similar one).
- Match the spool cap size to the spool: small spools require the small cap, large spools the large cap.
- Power-cycle the machine to clear any winder-engagement sensor fault.
Solutions
Most bobbin-winding faults are user-correctable. A worn spindle component or winder motor failure requires dealer service; replacement parts are inexpensive and the labor is brief, but the procedure involves removing the top cover and is not consumer-serviceable.
Maintenance-Related Failures
A significant percentage of 570 QE service calls trace not to a defective machine but to insufficient cleaning and lubrication. Bernina educator Hans Herzog, in the official maintenance FAQ on WeAllSew, states the rule of thumb plainly: lubricate the machine after every three to four bobbin changes, or clean and lubricate the hook area after each day of sewing.
Symptoms
- A machine that previously ran quietly now whirs, ticks, or growls.
- Stitch quality degrades gradually over weeks of heavy use.
- The machine prompts the user to oil the hook (the oil-can icon appears on the touchscreen).
- Random gear errors on a machine that has not been serviced in over a year.
- A 570 QE that has sat unused for several months suddenly exhibits noisy zigzag operation or a sticky handwheel.
Causes
- Failure to oil the hook on Bernina’s recommended schedule.
- Lint compaction between the feed dogs, around the bobbin case finger, and around the take-up lever shaft.
- Use of incorrect oil—Bernina explicitly states never to substitute non-Bernina oil and never to use the heavier oils intended for older 730/830/930 models, which “is way too thick and can cause all kinds of tension issues.”
- Skipping annual professional service.
- Storing the machine without a cover, allowing dust to enter through the open hook cover and sliding accessory ports.
Troubleshooting Steps
- Perform the full Bernina hook-cleaning and oiling procedure (described in detail in the next section) the moment the oil prompt appears, or sooner.
- Remove the bobbin case, hook, and stitch plate and brush all lint thoroughly.
- Note the noise: hook-area squeaking is almost always solved by oiling the hook race, while a deeper rhythmic clunk indicates internal lubrication is needed and warrants a dealer visit.
- Run a test seam after oiling on a scrap of fabric to absorb any excess oil.
Solutions
If a machine has been neglected for an extended period, an annual or biennial dealer service is essential. The Bernina service technician will internally lubricate components inaccessible to the user, verify hook timing, recalibrate sensors, update firmware, and inspect for early signs of wear that can be corrected before they cause failure.
Preventive Maintenance and Recommended Servicing Schedule
A 570 QE that is properly maintained will, like its forerunners, sew reliably for decades. Bernina’s official guidance, supplemented by community best practice, can be condensed into the following routine.
Cleaning Lint from the Bobbin Area
Cleaning is performed without compressed air, which Bernina warns may drive lint deeper into the mechanism. The supplied red brush (or a high-quality lint brush) is the correct tool. Remove the bobbin, the bobbin case, and the stitch plate. Brush the feed dog teeth, the hook race, the bobbin sensor window, and the thread catcher. A Q-tip can be used to lift caked lint; many U.S. dealers recommend a slight twist of the Q-tip to leave it “fluffy” and then trace it across all metal surfaces to highlight burrs. Bernina advises this complete cleaning at the end of each sewing day for heavy use, and at minimum at every project change.
Proper Threading Techniques
- Always raise the presser foot before threading the upper thread; this opens the tension discs and is non-negotiable for clean stitch formation.
- Follow the threading path printed inside the front cover of the machine. The take-up lever must be in its highest position when threading; if not, raise it via the handwheel.
- Pass the thread through the automatic needle threader exactly as illustrated in the manual.
- Insert bobbins with the silver sensor surface to the rear of the housing.
- Use only Bernina-brand bobbins; metal generic bobbins, while occasionally cheaper, may have slightly different dimensions and can throw off bobbin-sensor reads.
Needle Replacement Intervals
Bernina states needles should be replaced as soon as any type of thread break, frayed thread, a skipped stitch, or thread looping occurs. Many quilters change needles after every 8 hours of stitching or at the start of every new project. The 570 QE uses standard 130/705 H system needles; sizes should be matched to fabric (75/11 for piecing cotton, 80/12 universal, 90/14 for denim, 70/10 microtex for silk, ballpoint for knits).
Lubrication Points and Frequency
Bernina specifies a single drop of Bernina-brand sewing-machine oil into the hook race after every three to four bobbin changes, or at minimum after each day of heavy sewing. The detailed procedure is documented in WeAllSew’s sewing machine cleaning and oiling tutorial. Do not add oil to the holes beneath the stitch plate on the 5 Series; that “oil reservoir” approach was tried on early 7 Series models and rejected by Bernina because of contamination during sewing. Owners should never substitute non-Bernina oil; Bernina cautions specifically against online-purchased oils because counterfeits and incorrect viscosities are common.
Firmware Updates
Check the installed firmware version annually via the touchscreen Setup menu, and apply any updates published on Bernina’s official firmware update page. For the original 570 QE, applying the update that addressed the early-engagement upper tension bug is essential. Firmware update procedure:
- Format a USB stick (256 MB minimum, 4–16 GB recommended) as FAT32.
- Download the firmware ZIP file for your specific model and generation.
- Extract the ZIP contents to the root of the USB stick (no subfolders).
- With the machine powered off, insert the stick.
- Power on and follow the on-screen prompts.
- Do not interrupt the update; the touchscreen will indicate completion.
Correct Fabric and Thread Pairing
The 570 QE is sensitive to thread quality. Bernina, dealer technicians, and the consensus on PatternReview all recommend genuine name-brand thread—Aurifil 50 wt for cotton piecing, Mettler 60 wt embroidery thread, Gutermann polyester for garments. Bargain or discount-bin thread sheds excessive lint and tangles in the tension discs. Pair thread weight to needle size and pair both to fabric weight. The 570 QE will sew nine layers of denim cleanly when correctly set up; the same machine will nest when asked to piece silk organza on a 9 mm plate with a 90/14 needle.
Recommended Professional Servicing Intervals
Bernina USA dealers and the WeAllSew maintenance FAQ both recommend annual professional service for machines used regularly, with biennial service acceptable for occasional users. The professional service includes internal lubrication of the kinematic chain (which is not user-accessible), hook timing verification, electrical-connection inspection, sensor calibration, firmware updates, and a complete stitch test. Cost in the U.S. typically ranges from $150 to $250 for a non-warranty service, depending on dealer. Most U.S. Bernina dealers maintain a “Bernina Spa” promotional service tradition around National Sewing Machine Day (June 13).
Variant-Specific Notes and Comparison with Other 5 Series Machines
Owners often ask whether problem prevalence differs across the 570 QE variants. The available evidence supports the following observations:
- Pre-2017 570 QE (CB hook). This generation has the lower bobbin capacity but is broadly considered more straightforward and less prone to thread-nesting because the smaller 5.5 mm needle plate slot supports lightweight fabrics better.
- 2017+ 570 QE (BERNINA Hook, 9 mm). The most-discussed problems—nesting on thin fabric, fabric pull-down through the 9 mm plate, dual-feed quirks with non-D feet—are concentrated in this generation. The straight-stitch plate and the 97D foot largely resolve these. The early-engagement tension firmware bug affected machines from this generation; current production reliably has the corrected firmware.
- 570 QE Kaffe Edition (2022). No documented mechanical or electronic differences from the standard 2017+ 570 QE. Owner reports describe the same learning curve and the same feed-dog characteristics as the standard model.
- 535 and 540. These 5 Series stablemates use the same BERNINA Hook system but lack the BSR and (depending on configuration) the dual feed as standard, narrowing the surface area for problems.
- 590. The top 5 Series machine has more harp space and additional features. Several Quiltingboard owners who exchanged a problematic 570 QE for a 590 reported “no issues” continued thereafter—but it is worth noting these reports are confounded with the firmware update history; many 590 buyers received a machine with current firmware while their 570 QE had not been updated.
The community consensus, voiced repeatedly across PatternReview and Quiltingboard, is that the 570 QE is fundamentally a strong machine with a steeper learning curve than is true of less-electronically-controlled brands, and that the dealer-provided “Mastery Classes” make a substantial difference. As one PatternReview owner concisely warned future buyers: “Bernina machines are NOT for everyone. There is a learning curve—even for the most experienced sewists.” A buyer who treats the 570 QE as an appliance to plug in and run will encounter problems; a buyer who treats it as a precision instrument requiring routine cleaning, oiling, and proper threading will likely be rewarded with years of high-quality stitching.
When to Seek Professional Bernina Dealer Service
The following symptoms should prompt an immediate dealer appointment rather than further home troubleshooting:
- A handwheel that remains locked after a complete hook-out cleaning and visual inspection.
- Persistent gear-error messages after firmware update and full sensor area cleaning.
- A needle bar visibly out of alignment, or the needle striking the bobbin case at any programmed position.
- Recurrent bobbin case ejection after the case has been confirmed to be a genuine Bernina part properly installed.
- A touchscreen with cracked glass, persistent dead zones, or repeating 1010 main-sync errors.
- A machine that has been dropped or has water damage.
- Any failure under warranty—home repair attempts can void warranty coverage.
U.S. owners can locate authorized dealers via the Bernina USA store locator. Bernina of America’s headquarters in Aurora, Illinois handles complex repairs that exceed the local dealer’s capacity. Owner reports indicate that machines requiring factory-level repair are typically returned to the dealer in two to four weeks.
Frequently Asked Questions
Why does my Bernina 570 QE keep making bird’s nests?
Bird’s nesting on the 570 QE is most often caused by threading the upper thread with the presser foot lowered, lint between the upper tension discs, or an outdated firmware version that delays tension engagement. Raise the presser foot before threading, floss the tension discs, install the latest firmware, and use a straight-stitch plate when piecing thin fabrics.
What does the gears icon mean on a Bernina 570 QE?
The two-gear “gears of death” icon indicates the machine has detected an obstruction or sync error in the drive system. In most cases the cause is a thread fragment or lint triggering an optical sensor rather than an actual motor fault. Power off, clean the hook race and thread path thoroughly, then power on. If the icon persists, the hook may need to be removed to check for a needle fragment.
How often should I oil my Bernina 570 QE?
Bernina recommends one drop of genuine Bernina oil on the hook race after every three to four bobbin changes, or at minimum after each day of heavy sewing. Never substitute non-Bernina oil and never apply oil to the holes beneath the stitch plate on the 5 Series.
How often does a Bernina 570 QE need professional servicing?
For owners who sew regularly, an annual professional service is recommended. Occasional users can extend this to every 18 to 24 months. Dealer service includes internal lubrication, hook timing verification, sensor calibration, and firmware updates and typically costs $150 to $250 in the U.S.
What is the difference between the pre-2017 and 2017+ Bernina 570 QE?
The pre-2017 570 QE has a 5.5 mm maximum stitch width and the smaller CB (oscillating) hook with a standard bobbin. The 2017 and later 570 QE has a 9 mm maximum stitch width, the larger BERNINA Hook, and a jumbo bobbin with 70 percent more thread capacity. Accessories, stitch plates, and bobbin cases are not interchangeable between the two generations.
Why is my BSR foot not recognized on my Bernina 570 QE?
The most common causes are an incompletely seated BSR connector, lint or fabric residue on the optical sensor lens on the underside of the foot, or a different presser foot selected on the touchscreen. Power off, unplug the BSR, plug it back in firmly, clean the lens with a microfiber cloth, and power on. Persistent failure to recognize requires firmware verification at the dealer.
Conclusion
The Bernina 570 QE is a sophisticated, sensor-rich sewing computer whose problems generally fall into two categories: operator-correctable (thread nesting, sensor false-alarms, BSR not recognized, dual feed misuse, lint-induced tension issues, firmware out of date) and dealer-required (needle bar misalignment, hook timing failure, broken internal gears, motor or PCBA-CPU failure). For the great majority of complaints surfaced on Quiltingboard, PatternReview, JustAnswer, Reddit, and YouTube comment sections, the resolution is one or more of the following: rethread with the presser foot raised; clean the hook race and floss the upper tension discs; replace the needle; install genuine Bernina bobbins; update the firmware; and reseat the BSR or dual-feed accessory. A machine that does not respond to these steps deserves an authorized service appointment rather than further self-repair.
Owners who adopt the routine maintenance schedule described above—a daily lint clean, hook oiling every three to four bobbins, annual professional service, prompt firmware updates—will find that the 570 QE rewards diligent care with the precise, quiet, and consistent stitching that has earned the Bernina 5 Series its enduring reputation among American quilters and sewists.