
Table of Contents

TL;DR
- The Massey Ferguson 135 is one of the most durable utility tractors ever built, but after five to six decades its most common problems are predictable: Multi-Power range failures and loss of engine braking, hydraulic lift faults centered on the Ferguson System lift pump and control linkage, CAV/DPA injection pump seal leaks aggravated by modern ultra-low-sulfur diesel, oil-soaked drum brakes from failed axle seals, and power-steering leaks at the steering column.
- Nearly every one of these faults is diagnosable and repairable by a competent owner with a service manual and basic tools, and the great majority are adjustment, seal, filter, or linkage issues rather than catastrophic failures; the Perkins AD3.152 diesel is regarded as almost indestructible.
- For U.S. buyers, the diesel Perkins AD3.152 model with live power take-off and power steering is the most desirable and valuable configuration; Multi-Power adds value but also a well-known failure mode, and buyers should budget for fluids, filters, seals, and brake work on any unrestored example.
Introduction and Model Context
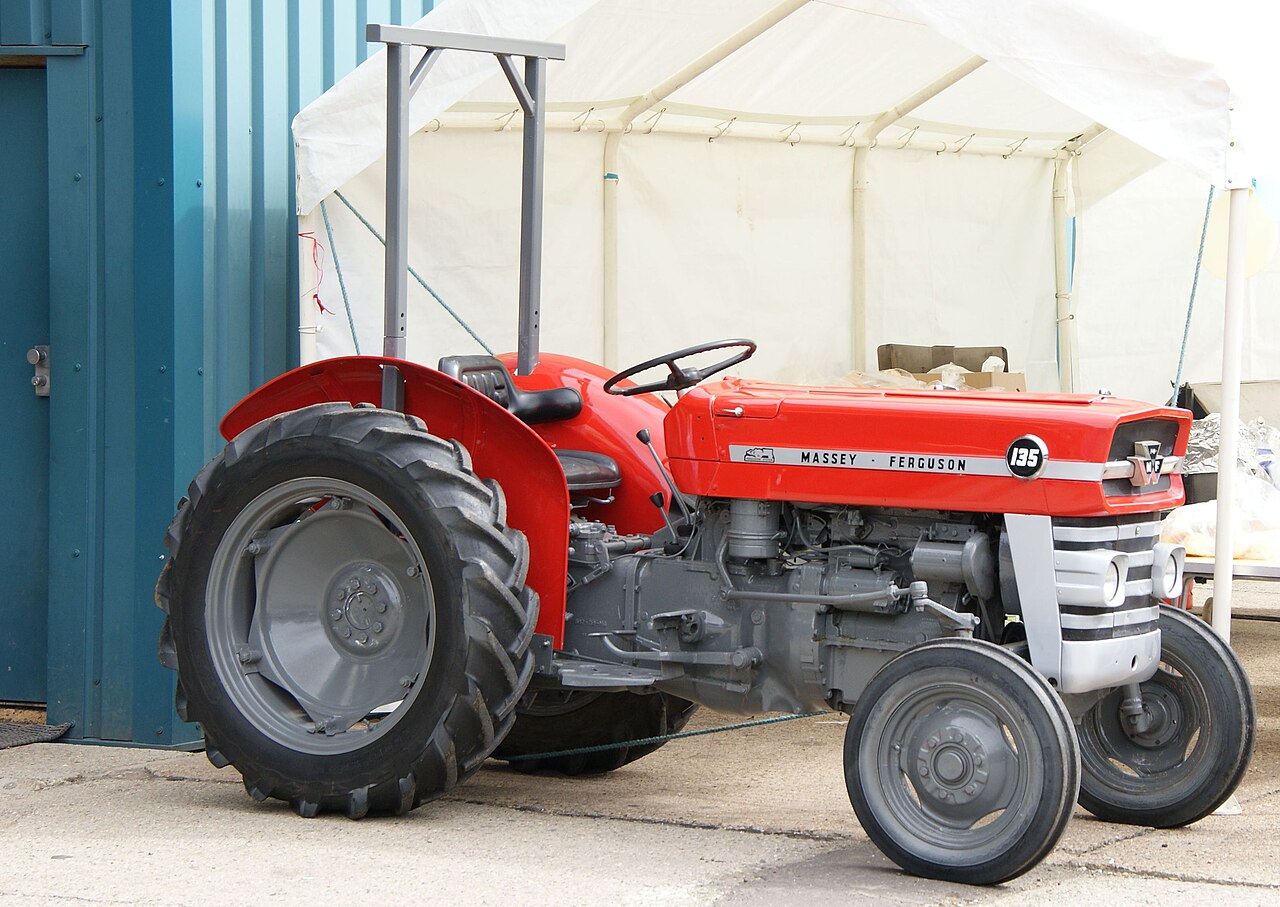
The Massey Ferguson 135 was produced from 1964 to 1975 as the first model in the Massey Ferguson 100 Series, succeeding the Massey Ferguson 35. It was built in the United Kingdom at the Banner Lane plant in Coventry, England, and in the United States at Massey Ferguson's Detroit, Michigan plant. UK production continued until 1979, while US production ended in 1975 when the model was succeeded by the MF 235. A total of 413,153 units were produced at Coventry between 1965 and 1979.
The most common engine was the Perkins AD3.152, a naturally aspirated, liquid-cooled, three-cylinder direct-injection diesel of 2.5 liters (152.7 cubic inches), bore and stroke 3.60 by 5.00 inches, compression ratio 17.4:1, delivering 45.5 rated engine horsepower at 2000 rpm. In independent testing, this engine produced a measured 37.82 power-take-off horsepower and 33.06 drawbar horsepower, per University of Nebraska Tractor Test Lab Test 895 (May 1965). Gasoline alternatives included two Continental four-cylinder engines used on early US-built tractors: the Z-134 (rated 39 horsepower; 3.312-inch bore, 3.875-inch stroke) and the Z-145 (advertised at 35 power-take-off horsepower; 3.375-inch bore, 4.062-inch stroke), the latter tested at 35.37 power-take-off horsepower per University of Nebraska Tractor Test 899 (1965). The Perkins AG3.152 three-cylinder gasoline engine (45.5 horsepower, 7.5:1 compression) was used on later models.
Transmission choices included a standard six-speed, an eight-speed on later versions, and the optional Multi-Power partial powershift, which provided twelve forward and four reverse gears by allowing a high and low shift within each gear without the clutch. Trim levels included the economy Special and the better-equipped Deluxe, the latter available with a dual-stage clutch (live power take-off), power steering, and additional instrumentation.
This article addresses each major problem category and the diagnosis and repair of faults most frequently reported by owners on TractorByNet, Yesterday's Tractors, My Tractor Forum, Tractor Forum, SmokStak, and specialist sites such as Vintage Tractor Engineer and Agriline.
Engine Starting and Performance Problems
Symptoms
Owners report hard starting, particularly in cold weather; a diesel that cranks at normal speed but will not fire; an engine that starts and runs but stumbles when returning to idle; low power under load; blue or white exhaust smoke; black smoke under acceleration; and excessive crankcase blow-by pushing oil from the dipstick tube or valve cover.
Causes
Hard starting on the Perkins diesel is usually a fuel-delivery or cranking-speed problem rather than a fault in the engine itself. Air in the fuel system after filter changes or after standing, a weak lift pump, clogged fuel filters, "stuck" fuel visible only when the injector unions are cracked, and a worn or leaking injection pump are the usual culprits. One owner reported that his 135 that "always cranked and ran on the third turn" would no longer start, and the fault proved to be a weak lift pump. Cold-weather difficulty is aggravated by a failed thermostart cold-start aid or a low battery, because a diesel must crank fast enough to generate the compression heat that ignites the fuel.
Low power, smoke, and blow-by point to engine wear. Blue smoke generally indicates oil being burned, from worn rings, worn valve guides, or a failed valve stem seal. In one documented case an owner's 135 that "suddenly began to spit oil through the exhaust manifold" was cured by replacing a single exhaust valve stem seal on the number one cylinder.
White smoke on a warm engine can indicate unburned fuel or injector faults, while black smoke under load indicates incomplete combustion, frequently from a restricted air filter or a collapsing intake hose. Persistent light smoke and oil "slobber" on an engine chronically under-loaded and never reaching operating temperature is the well-known "diesel slobbers" condition rather than a mechanical fault.
Troubleshooting Steps
- Confirm cranking speed and battery condition first. A diesel that will not start but cranks slowly frequently needs nothing more than a fully charged battery and clean, tight cable connections.
- Bleed the fuel system methodically. Loosen the bleed screw near the filter and crank or prime until fuel flows without air, then tighten. Crack the injector unions at the pump, set the stop control to run, open the throttle, and crank until fuel pulses from each line, then retighten.
- Test the lift pump. If the filters have been changed and the system bled but the engine still will not start or dies under load, suspect a weak lift pump.
- For cold-start complaints, verify thermostart operation. Turning the key counterclockwise energizes the heating element in the intake manifold; the operator should count roughly fifteen seconds before cranking.
- For smoke and blow-by, remove the oil filler cap with the engine running. Heavy pressure and smoke indicate ring or cylinder wear; little or no blow-by with blue smoke points toward valve guides or stem seals. A compression test helps assess engine condition. Compare readings with the service manual for the fitted engine, because diesel and gasoline engines have different compression requirements.
Solutions
Replace fuel filters and the lift pump with new components; the lift pump is inexpensive and owners report replacing it several times over a tractor's life. Bleed the system fully after any fuel work. Because the old MF fuel lines use rubber "olives" that are extremely difficult to remove without damage, plan on replacing lines that must be disturbed rather than reusing them.
For cold climates, the most reliable improvement is a block heater installed in a frost plug. Owners in the northern United States and Canada report that a 750-to-1000-watt block heater run for one to two hours allows easy starting even at extremely low temperatures, and that this is gentler on the engine than the thermostart or, worse, starting fluid. Starting fluid must never be used on a thermostart-equipped engine, because igniting the ether against the glowing element can blow the intake manifold off and can hydraulic the engine into a bent connecting rod.
For a worn engine, the Perkins AD3.152 is inexpensive and straightforward to rebuild; complete piston, ring, and liner kits are available, and short blocks are also sold.
Set valve clearances at 0.012 inch cold (both intake and exhaust).
Cylinder head bolts on the AD3.152 are torqued to 75 lb-ft in three progressive stages, working from the center outward. Static injection timing for the AD3.152 is 24 degrees before top dead center, though the exact figure should be verified against the set code stamped on the specific CAV/DPA pump.
Fuel Injection and CAV/DPA Injection Pump Problems
Symptoms
The single most frequently reported fuel-system problem is a leak from the CAV/DPA rotary injection pump: fuel weeping from the throttle shaft, the shut-off (stop) shaft, the top cover, the head, the banjo fittings, or the inspection plate. Related complaints include the engine not returning fully to idle when warm, stumbling at idle, and, in the most serious cases, fuel leaking internally and diluting the crankcase oil.
Causes
The Massey Ferguson 135 diesel uses a CAV DPA (later Lucas, then Delphi) distributor-type rotary injection pump, lubricated primarily by the diesel fuel itself. The rubber seals and O-rings around the throttle and shut-off shafts harden and shrink with age, a process markedly accelerated by modern ultra-low-sulfur diesel. As one owner who had just resealed his 275 pump explained, if one seal is leaking then the others are also deteriorating because of the modern fuel, so it is wise to reseal the entire pump at once rather than chase individual leaks.
An internal leak that pumps diesel into the crankcase is dangerous because it can lead to oil dilution and engine damage.
Banjo-fitting leaks are usually a failed sealing washer; forum contributors note these are a special steel washer rather than an ordinary copper one.
Troubleshooting Steps
- Clean the pump with degreaser or brake cleaner, dry it, dust the area with talc, start and stop the engine, and observe exactly where fuel emerges. This isolates a throttle-shaft, shut-off-shaft, head, or banjo leak precisely.
- Check whether the leak is external (dripping onto the ground) or internal (crankcase oil level rising, oil smelling of diesel). Rub the dipstick oil between finger and thumb; diesel-diluted oil feels thin and smells of fuel.
- If the engine runs poorly with blue smoke and low power after a shop reassembled the pump, suspect incorrect reassembly of the governor spring.
Solutions
For throttle-shaft and shut-off-shaft leaks, a set of four small O-rings and a top-cover gasket is inexpensive. CAV/DPA repair kits, such as the CAV7135-110 kit, contain all gaskets, seals, O-rings, and washers and are widely available. Before lifting the top cover, record which holes the governor spring occupies at both ends, because reassembling it into the wrong holes will prevent the engine from ever running correctly again.
The head O-ring can be replaced by pulling the pump head out just far enough, although many who go that far remove the pump and reseal it completely.
A professional reseal typically runs a few hundred dollars; owners have reported roughly $200 for a mailed-in 165 pump reseal and quotes near $600 for a full rebuild.
Because the pump can be removed without disturbing the timing if the scribe line is noted relative to the timing-case mark before removal, a careful owner can remove and reinstall the pump without professional retiming.
To protect the pump against the poor lubricity of modern fuel, use a diesel lubricity additive at every fill. The removal of sulfur from diesel also removed the oxygen- and nitrogen-bearing compounds that provided natural lubricity, and rotary mechanical injection pumps are the components most vulnerable to the resulting wear. Products marketed for lubricity, such as Stanadyne, Power Service, or Hot Shot's Secret LX4, restore fuel lubricity toward the 460-micron maximum wear-scar limit set by the Engine Manufacturers Association (and EN 590/ISO 12156 in Europe), which is stricter than the US ASTM D975 limit of 520 microns.
Hydraulic System Problems (Ferguson System Lift, Draft and Position Control)
Symptoms
Hydraulic complaints include: the three-point hitch will not lift at all; the lift raises but will not pick up a heavy load; the lift is slow to raise; the lift works when cold but weakens after half an hour as the oil warms; the lift shudders or is jerky; the arms drop when the engine is stopped; the arms rise to full height and will not stop; and, in a distinct failure, the arms can be raised by hand with no resistance at all.
Causes
The Massey Ferguson 135 uses the Ferguson System hydraulics with a Mk2 piston-type lift pump mounted in the base of the transmission housing, controlled by draft control (the outer quadrant lever) and position control (the inner quadrant lever). The system shares its oil with the transmission and rear axle.
A total failure to lift most often traces to a stuck relief valve, a stuck control valve, a clogged suction filter, a worn pump, or the stand pipe or transfer plate being out of position. Several owners have chased a complete no-lift condition only to find that the stand pipe was simply not seated properly on the pump; once reset, the lift worked.
Where the lift raises but continues to full height and will not stop, the internal control framework or its rollers are bent or broken, so the feedback signal between hitch position and control valve is lost.
Weakness under load, and lift that fades as the oil warms, is a symptom of general internal wear, because the oil thins as it heats and escapes past worn valves and pistons.
Shuddering is caused by valve-chamber valves not sealing, usually from dirt, a fragment of an O-ring, or excess silicone in a valve seat.
Arms dropping after shutdown indicates general wear on the valve seats, control valve, or stand-pipe O-rings and is not serious.
Water ingress is a recurring theme: the pump sits at the lowest point of the housing, and if water collects there and freezes, the pump can crack.
On a dual-clutch tractor, drive to the hydraulic pump passes through the power-take-off clutch plate, so a sheared or worn PTO clutch plate can produce what appears to be a hydraulic failure; check this before dismantling the hydraulics.
Troubleshooting Steps
- Check the fluid level and condition first. Low or water-contaminated fluid reduces lift power. The dipstick is near the rear of the right footplate, and the arms should be down when checking.
- Clean the hydraulic suction filter, located beneath the transmission housing, roughly below the operator's left heel, retained by three set screws.
- Perform the top-link test for weak lift. Remove the load from the top link (or replace it temporarily with a chain to the implement). If the lift then works normally, the draft control spring needs adjustment. This five-minute test can save a great deal of unnecessary pump work.
- Fit a pressure gauge to confirm pump output. A gauge can be installed at the Allen-headed grub screw port under the seat (3/8-inch BSP taper thread). Normal readings are near the system maximum of 2,800 psi; one owner obtained approximately 2,500 psi on a functioning system.
- Remove the dipstick side cover and watch the pump control-valve lever respond to the quadrant levers, without draining the oil or removing the top cover.
Solutions
Free a stuck control valve by working the pump control-valve lever back and forth, or by repeatedly raising and dropping the lift arms with the levers down. If cleaning fails, remove and clean or replace the pump and control valve. Address a slack relief valve (a spring that has lost tension) by overhaul. For the "arms rise and will not stop" fault, remove the lift cover and repair the bent or broken control framework and rollers. Critically, when removing the top lift cover, first remove the roller in the control linkage, because failing to do so damages the linkage; the roller, if dropped, migrates to the underside of the pump.
For the stand-pipe fault, reset the stand pipe and transfer plate into their correct positions. For water contamination, drain, flush with diesel, replace the filter, and refill. A cracked pump can be patched with available pump kits. When resetting the pump and linkage after a lift-cover removal, the draft spring assembly, draft control linkage, and position control linkage must be adjusted in that order, ideally using the special MF setting equipment.
Transmission and Multi-Power Problems
Symptoms
The classic Multi-Power complaint is loss of the high range, leaving the tractor "stuck in low," which produces no engine braking so that the tractor freewheels down hills. Other symptoms include Multi-Power that slips in high, engages for a moment then freewheels, works only until the oil warms, will not work at all, or downshifts from high to low on its own.
Causes
The Multi-Power system contains one hydraulically actuated clutch pack and a ratchet-type (overrunning) clutch. In low range the hydraulic clutch is disengaged and drive passes through a pair of gears into the ratchet clutch; because of the ratchet, there is no engine braking in low. In high range the hydraulic clutch locks up and drives a faster gear, and the low-range ratchet then overruns as a freewheel. This is why engine braking is available in high Multi-Power but never in low, and it is an inherent characteristic of the system, not a fault. It is nonetheless a genuine safety hazard: one dealer recounted a customer whose tractor reached a high speed coming down a loading ramp in low Multi-Power because there was no engine braking to restrain it.
Loss of high range is most commonly caused by a clogged Multi-Power filter, degraded or contaminated transmission oil, worn hydraulic clutch friction plates, a maladjusted control linkage, or a leaking Multi-Power control valve. The system uses its own pump and a separate square filter mounted on top of the main hydraulic pump, distinct from the main suction filter. This filter clogs with a fine black sludge that proves to be disintegrated clutch friction linings.
Troubleshooting Steps
- Check and adjust the control linkage first. Failure to engage is frequently caused by the rod from the dash control not moving the valve far enough. With the Multi-Power lever firmly up, loosen the clamp on the pin at the top of the transmission, tap the pin down while lifting the clamp, and retighten.
- Drain the transmission oil and clean both filters. Clean the main round suction filter through the PTO lever cover, and clean the separate square Multi-Power filter.
- Refill with the correct fluid. A tractor with Multi-Power must use the correct Massey Ferguson specification fluid.
- Road-test to distinguish linkage from clutch faults. If the tractor shifts into high and does not slip, the problem was linkage; if it slips in high, the clutch pack is worn.
Solutions
Many Multi-Power failures are resolved simply by cleaning the square Multi-Power filter and changing the transmission oil. One owner described his Multi-Power as "stuck in low," and after draining the oil, cleaning both filters (finding the square filter blocked with thick black gunk), rinsing with diesel, and refilling, "Multi power now works great, full engine braking and hill hold in forward and reverse." Because black material in the filter is disintegrated clutch lining, a clogged filter warns that a clutch overhaul may eventually be required.
A worn Multi-Power clutch pack requires splitting the transmission and overhauling the clutch; parts can be expensive and increasingly hard to find, but the repair is practical for a competent mechanic. When running in low Multi-Power only, keep the dash lever in low to avoid additional clutch wear. Some owners lock out the Multi-Power in low to obtain speeds equal to a standard six-speed, but this sacrifices the engine braking available in high, so the better course for a hill tractor is to repair the system. Clean, fresh transmission oil is essential to Multi-Power operation, and lack of oil maintenance is the most common underlying reason these systems fail.
Clutch Problems
Symptoms
Reported clutch problems include a clutch that slips; a clutch that will not disengage so the tractor moves when put in gear; inability to engage the power take-off without gear grinding while the engine runs; the power take-off not stopping when the clutch is depressed; and oil in the clutch bell housing.
Causes
The Deluxe models use a dual-stage clutch that provides live power take-off: pressing the pedal to the first stage disengages the transmission while the power take-off continues to turn, and pressing fully disengages the power take-off as well.
The Special models use a single-stage clutch. Wear on the friction surfaces gradually changes pedal free-play and eventually causes slipping. Difficulty engaging the power take-off is almost always a maladjustment of either the pedal free-play or the power-take-off clutch release studs. Oil in the bell housing comes from a leaking rear main seal or transmission input shaft seal and will contaminate and ruin the clutch.
The Massey Ferguson 135 was fitted with an 11-inch clutch up to serial number 121069 and a 12-inch clutch thereafter; the adjustment procedure is the same for both.
Troubleshooting Steps
- Always adjust the pedal free-play before condemning the clutch. If the pedal is out of adjustment, the release bearing will not push the release fingers far enough to disengage the secondary (power take-off) clutch.
- Determine whether the power take-off grinds or engages silently. If it grinds when engaging with the engine running, the tractor has a live (two-stage clutch) power take-off and the clutch or its adjustment is at fault. If it engages silently regardless of the clutch pedal, it is an independent power take-off.
- Check the bell-housing drain. A cotter pin fitted loosely in a hole on the underside of the clutch housing should vibrate freely to keep the drain clear; if the hole plugs, oil accumulates and destroys the clutch.
Solutions
Adjust the clutch pedal free-play by slackening the pedal clamp bolt and rotating the clutch release shaft relative to the pedal, then retightening.
The specification is 3/8 inch of soft free movement for the dual clutch and 3/4 inch for the single clutch, although owners cite up to a total pedal free travel of one to one and a half inches on the 135.
The Agriline procedure sets a 6-millimeter gap between the pedal bracket and the gearbox housing during adjustment.
Adjust the power-take-off clutch release studs through the access panel on the underside of the bell housing. Using feeler gauges, set the gap between each of the three adjusting-stud heads and the release mechanism to the factory specification of 0.089 to 0.091 inch (nominally 0.090 inch), ensuring all three are equal.
Experienced MF mechanics often set the gap slightly tighter, to about 0.080 inch, because the gap widens as the main clutch disc wears.
The unladen power take-off should stop turning with about one inch of pedal travel remaining. Where oil has contaminated the clutch, the tractor must be split, the clutch replaced, the bell housing cleaned, and the leaking seal replaced at the same time. Because splitting the tractor is the labor-intensive part, replace the engine sump gasket and both seals while apart.
The Massey Ferguson clutch is designed so individual components can be replaced separately, which keeps the repair relatively inexpensive.
PTO and 3-Point Hitch Problems
Symptoms
Power-take-off complaints include a shaft that will not stop turning, gear grinding on engagement, confusion over ground-speed versus engine-speed operation, and a power take-off that spins whenever the tractor moves. Three-point hitch complaints overlap with the hydraulic section: failure to lift, failure to hold, and uncontrolled drop.
Causes
The Massey Ferguson 135 was offered with three distinct power-take-off systems, and much owner confusion arises from not knowing which is fitted. The transmission (single-clutch) power take-off requires an overrunning coupler and stops only when the transmission is declutched. The live power take-off, driven through the two-stage clutch, is the most common; it turns whenever the engine runs unless the clutch is pressed fully. The independent power take-off, with its own hydraulic clutch, can be engaged and disengaged at will without the clutch pedal. A tractor with a two-stage clutch has a selector plate with three positions (engine speed, neutral, ground speed), whereas an independent unit typically has different lever geometry and a plugged extra hole in the plate.
A power take-off that will not stop on an independent system usually indicates a failed power-take-off brake, a major repair. Grinding on engagement of a live power take-off indicates a clutch adjustment or wear problem. A power take-off that spins whenever the tractor moves is normal when a live power-take-off selector is placed in the ground-speed position, in which the shaft turns in proportion to ground speed at approximately one revolution per twenty inches of travel.
Troubleshooting Steps
- Identify the power-take-off type from the selector plate, the operator's manual, and the behavior of the shaft with the engine running and the clutch pressed.
- For grinding engagement, adjust the pedal free-play and the release studs as described in the clutch section, and engage only at low idle.
- For a hitch that will not lift or hold, follow the hydraulic troubleshooting steps, including the top-link load-removal test and the suction-filter cleaning.
Solutions
Set the power take-off to 540 rpm using the mark on the tachometer; on the diesel this corresponds to roughly 1700 engine rpm. For engagement grinding, correct the clutch adjustments; where the clutch plate has been warped during a previous reassembly, replacement is required. A live power take-off that grinds even when the clutch is fully depressed indicates a clutch fault rather than an operating error. The Category 1 three-point hitch itself is robust; most hitch complaints are hydraulic.
Steering and Brake Problems
Symptoms
Manual-steering tractors develop stiffness and heavy effort. Power-steering tractors most commonly leak: fluid is pushed out of the breather or vent at the top of the steering column, emptying the reservoir quickly; steering assist is lost in one direction; the pump and lines run very hot; or fluid disappears into the engine crankcase. Brake complaints include weak braking, one brake working and not the other, the tractor pulling to one side, and oil-soaked shoes.
Causes
The Massey Ferguson 135 was available with a manual steering gearbox or an optional power-assisted steering system using a pump mounted at the front right of the engine, a control valve in the steering column, and two small hydraulic rams on the front axle.
The steering system has its own small kidney-shaped reservoir with an internal filter and uses automatic transmission fluid or an equivalent.
The characteristic leak from the top of the column is a failed lower column seal; because the escaping fluid is not obvious until the reservoir empties, it is often misdiagnosed.
Fluid disappearing into the crankcase indicates a failed seal on the engine-driven pump.
Hot lines and fluid pushed over the relief valve can indicate a blocked filter in the pump canister.
The Massey Ferguson 135 uses mechanical (rod-operated) drum brakes on most examples, described by owners as "dry brakes." The overwhelming cause of weak or one-sided braking is oil-soaked linings from a failed axle (trumpet housing) seal, followed by simple maladjustment and worn actuating cams. The brakes were never powerful by modern standards, but in good condition they will lock the rear wheels.
Troubleshooting Steps
- For a power-steering leak from the column top, confirm the source; the lower column seal is the usual culprit. Check the reservoir level and the pump canister filter.
- For loss of assist in one direction or hot lines, check the fluid level, filter, and relief valve, and jack the front up to turn the wheels stop to stop while bleeding air.
- For weak brakes, jack up the rear wheels, remove the drums, and inspect the linings. Oil-soaked or glazed linings, or bright unworn linings that still do not grip, tell the story quickly.
- For one-sided braking, check that both brakes are adjusted equally and that the linkage clevises are free.
Solutions
For the common column-top power-steering leak, replace the lower column seal, top bushing, and O-ring; the steering wheel must be removed carefully to avoid cracking it.
Where a proper seal replacement does not hold, owners have documented a durable field fix: drill and tap a 1/8-inch NPT port in the column just below the seal and plumb a return line back to the reservoir to recirculate the leaked fluid.
A speedy-sleeve on the shaft is another proven remedy. For fluid entering the crankcase, replace the seal on the engine-driven pump. The manual gearbox and power-steering sector can be rebuilt, but the sector rebuild is expensive and the rack can be fragile; some owners simply operate without the power assist.
For brakes, the correct repair for oil-soaked linings is to replace the trumpet-housing axle seal, reset the axle shaft end-float to 0.002 to 0.004 inch with shims, and fit new shoes. Owners report that cleaning and burning oil out of contaminated linings gives only marginal results and that new shoes restore proper braking.
Adjust the drum brakes by raising the rear wheels, removing the adjusting-hole covers, tightening the star-wheel adjuster until the drum will not turn, then backing off until it turns freely.
The actuating cams wear on the front upper and lower rear faces and can be built up with weld and ground back.
Final linkage adjustment is made on a hard surface with the pedals latched together, so the tractor stops in a straight line; if it pulls, the linkage on one side is adjusted to correct it.
Cooling System Problems
Symptoms
Owners report overheating under load, coolant pushed out of the overflow, coolant expelled from the radiator cap when the engine is shut off, repeated failure of the bypass hose, and a temperature gauge that only reads when the cap is loosened.
Causes
The cooling system comprises a water pump, thermostat, radiator with a pressurized cap, and hoses. The most common causes of overheating are a clogged radiator core, a slipping or worn fan belt, a stuck thermostat, a failing water pump, a fan positioned too far out of the shroud, and, more seriously, a head gasket leak allowing combustion gases to pressurize the cooling system. Coolant expelled at shutdown or from the cap frequently indicates a failed radiator cap that no longer holds pressure, or combustion-gas intrusion. A repeatedly bursting bypass hose is a symptom of pressure or flow problems.
A frequent owner error is removing the thermostat to cure overheating; this often makes overheating worse, because the coolant then flows through the radiator too quickly to be cooled adequately.
Another documented cause is fitting the wrong water pump or an alternator pulley of the wrong width, which lets the belt bottom in the pulley and slip even when tight.
Troubleshooting Steps
- Verify the complaint with an accurate thermometer rather than an old gauge.
- Pressure-test the cooling system. A rapid pressure rise with the engine running indicates combustion gases entering the coolant, pointing to a head gasket.
- Check the fan belt tension and condition, and confirm the fan sits correctly relative to the shroud.
- Confirm circulation by squeezing the lower radiator hose with the engine running and checking for turbulence at the cap once the thermostat opens.
- Test the thermostat in hot water to confirm it opens, and inspect the radiator core for scale and debris.
Solutions
Replace the thermostat with the correct unit; the diesel specification calls for an opening temperature of 175 to 182 degrees Fahrenheit.
Do not run permanently without a thermostat. Replace a worn or glazed fan belt; one owner's tractor "went from running hot to running cool just by changing the fan belt."
Have the radiator professionally cleaned ("cored out") or use a commercial radiator cleaner if the core is scaled, and pressure-wash accumulated chaff from the fins. Replace the radiator cap, an inexpensive and common cause of coolant expulsion. Replace the water pump if the impeller is eroded or the bearing or seal has failed; because the fuel tank must be removed to service the water pump, it is efficient to replace the pump, thermostat, gaskets, hoses, and backing plate together.
If a pressure test confirms combustion-gas intrusion, the head gasket must be replaced.
Electrical System Problems
Symptoms
Electrical complaints include a battery that discharges over a few days when parked, no charging, intermittent no-start traceable to a broken wire, gauges that do not function, and difficulty sourcing a wiring harness that matches the tractor.
Causes
The Massey Ferguson 135 is a 12-volt system. Early tractors used a generator (dynamo) with an external control box, and later tractors used an alternator. UK-built tractors used Lucas electrics (a Lucas C40 dynamo rated at about 11 amps, or an early Lucas alternator with external control box, plus Lucas switches and British-thread terminals), while North American tractors used Delco (Delco-Remy) components. This distinction is why a harness sold for a UK tractor will not fit a North American tractor: the Lucas harness has extra branches, different wire colors, and different terminations for the control box, and uses British bullet connectors and BSF-sized ring terminals.
The generator system's chief weaknesses are the control box (voltage regulator), frequently the culprit in charging faults, and the generator's low output of only 10 to 12 amps.
A commonly overlooked fault is the chassis end of the battery ground cable, and an oil-pressure switch at the base of the oil-pressure gauge that switches the charging system on when the engine starts and can fail, leaving the charging system shut off.
Aged, brittle wiring that appears sound but is broken internally is a recurring cause of intermittent faults on tractors now more than fifty years old.
Troubleshooting Steps
- For a no-charge condition on a generator tractor, test the generator by briefly jumping the field terminal to the generator body with the engine at high idle; if it then charges, the regulator or its ground is at fault, and if it does not, the generator is bad.
- Check the battery ground cable and its chassis connection, and jumper the ground to a solid casting to rule out a poor ground.
- Check continuity of the charging wires end to end, because a wire that looks sound can be broken internally.
- Determine whether the tractor originally had a generator or alternator and whether it retains an external or internal regulator.
Solutions
For a failed control box on a generator tractor, replace the regulator with a quality unit; owners warn that inexpensive regulators fail quickly.
Many owners convert the generator system to an alternator for reliability and greater output; a Delco 10SI alternator delivering 45 to 50 amps is a popular choice and can be obtained rebuilt inexpensively.
When converting, the system must be changed to negative ground, an appropriately rated ammeter should be fitted (an owner upgraded to a 60-amp ammeter), and the exciter and output wiring connected correctly, ideally with a diode in the exciter circuit so the ignition switch can still stop the engine.
Complete dynamo-to-alternator conversion kits are available. Replace brittle wiring with a correct harness for the tractor's origin, and clean and tighten all grounds.
Oil Leaks
Symptoms
The most reported oil leaks are drips from the cotter-pin hole at the bottom of the clutch bell housing, leaks at the hydraulic lift cover, oil in the brake drums from axle seals, engine sump leaks, and rear main seal leaks.
Causes
The bell-housing drip is diagnostic: the hole with the loose cotter pin at the bottom of the clutch housing is deliberately provided to let oil escape without reaching the clutch, and its source is either the engine rear main seal (dirty engine oil) or the transmission input shaft seal (clean hydraulic fluid).
The cotter pin turns and vibrates to keep the hole clear.
Axle seal leaks contaminate the brakes. Sump and rear main leaks arise from hardened cork and paper gaskets aged over decades. Overfilling the transmission/hydraulic system can cause leaks at the cross-shaft freeze plug in the axle housing.
Troubleshooting Steps
- Determine whether the leaking fluid is engine oil or hydraulic/transmission fluid by its color, cleanliness, and smell.
- Keep the transmission/hydraulic oil at the halfway mark on the dipstick, with the lift arms down, to reduce leakage.
- Confirm the bell-housing drain (cotter pin) is clear, and never plug it, because trapped oil ruins the clutch.
Solutions
A minor drip from the bell-housing cotter pin is common and many owners simply live with it. A significant leak requires splitting the tractor to replace the rear main or input shaft seal; because this is a major job, replace both seals and the sump gasket together. On the diesel and Perkins gasoline three-cylinder engines the rear main is a rope seal, and forum experts note that non-original-equipment rope seals frequently leak, so genuine Massey Ferguson or Perkins seals are recommended.
Modern rubber-bonded-steel or fiber-composite gaskets and Viton seals last far longer than the original cork. The sump gasket can be replaced without splitting the tractor. For axle-seal leaks, replace the trumpet-housing seal and reset the axle end-float. For the cross-shaft freeze-plug leak, the axle housing must be removed to replace the plug.
Maintenance-Related Failures
Many "failures" on the Massey Ferguson 135 are the direct result of deferred maintenance: Multi-Power failures from old contaminated transmission oil; injection pump wear and seal failure from modern fuel without additives; clutch destruction from a plugged bell-housing drain; overheating from a scaled radiator or slipping belt; brake failure from unaddressed axle-seal leaks; and hard starting from neglected filters and a weak battery. In each case a simple, inexpensive service item was neglected until it caused a larger failure. The shared transmission/hydraulic oil must be kept clean because it lubricates the gearbox, differential, hydraulic pump, and Multi-Power clutch pack. The remedy is a disciplined preventive-maintenance program. The single most valuable lesson from owner reports is that the Massey Ferguson 135 rewards regular fluid and filter changes with extraordinary longevity, and punishes neglect with failures that are individually avoidable.
Preventive Care and Recommended Servicing Schedule
Engine Oil and Filter
Change the engine oil and filter regularly. The Perkins diesel holds 6.5 US quarts (6.2 liters) including the filter; the Continental gasoline engine holds 6.0 US quarts (5.7 liters). Use a good-quality diesel-rated engine oil and confirm the level on the dipstick after refilling. Clean the filter housing before fitting a new element.
Transmission and Hydraulic Fluid
The transmission, differential, and hydraulic system share a single oil reservoir of approximately 8 US gallons (30.3 liters).
The correct fluid meets Massey Ferguson specification M-1129A (or the older M-1110), sold today as Permatran or AGCO 821XL and equivalent to a good universal tractor transmission/hydraulic fluid available from farm suppliers. A tractor with Multi-Power or an independent power take-off should use genuine Permatran-specification fluid, because the cost of the fluid is trivial compared with a Multi-Power or power-take-off repair.
Change this fluid on the recommended schedule (the factory interval is 750 hours), replace the hydraulic filter element annually, and keep the level correct. Never allow water to accumulate; replace a cracked or missing gearshift boot promptly, because water entering the housing can crack the lift pump if it freezes.
Fuel System
Replace the fuel filters on schedule (the factory interval for the fuel filter is 500 hours, or more often in dusty conditions or with questionable fuel). Drain any water from the primary filter glass bowl regularly. Given the poor lubricity of modern ultra-low-sulfur diesel, add a lubricity additive at every fill and consider periodic reseal of the injection pump if the tractor sees heavy use. Store the tractor with a full fuel tank to reduce condensation.
Cooling System
The cooling system holds 10.5 US quarts. Check the coolant level and condition regularly, maintain a proper antifreeze mixture, inspect and replace hoses before they fail, keep the radiator fins clear of chaff, and confirm fan belt tension. Replace the thermostat and radiator cap as inexpensive insurance during any cooling-system service.
Clutch
Check and adjust clutch pedal free-play periodically: 3/8 inch of soft free-play for the dual clutch and 3/4 inch for the single clutch.
On dual-clutch tractors, verify the power-take-off clutch release studs remain at 0.090 inch. Keep the bell-housing drain (cotter pin) clear at all times.
Steering
Lubricate the front hubs, front axle spindles, and axle pivot pin on schedule. On power-steering tractors, check the reservoir fluid level and pump canister filter, and address column-seal weeps before the reservoir runs dry.
Brakes
Inspect the brake linings and drums periodically, adjust the brakes so both engage equally and the tractor stops in a straight line, and address any axle-seal leak immediately before it contaminates the linings. Maintain one to one and a half inches of pedal free travel.
Electrical
Keep the battery charged and the terminals and grounds clean and tight, paying particular attention to the chassis end of the ground cable. Inspect aged wiring for brittle insulation and internal breaks, and test the charging system periodically. Consider an alternator conversion on a generator-equipped tractor used regularly.
Model-Year and Variant Differences
The engine is the most important variable for a U.S. buyer. The Perkins AD3.152 diesel is the most sought-after and durable, described by long-time owners as nearly indestructible and inexpensive to rebuild; one owner relayed that a friend called his 135 a "cockroach" because "it will never die." The Continental Z-134 (rated 39 horsepower) and Z-145 (advertised 35 power-take-off horsepower) gasoline engines fitted to early US-built tractors, and the Perkins AG3.152 gasoline engine, are serviceable but generally command lower prices, and gasoline tractors sell for slightly less than diesels. The Multi-Power transmission adds value and capability but introduces the well-documented failure mode described above and demands scrupulous transmission-oil maintenance. The standard six-speed and later eight-speed transmissions are simpler with fewer failure points. The Deluxe models with a dual-stage clutch (live power take-off) and power steering are more desirable and valuable than the economy Special models, which came with a single-stage clutch (no live power take-off), a pan seat, and minimal instrumentation.
The UK-versus-US distinction matters for parts and electrics. UK tractors were built at Coventry and are generally regarded by owners as slightly better built; US tractors were built in Detroit. The two differ in their electrical systems (Lucas versus Delco), affecting wiring-harness compatibility, and in some fittings and threads. Serial numbers identify the year: North American tractors from 1967 onward use a "9A" prefix (for example, 9A10001 in 1967, 9A87325 in 1970, 9A128141 in 1972, 9A207681 in 1975), while UK and other tractors use different sequences. The identification plate is on the instrument panel below the steering wheel, and can also be found on the right side of the engine under the battery tray. The design was made more angular in 1965 and updated in 1971 with a larger fuel tank.
Repair-Versus-Replace and Cost Considerations
The Massey Ferguson 135 remains economically repairable, which is central to its enduring value. The engine rebuilds inexpensively; injection pump reseals cost a few hundred dollars or can be done at home with a kit; clutches, seals, and gaskets are available and the clutch is designed for component-level repair; hydraulic pump kits are stocked; and cooling, electrical, and brake parts are widely available from suppliers such as AGCO, Jensales, and All States Ag Parts / Tractor Parts ASAP. Genuine parts and service manuals are available from AGCO Technical Publications and the AGCO parts books.
On the used market, prices vary widely with condition and specification: TractorHouse.com listings have ranged from $2,600 to $17,363, with the site reporting an average near $5,284. As a practical rule of thumb from owner reports, a fully equipped diesel 135 in good working condition with live power and power steering has typically brought roughly $4,000 to $5,500, with gasoline and non-live-power examples several hundred to a thousand dollars less, and exceptional or fully restored examples considerably more. Prospective buyers should budget for a full fluid-and-filter service, likely seal work, and probable brake work on any unrestored tractor, and should specifically test the Multi-Power in both ranges, the hydraulic lift under load, the power take-off engagement, the brakes, and the charging system before purchase.
Recommendations
- On acquiring any Massey Ferguson 135, perform a complete baseline service before working it. Change the engine oil and filter, the transmission/hydraulic fluid and filter (using M-1129A-specification Permatran or equivalent, and genuine Permatran if Multi-Power is fitted), and the fuel filters; check the coolant, cap, belt, and hoses; and confirm the bell-housing drain is clear. This single step prevents the majority of maintenance-related failures.
- Diagnose before dismantling. For a weak or dead hydraulic lift, clean the suction filter and perform the top-link load-removal test before touching the pump. For Multi-Power failure, clean both filters and change the oil before assuming a clutch overhaul. For weak brakes, pull the drums to check for oil contamination before buying parts.
- Protect the injection pump against modern fuel. Use a lubricity additive at every fill, and reseal the CAV/DPA pump with a complete kit at the first sign of a shaft or head leak rather than chasing individual seals, because one failing seal signals that the others are failing too.
- Treat the loss of engine braking in low Multi-Power as a safety matter. If the high range is not working, repair it before using the tractor on hills; do not rely on the brakes alone, and do not disable the high range on a tractor used on slopes.
- Consider an alternator conversion on generator-equipped tractors used regularly, for reliability and output, ensuring the change to negative ground and correct wiring.
- Keep the shared oil at the halfway mark and never plug the bell-housing drain, to minimize leaks and protect the clutch.
Benchmarks that change these recommendations: If a hydraulic pressure test reads well below the 2,800-psi system maximum after the filter and linkage checks, plan a pump overhaul. If the Multi-Power still slips in high after a filter and oil change, budget for a clutch-pack overhaul and a transmission split. If a compression test shows readings below the service-manual specification for the fitted engine, together with heavy blow-by, assess the need for an engine rebuild. If a cooling-system pressure test shows a rapid pressure rise at idle, plan a head gasket. If the power-steering sector rebuild is quoted at a significant fraction of the tractor's value, running without power assist is a rational choice.
Caveats
Much of the detailed troubleshooting guidance here is drawn from owner and enthusiast forums, which represent extensive practical experience but are not a substitute for the factory service, parts, and operator manuals; owners should obtain the correct manuals for their specific variant, because UK and US tractors differ. Specifications cited here, including torque figures, clearances, timing, and pressures, should be verified against the manual for the individual tractor and its specific components, particularly the injection pump set code, before any repair. Some numeric values reported in secondary sources conflict (for example, rear axle end-float has been quoted as both 0.002 to 0.004 inch and 0.005 to 0.010 inch, and hydraulic relief-valve ratings across a band from roughly 2,300 to 3,000 psi); where such conflicts exist this article cites the more consistently reported figure and notes the discrepancy. Prices are volatile and regional, so the figures given are indicative rather than firm. Finally, safety is paramount: the mechanical drum brakes are modest, the low-Multi-Power freewheel is a genuine hazard on slopes, and the tractor must be safely supported when split or when wheels are raised for brake or axle work.
Further Reading
Image credit: Chris Sampson / Wikimedia Commons, CC BY 2.0. Image used as supplied.