Golf carts can provide a warming and exciting outdoor experience be it on a holiday local travel, fishing and many more events. This is made possible by a wide range of available golf cart decorations. Golf carts can be decorated for parading for various events. With good design and decoration skills, golf cart experience can be cherished. The good thing about this is the flexibility that comes with decoration process. Mainly the decoration is not permanent and can be changed or modified to suit different event requirements. The decoration process requires procurement of some staff and cost depends on the quantity and quality of decoration required. To properly decorate your golf cart you mostly need someone to assist you.

Table of Contents
Items and Tools Required
In order to attach decoration to a golf cart, there are tools and decoration items required. The list of requirements is given below. The list is however not exhaustive as each decoration is unique.
- Transparent sellotape 2 inch, yarn, flower garlands and streamers, cable ties, poly ribbon for outdoor use, artificial wreath, balloons, battery powered glow lights and decal and candy can sticks.
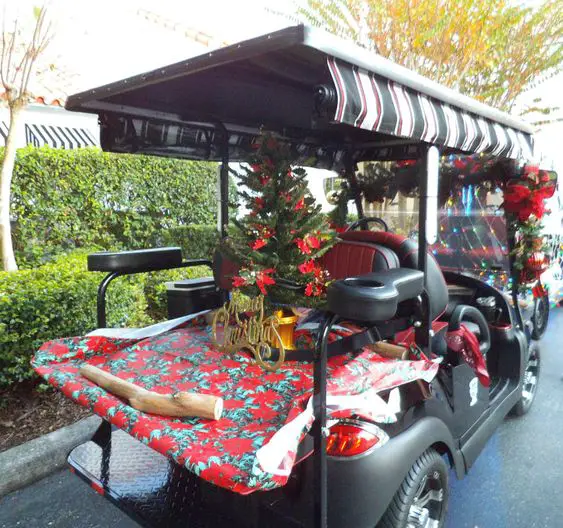
Attaching Decoration on Golf Cart
When attaching your decoration on a golf cart it is important to ensure that your decoration matches the event if you are decorating your golf cart for an event. For a fishing tour, the decoration should resonate with the event and the same applies for all other events. The decoration of the golf cart should be done in sections, front, back and body. All these views should be enticing to the eye.
Decorate Front
- Take your custom made decal and align it from one end of your front bonnet. When satisfied with the location, trace the decal with a chalk which you can later erase.
- Carefully remove the seal and transfer the decal onto your cart. Apply pressure gently and evenly.
- Remove gently the paper, you should see the print on your golf cart.
- Take your cable ties and wreath, align them on the front bar of your golf cart. In case your golf cart does not have the bar you may need to use a prepared wood stick and attach it using cable ties on the front. You may paint the wood stick with the color that matches your golf cart.
- Using cable ties, array your wreaths on average three depending on their sizes. Position should be such that they don’t affect driver visibility while driving the cart.
- Attach streamers hanging using sellotape along the length of the same bar.
The decoration should be simple and easy to remove. Never use bonding materials that will require you to use heat or scratch to remove. Golf cart decorations have to be temporary since mostly golf carts are not dedicated vehicles for only one event.
Decorate Body
The body has the bulk of space and that’s where the major decorations should be attached. Always bear in mind the theme of your decoration when on the body. The cab of the golf cart is a great position for decoration.
- Take custom cut letters for your theme and stick to the front of your golf cart cab. This is the best part to place due to its visibility.
- Attach one artificial wreath on the center of the cab and use magnetic tape to attach.
- Cut double length of yarn that can cover the whole cab circumference and align it around the cab circumference.
- Take different colored flower garlands and tie them around the cab on the yarn. The flower garlands should be slightly short that they don’t hang around and enclose the whole golf cart body. The driver should remain clearly visible and so the garland should act like a cab overlap or small curtain.
- Align glow lights around the second yarn that covers the cab circumference and attach them on the cab circumference.
- Take the lights cable and drop it down along the cab poles so they don’t hang around and direct them to the power source. Some glow lights are powered by small DC batteries which can be secured on the seat side and properly covered.
- Use cable tie or sellotape to secure the cable on the cab pole.
Decorate Back
The golf cart back also has good space for decoration, since it rarely interferes with driver visibility during driving.
- Take different flower garlands and array them properly on the back of your golf cart. Decorate them with different styles.
- At the center of your golf cart rear bar, take the poly ribbon and stick around 10 pieces at their center and use a button shaped cloth of different color. The ribbon should look like a sun flower except for the color.
- Take balloons of different colors and tie them onto your golf cart using strings. You may opt to design a tail using balloons and tie them at the back. Always make sure that the tail is long enough not to interfere with other drivers when swayed by wind during driving.
Decorate Wheels
The wheels also are good for decoration when attaching decoration to a golf cart. For your wheels you just have to use your candy cane sticks and attach them to your wheels in a circular array. The candy canes when the wheel is rotating will look like a wheel extension around the wheel circumference. Do this for all the wheels and make sure the canes do not extend too much into and outside the road side.
After that you may need to test your decoration by driving your cart slowly and gradually increasing speed to the maximum allowed and see if the decoration is intact.
This is one of the many ways of attaching decoration on a golf cart. Choice of decoration varies with owner’s preference. You may attach decorations on your own or hire someone to do that on your behalf. The god thing about the decorations is that they are not permanent and they can always be changed whenever possible.