The love of golf coupled with the need for fast and easy transportation in the golf course called for the use of golf carts. Conventionally these were powered by gasoline engines however gasoline has its own drawbacks, which include, noise, pollution and the rising cost of fuel. Electric golf carts such as the Club Car golf cart totally eliminate these challenges and also offer additional advantages on top of these. These include fast responsive rides that are generally quiet while releasing minimal pollution in to the environment. Despite these pros electric golf carts are not perfect and do present a few challenges due to the use of batteries to drive the motor and ultimately the golf cart. These include long charging times and the cost of purchasing batteries. The battery charger is any integral part of the Club Car golf cart as it directly affects the amount of voltage and current the batteries receive, together with how fast the battery charges and how it responds to temperature variations.

Table of Contents
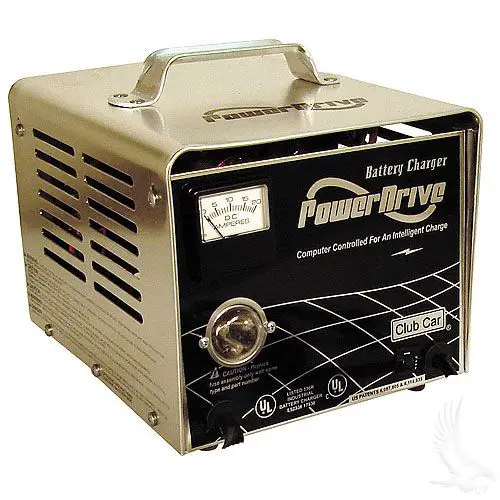
What Is A Battery Charger And Why Does It Need Troubleshooting?
In order for the batteries to deliver power to the motor and ultimately cause the Club Car golf cart to move it needs to be charged and this is done using the Club Car golf cart designated charger. It delivers the right amount of current and voltage to safely charge the batteries while reducing effects of overheating and hydrogen gas production. The battery charger therefore needs regular servicing and maintenance to ensure it meets service requirements. Troubleshooting involves looking at the battery charger holistically and checking for any inconsistencies in charging current and voltage or even excessive heating.
Safety Precautions In Charging
Charging the battery is usually a relatively simple task but certain precautions need to be taken into consideration when checking the battery and also when troubleshooting it for any issues which may affect its performance.
These include, ensuring the Club Car golf cart is off before charging to limit deep cycling and also ensuring proper ventilation and cooling to ensure both the charger and the Club Car battery pack don’t over heat. Ventilation also prohibits the accumulation of hydrogen gas in the space which is very flammable and can combust.
Safety Precautions in Club Car Battery Charger Troubleshooting
When troubleshooting the Golf Car charger, the following precautions need to be taken into consideration. These include,
Disconcerting the charger from the wall socket or any source of power to prevent electrocution or damaging of the electrical components in the charger.
If the need arises to open the battery charger, this should be done in a clean and well-ventilated environment to prevent dust accumulation which can negatively affect both the electrical circuits in the charger and the person carrying out the maintenance.
Wearing personal protective equipment such as safety googles, gloves and insulating clothing can protect from smaller explosions, toxic fumes and electrocution. Avoid wearing loose clothing and jewelry which can increase changes of electrocution and clothes being caught in electrical components.
Use insulated tools when troubleshooting the Club Car golf cart battery and battery charger to prevent short circuiting the electronics.
Steps In Club Car Charger Troubleshooting
- Before any maintenance can commence, ensure the battery charger is functioning by plugging in the charger into the Club Car golf cart charging pot located below the forward/reverse switch. An indicator light below the steering column will flash three times and also the reverse buzzer will sound simultaneously to indicate the start of the charging session. If this does not occur, either the charger is not working and needs troubleshooting or the components in the golf cart are not functioning properly and also need to be checked.
- Manually check the battery charger code for any damaged or exposed wires as these may cause short circuiting and fires if not attended to. Unnecessary bending of the charging cables should also be avoided.
- If the charging process does not commence after plugging in the charger, trouble shoot the batteries themselves to ensure they are still in working order.
- Battery charger troubleshooting and maintenance should ideally be carried out by trained professionals who can properly trouble shoot the battery. Ensure the battery charger is not used when it has cuts or damaged power cables.
- Regularly check the surge arrestors on the incoming AC power line of the battery charger. These protect the electrical components in the charger and on the vehicle from lightning strikes. Ideally these should be tested by a trained professional to ensure they are still operating optimally.
- Check the power supply of the battery charger to ensure it delivers 15 to 20 amps of current and it is also a single-phase power source. It is a good practice to use fuses and circuit breakers to protect the electronic components of the battery charger from excess current.
- The power supply should be a grounded three-wire outlet that provides the correct voltage and frequency requirements of the charger.
- Ensure any extension cables used with Club Car battery charger are grounded to reduce the risk of electric shock.
- To prevent the AC plug that connects the charger to the golf cart from experiencing too much strain, secure the cord to the charger using a zip tie making sure it’s not a tight connection. This will prevent the AC plug from coming loose or being damaged.
- The charger cord, plug, and receptacle can be worn hence should be inspected daily for cracks, loose connections or frayed wiring. Also manually check these cables either by using your hand or a thermometer to ensure they are not overheating. The ERIC charger operates between -40) and 104 ). The charger may function outside this temperature range although charging times will be longer.
- Regularly check that the charger mount is securely fixed and does not move. It should also be in a place where it receives adequate ventilation for cooling. Ideally the area should remain at 104) during the charging process.
- If the charger stops working, check the fuse. It normally has a 30-amp fuse located near the solenoid.
- Ensure the outlet provides voltage in the 100 to 240 VAC range which is the optimal range, however 85 VAC to 270 VAC is also acceptable, anything beyond this range, the charger will not operate.
- The charger has a charge indicator hence check the light sequence shown, green means the golf cart is charging while red indicates the charger has a fault. A flashing orange also indicates an external error condition. The error is usually shown on the display panel.
- The onboard charger has a USB slot that allows the programming of the charger parameters. This allows for the clearing of errors in the electronic components. Allow only a trained professional to use this pot, if need be, to carry out charger troubleshooting on the Club Car golf cart.