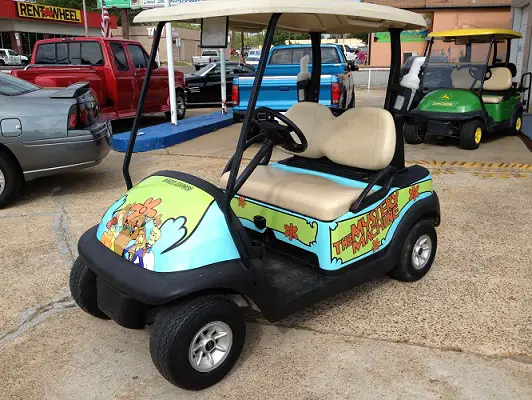
Golf cart wrapping is done for several different reasons, sometimes it is done to display important information, however most of the times it is done to change the exterior design of the golf cart and improve its aesthetics. Golf cart wrapping is preferred by most people because it can be a low-cost alternative to painting. Golf cart wrapping also provides great looking graphics which are tailored to the needs of the owner. Golf cart wrapping is however meticulous work and often requires skilled hands in order to successfully do an aesthetically pleasing wrap without air pockets. The good thing is that golf cart wrapping can be taught and replicated if one follows the correct set of rules and uses the appropriate materials that are of high quality. Wrapping one ‘s golf cart, be it a Yamaha, Ezgo, Club Car or any other brand can be successfully done using a few simple tools and following the right steps. The vinyl film is usually made up of a multi-layered film of Polyvinyl Chloride (PVC) with an adhesive backing that allows an air tight seal.

Table of Contents
Why Wrap a Golf Cart
Wrapping a golf cart is often preferred because of its flexibility, it offers a wider range of visually pleasing designs than the alternatives such as painting. It is also cheap and can be done for as low as $150 to $350 dollars. Partial wraps can also be done if one does not want to cover the entire golf cart. Golf cart wrapping also offers protection as the vinyl wraps used don’t damage the painted surface underneath. This also means the process can be reversed and the vinyl wrap peeled off later on, if the owner no longer wants it. Vinyl wrapping is also generally not time consuming. It can take as low as 3 to 4 hours while the painting process can take as high as 3 days to 2 or 3 weeks. Customization is also really easy with golf cart wrapping as wraps come in many solid colors, textures and faux finishes, these are also really durable too. Golf cart wrapping also does not need special tools such as compressors and spray guns which can be expensive to purchase.
Materials Needed
When wrapping a golf cart a few simple tools are needed in order to do a proper, long lasting and aesthetically pleasing golf cart wrap. These tools include paper towels, a squeegee tool, a snap blade knife to cut the wrap, 70% rubbing alcohol and a simple degreaser, cotton application gloves, a heat gun and masking tape. One can also use a 3M Brand Adhesive Promoter Pad, if need be, especially for applying in nooks and crannies. A knife-less tape can also be used where necessary. The vinyl wrapping film is put over the knife-less tape and then it is cut by pulling the filament through the film for a very clean line finish.
Golf Cart Preparation For Wrapping
Before a golf cart can be successfully wrapped some steps need to be carried out in order to ensure a clean, airtight wrap is carried out. Hardware such as lights, lenses and other attachments may need to be removed as these may get in the way of the wrapping process. The windshield and top may also need to be removed for the same reason. This to ensure a clean wrap without any distractions. Having a level surface is very important as dimples and bumps will show in the final product and correcting them at this point may be very difficult. To fix the problem of bumps and dimples the surface may need to be sand down of any rough spots or gouges. Sometimes they may be holes on the golf cart surface as such before wrapping, fill these holes with Duraglass or Bondo Glass Filler and then sand them down to ensure a smooth plain surface that is suitable for wrapping.
Applying The Golf Cart Wrap
After cleaning and leveling down the surface, the next step is to apply the actual golf cart wrap. For a uniform looking wrap it is advisable to start wrapping the cab of the golf cart. This is the part around the driver’s seat, the one that’s behind the legs of the front passengers. The cab normally has the largest uninterrupted flat surface area as such it is very easy to cover. Starting with the cab also allows one to get used to the wrapping process, especially if one is wrapping for the first time and needs to get used to stretching the vinyl. Marking the middle with a piece of masking tape can also help one do a symmetrical wrap. Vinyl wrap can then also be applied on other places and these include the bumpers, fenders, dash, roof, mirrors and rims.
Using a Film Squeegee
When covering a significant portion of a golf cart using vinyl, it is wise to cut an area of vinyl that is 20% larger than the required material in order to ensure one reduces the possibility of errors. It is also advisable to test position the vinyl using masking tape in order to make an alignment mark that will match up with the pencil mark made on the golf cart body. This mark will then will be used to tear a strip of paper from the middle of the vinyl paper backing. Attach the exposed part of the vinyl to the surface starting with the marked part. The adhesive on the vinyl needs pressure so that it can stick to the surface. They may be need to stretch out the vinyl with a partner in order to easily pull off the back cover of the vinyl before sticking the vinyl to the target surface. The felt-covered squeegee or cotton gloves can then be used to smooth out any bubbles out of the vinyl film. A heat gun can also be used to apply heat while sticking the vinyl all the way to the outside edges of the golf cart. Care is needed when using a heat gun since it produces a large amount of heat hence it is advisable to stick the vinyl from further away. A hair dryer can also be used however it is not as hot as the heat gun. A razor knife can then be used to cut off relief slits for places with protrusions such as the reverse/forward knob shaft and key switch. This is to allow the vinyl film to pass over these protrusions neatly. A knife and squeegee can also be used later on to make a tight fit around the protrusion. A heat gun is used to activate the adhesive on the vinyl so that it can stick to the surface.
Finishing The Wrapping Process
After successfully wrapping a golf cart ensure to properly tuck all the edges and inspect the entire golf cart to ensure there are no curl ups or wrinkles. Ensure proper use of the squeegee, especially on rounded and curved surfaces, they may be need to use the arced sweep of the squeegee to prevent the buildup of “bottle-capping” or small groups of wrinkles. In places where a seam is necessary, overlap the joint and later use a knife or knife-less tap to create a clean cut. This will allow the edges to butt closely together. It is always a good ideal to save all scrap pieces for later use. If there is need to later remove the vinyl wraps, one can use Goo Gone or other citrus-based chemicals to remove the adhesive on the vinyl back.
Conclusion
Golf cart wrapping is a wonderful alternative to painting and allows one to customize their golf cart at a relatively cheap price however one should take care to ensure it is done in a proper way. This will serve to ensure there are no air gaps and the wrap is as neat as possible. This will also allow the wrap to last a long time.