
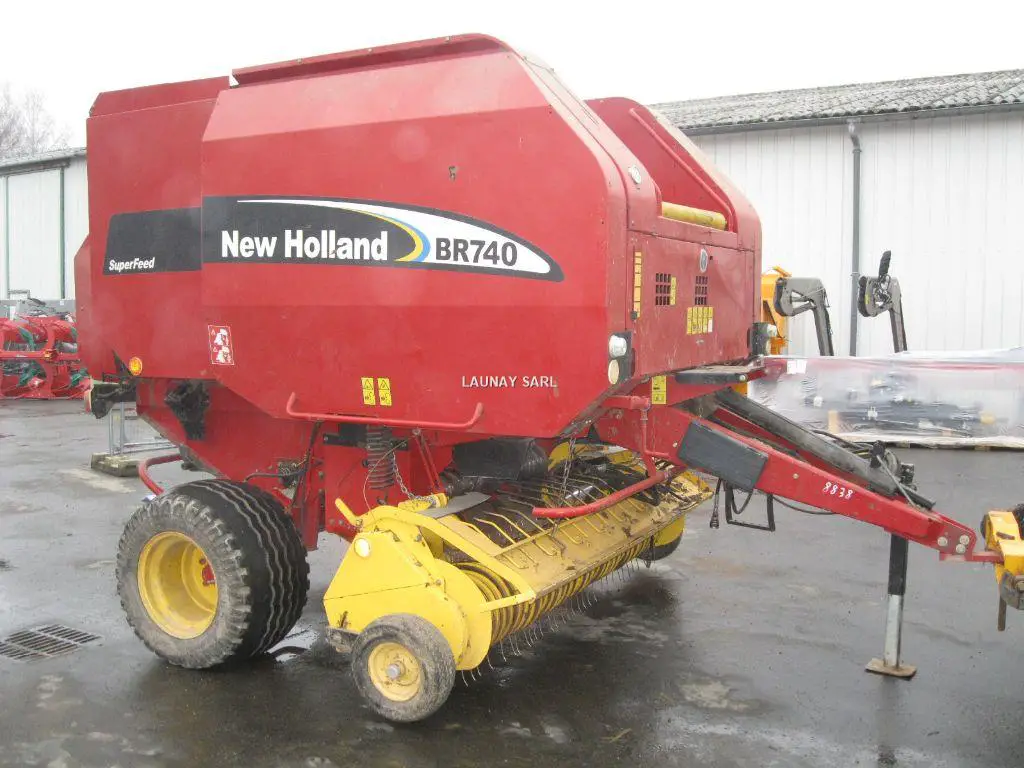
A New Holland BR740 that leaves crop behind, refuses to start a roll or produces a poorly wrapped bale does not necessarily need the same repair. The useful question is where the normal sequence first breaks down: gathering crop, forming the bale, applying the wrapping material, cutting it or discharging the finished bale.

This guide separates those symptoms so you can make the accessible checks before ordering parts. It covers the original BR740, with equipment differences called out where they matter. It does not treat every possible fault as a proven weakness of the model, and there is no reliable failure-rate ranking behind the section order.
Identify the BR740 You Actually Have
Record the model and serial number from the machine plate, then identify the pickup, feeding equipment and wrapping controls. Do this before buying a belt, actuator, shear bolt or net-wrap component. A previous owner may also have changed equipment, so photographs and the serial number are more useful than the model decal alone.
CNH lists the BR740 and BR740A separately in its parts catalogue. New Holland also separates the original BR700 and BR700-A brochures in its prior-model resources. A BR740A adjustment should not be assumed to fit an original BR740.
The BR740 is a nominal 4-by-5-foot round baler. Within the original range, differences include Standard and Silage Special equipment, stuffer or rotor-cutter feeding arrangements, and AutoWrap or Bale Command Plus controls. BaleSlice and a rotor cutter are different crop-cutting arrangements. Identify what is installed before following instructions for either.
| Check | Why it changes the investigation |
|---|---|
| Complete model and serial number | Selects the applicable parts and manual revision. |
| Pickup and feeder arrangement | Determines which drive and plugging instructions apply. |
| AutoWrap or Bale Command Plus | Changes the wrapping controls and adjustment procedure. |
| Twine-only or net-equipped | Separates twine delivery faults from net insertion and cutting faults. |
| Crop-cutting equipment, if fitted | Adds components that a standard dry-hay machine may not have. |
| Recent repairs or modifications | Identifies changes worth checking before blaming age or wear. |
Keep both the baler operator’s manual and the appropriate monitor instructions available. Do not select an instruction solely because an online photograph looks familiar. This article deliberately leaves spring lengths, torque values, pressure settings and electrical pin assignments to the correct machine documentation.
Make the Machine Safe Before Checking It
Before approaching a blockage or opening guards, disengage the PTO, stop the tractor engine, remove the key, apply the parking brake and wait for every moving part to stop. Prevent unintended movement of the tractor and baler. Nobody should operate the controls while another person is inspecting the machine.
Use the manufacturer’s tailgate lockout and support procedure whenever access near a raised gate is necessary. Hydraulic pressure alone is not a safe support. Belt tension and spring loads also need the prescribed release procedure before component work. If the lockout is damaged or its operation is uncertain, arrange service rather than working underneath.
Keep hands away from the knife, duckbill, pickup, belts and chains during any powered test. A stationary-looking mechanism may move when a command is issued. Observe normal operation from the operator’s position; do not put someone beside exposed machinery to watch a fault happen.
The University of Missouri’s round-baler safety guidance specifically warns against clearing a running pickup or pushing loose material into it by hand or foot. After safe clearing, spread the removed material back into a normal windrow. Stop for leaking hydraulics, damaged guards, a gate that will not lock, smoke or abnormal mechanical noise.
Find the First Failed Stage
Use the following table to describe the problem before adjusting anything. These are diagnostic starting points, not instructions to replace the named parts.
| What you observe | First question | Useful evidence to record |
|---|---|---|
| Crop remains in the windrow | Is it being missed by the pickup or rejected farther in? | Location of the uncollected strip and crop conditions. |
| Crop enters but no core forms | Does this happen only when the chamber is empty? | Crop type and whether the last bale discharged fully. |
| Bale shape changes | Is the physical bale uneven, or only the display? | Photographs of both ends and the monitor indication. |
| Wrapping does not begin | Was there a wrap command, movement and material delivery? | The last stage completed and the exact warning. |
| Wrapping begins but fails | Did material stop feeding, tear or fail to cut? | The remaining material end after shutdown. |
| Bale is damaged on discharge | Was the wrapping sound before ejection? | Position and direction of the tear. |
| Fault appears after a tractor change | What connections or settings changed? | Tractor, hydraulic connections and electrical supply. |
Change one permitted setting at a time and record the result. If you alter several things together, even a successful bale will not tell you which change mattered.
1. The Pickup Leaves Hay or Repeatedly Plugs
Distinguish crop missed on the ground from crop collected and then stopped at the entrance. Look at the unfinished windrow after parking safely. A consistent strip, isolated lumps and a whole windrow pushed ahead of the pickup are different observations.
Inspect accessible pickup tines and guards for missing or damaged parts. Check pickup height and ground clearance against the operator’s manual. A lower setting is not automatically better if it brings the pickup into contact with soil, stones or uneven ground. Case IH’s seasonal baler guidance also identifies broken pickup tines and belt condition as basic inspection items.
Check the Conditions Before Condemning the Feeder
A uniform windrow gives you a better comparison than alternating thin patches and large bunches. Record whether plugging occurs only in the heaviest sections, throughout the field or after a change in crop condition. Maintain the specified PTO operating conditions while choosing a suitable forward speed; do not assume faster travel will clear an accumulating blockage.
University of Missouri guidance links reliable feeding and core formation to appropriate windrows and pickup clearance. That supports checking crop presentation before replacing a feeder assembly. It does not establish that a particular rotor, bearing or clutch on your machine has failed.
If an obstruction returns immediately after safe removal, stop repeating the cycle. Identify the point where material accumulates and have the corresponding drive and feeder checked. On a rotor-equipped machine, use only its documented reversing or clearing procedure. Do not apply rotor instructions to a stuffer-equipped BR740.
2. Crop Goes In but a Bale Will Not Start
Write down whether the failure is confined to the first few moments of an empty chamber. “Will not start a core” is more precise than “will not bale,” especially if the machine works normally once a roll has formed.
Before the next permitted attempt, establish whether the previous bale left the chamber completely and whether crop remains lodged in the feed area. With the machine safely isolated, look for obvious damage, trapped wrapping material or a drive component that has stopped functioning. Do not reach inside to help the crop begin rotating.
Compare the failed attempt with the last successful one:
- Was it the same crop and similar windrow size?
- Had the crop become much drier, wetter or shorter?
- Was this the first bale after storage or maintenance?
- Did a protective device trip or a new noise occur?
- Did the failure begin immediately after the preceding discharge?
These comparisons help a repairer decide whether to begin with operating conditions or a mechanical inspection. They are not proof that the belts need tightening. Avoid increasing several tension settings merely because the chamber will not start a bale.
Do Not Use Dew as an Unmeasured Repair
Very dry crop and damp crop present different handling challenges, but intentionally adding moisture is not a universal solution. Decide whether you are making dry hay or a properly managed wrapped-forage product, and measure the crop accordingly.
University of Missouri’s current large-round-bale storage advice recommends less than 18% moisture for dry hay. Higher moisture can cause heating and loss in storage. That is a storage guideline, not a BR740 mechanical adjustment or a specification for silage. Follow appropriate local forage advice and the limits for your intended storage system.
3. Bales Are Uneven, Soft or a Different Size Than Expected
Separate shape, density and diameter. A bale can be the desired diameter but soft, or firm but visibly larger at one end. Increasing the diameter setting cannot correct every one of these conditions.
First compare several bales made under similar conditions. Photograph the ends and record the windrow and driving pattern. New Holland’s BR-series clinic guidance connects uneven chamber filling with poor bale shape and distinguishes actual bale shape from inaccurate sensor indication.
If the display repeatedly disagrees with the discharged bale, inspect the accessible sensor linkage for obstruction with the machine stopped, then use the applicable adjustment or calibration procedure. Do not recalibrate merely to make an uneven bale look balanced on the screen.
A Soft Bale Is Not Automatically a Failed Cylinder
Bale quality also depends on crop and operation. Oklahoma State University’s round-bale storage research explains why a firm outer layer matters for limiting weathering. Net wrap cannot compensate for every poorly formed bale, and a bale that looks neat at discharge still needs suitable storage.
Record the density setting and gauge behaviour using the manual’s specified observation conditions. If the result changed abruptly without a crop or setting change, report that explicitly. Have the density system tested before ordering a valve or cylinder. A pressure value copied from another model is not a safe substitute for the BR740 instructions.
Do not keep raising pressure to hide an unexplained change. Ask the technician to distinguish an incorrect setting, an inaccurate indication and a system that cannot maintain its intended operating condition.
4. Net Wrap Will Not Start
Treat net wrapping as a sequence: the control requests wrapping, the mechanism responds, net enters the chamber, the bale receives it and the cycle finishes. Record which of those events occurred. A missing command and net that moves but never reaches the bale are different faults.
With the machine stopped and isolated, compare the installed roll and threading with the exact loading diagram. Check that the roll and core are suitable, correctly positioned and free of obvious damage. Look for trapped material along the accessible route. Do not improvise an alternative path around a guide.
Net manufacturer Tama identifies damaged or jammed cores, incorrect braking and poor cutting from the previous bale among possible feeding problems. Its netwrap troubleshooting guidance is useful for material-related checks, but the BR740 manual governs its hardware adjustments.
Inspect What the Previous Cycle Left Behind
If a freshly threaded roll works once and the following bale fails, photograph the remaining net end after shutdown. That makes the end of the preceding cycle part of the investigation. Pulling out more material may get another attempt started without explaining why the problem returns.
Do not assume there is an independent “tail length” adjustment just because the tail is short. Ask whether the previous cut and return sequence left usable material in the intended position. Linkage timing, brake service and duckbill adjustment require the matching procedure.
5. Net Bunches in the Centre, Tears or Misses One Edge
Record whether the same edge is affected every time. Also note whether the problem began with a new roll, a rethreading, a repaired component or a change in bale shape. Keep the roll label and a sample of the damaged net for the supplier or technician.
Karatzis, a netwrap manufacturer, identifies snagging surfaces, obstructed material paths, unsuitable tension and uneven bale density among possible causes of tearing or incomplete spreading. Check the accessible route for damage and crop residue after isolation. A repeated narrow tear deserves a search for a repeated contact point, rather than an immediate conclusion that the whole roll is defective.
Do not sand, bend or reposition components speculatively. A surface that appears sharp may be part of a cutting or gripping assembly. Mark the suspect location in a photograph and compare it with the parts drawing.
If the problem appeared when changing net, compare the roll specifications and loading with the previous successful setup. That is a controlled comparison, not proof that one material is always better. Avoid adding lubricants or anti-stick products to braking and gripping surfaces unless the equipment and material instructions expressly allow them.
6. Net Feeds but Does Not Cut Cleanly
Describe the result precisely: no cut, a partial-width cut, a ragged end or net continuing to feed after the expected finish. Preserve the evidence before rethreading if it can be photographed safely.
New Holland’s BR guidance identifies the knife, braking and the cutting sequence as separate checks. An ineffective brake can involve the roll-core grip, not only the brake pad. The visible symptom therefore does not justify replacing a knife or tightening a brake without inspection.
For owner service, follow the knife-removal and sharpening instructions exactly, including isolation and stored-energy precautions. Do not attempt to feel the cutting edge while it is installed in a mechanism that can move. Have uncertain timing, damaged mountings or inconsistent movement checked by a baler technician.
After repair, confirm both the completed wrap and the start of the following bale. One clean cut alone does not demonstrate that the whole wrapping cycle is working correctly.
7. Twine Will Not Feed, Cuts Short or Comes Loose
A twine fault needs its own description. Which side fails? Does twine leave the supply ball? Does the arm move? Is the problem starting, positioning or cutting? Answering those questions narrows the investigation before any calibration change.
Check the threading against the machine diagram with the baler isolated. New Holland identifies routing, tangles, tension and cutting condition among the relevant twine checks. AutoWrap and Bale Command Plus use different methods to control the pattern, so monitor advice does not automatically apply to an AutoWrap machine.
If one side works and the other does not, photograph both accessible routes before changing anything. Note where they differ from the diagram rather than copying one side blindly. If the fault began with a new ball or a joined supply, include that detail in the repair history.
Do not hand-feed twine into a running baler. Where a supplied threading tool is specified, use it in the safe condition described by the manual. A recurring short end should be investigated as a repeatable cycle fault, not managed indefinitely by reaching in to pull out more twine.
8. The Monitor Resets, Shows Errors or an Actuator Stalls
Record the exact message and when it appears. Photograph the display before clearing it. Include whether the machine was starting, wrapping, finishing a cycle or closing the tailgate. An error tells you which condition the controller detected; it does not necessarily identify the failed component.
Begin with a stopped-machine inspection of accessible supply connections, grounds, fuses and harness damage. Check for cables pinched or stretched at moving joints. Use the specified fuse rating, and investigate repeated fuse failure instead of fitting a larger fuse.
Fluke’s electrical diagnostic guidance explains why a circuit can appear satisfactory without a load yet perform poorly when current flows. A technician should check voltage drop on both the supply and return paths under the approved test conditions before condemning a controller or motor.
Electrical tests can command mechanical movement. They require the wiring diagram, suitable test equipment and a controlled working area. Do not bridge a switch, bypass an interlock or power an actuator directly as an improvised field test.
Make a short event record:
- Exact display message and wrapping mode.
- Whether the screen stayed on or restarted.
- Last movement completed before the error.
- Whether the fault occurs cold, warm or intermittently.
- Any recent tractor, battery, wiring or component change.
Do not use an unverified internet code list or a calibration sequence from a different monitor. Clearing an alarm is not confirmation of a successful repair.
9. The Tailgate Moves Slowly, Will Not Secure or Bales Hang Up
Keep people clear of the rear of the baler. Never enter beneath an unsupported gate or try to pull a trapped bale out by hand. Discharge on suitable level ground and stop if the gate does not secure correctly.
For slow movement, check the tractor-side setup and connections against the manuals before assuming a baler cylinder has failed. General hydraulic troubleshooting from Parker identifies flow restrictions, supply problems, valves and cylinder faults as different diagnostic possibilities. Leakage can also be internal, so the absence of an external puddle does not settle the question.
Record whether the problem affects raising, lowering or holding position, and whether it changes as the oil warms. A technician can use that history to select pressure, flow or leakage tests. Do not loosen a fitting to “see whether oil comes out,” and never search for a pressurised leak with a hand.
If the Net Tears During Discharge
Tama notes that delayed ejection or contact during discharge can damage wrapping that was initially applied successfully. That makes the location and timing of the damage important. Photograph the bale after it is safely clear and compare the damage with previous bales.
The appropriate discharge sequence remains machine-specific. Do not copy a generic recommendation to stop or continue the PTO without checking the BR740 procedure and crop conditions. If crop-cutting equipment is installed, have its position and operation included in the investigation.
10. Belts, Chains or Bearings Show Damage
Stop for a belt that folds over, obvious tearing, a displaced chain, new grinding or smoke. Keep guards in place during operation. Inspection and tension release belong in the stopped and secured condition specified by the manual.
Inspect accessible belt surfaces and lacing, if fitted, and record where damage occurs. Case IH’s maintenance guidance recommends assessing baler belts for wear; it does not mean every belt needs replacement because the machine is old. Ask whether the proposed repair addresses the damage’s cause as well as the damaged belt.
Renold’s chain guidance distinguishes measurable wear elongation from a simple slack adjustment. Continually moving an adjuster does not restore worn joints. Have chain condition and mating sprockets assessed together, using the machine’s service limits. Do not apply one universal deflection measurement to every BR740 chain.
Timken identifies contamination, lubrication, installation and alignment among the possible contributors to bearing damage. A noisy or overheated bearing therefore warrants more than automatically pumping in extra grease. Follow the specified lubricant and interval, and have associated shaft or housing damage assessed when necessary.
Do not install a stronger shear bolt or tighten a protective clutch just to stop it interrupting work. First identify the fitted protection system and why it operated. Protection that has been defeated may transfer the damage to a much more expensive component.
Prevent Repeat Failures Before the Next Field
Use the BR740 lubrication chart and service schedule for the actual equipment fitted. A generic “grease everything every ten hours” rule can miss different intervals and components that are not serviced that way.
Before work, check guards, visible damage, wrapping supplies, accessible connections and the condition of hoses. Deal with known faults while the machine is empty and there is time to obtain the correct parts.
South Dakota State University’s baler-fire checklist emphasises removing accumulated crop and dust, repairing leaks and checking friction points. Keep suitable, maintained fire-extinguishing equipment accessible. Stop immediately for smoke or a burning smell; do not finish another bale first.
Mississippi State Extension also describes infrared temperature checks as a way to identify developing hot spots. Take readings only from a safe position after shutdown, compare like-for-like locations and investigate an unusual change. No single temperature quoted online certifies every bearing as safe.
For recurring faults, keep the following with the service record:
- Machine serial number and installed equipment.
- Crop type, measured moisture and windrow conditions.
- Exact symptom, warning and stage of the cycle.
- Photographs taken with the machine safely stopped.
- Settings changed, parts fitted and the result of each change.
Is Repair Worthwhile?
Request a diagnosis and an itemised quote before deciding from the age of the baler alone. Separate the immediate fault from other work required to make the machine safe and dependable. Ask about parts availability, expected downtime and whether the repair needs specialist setup afterwards.
Consider the whole machine: pickup, chamber, belts, drive components, wrapping equipment and structure. A small wrapping fault on an otherwise sound baler presents a different decision from a machine needing several major assemblies. There is no dependable universal repair-price threshold for every BR740.
Ask what will be demonstrated when the repair is complete. For a wrapping repair, that should include the relevant cycle and subsequent restart under suitable operating conditions. For an intermittent fault, agree how it will be checked rather than treating one successful attempt as conclusive.
Questions Owners Often Ask
Are BR740 and BR740A Instructions Interchangeable?
Do not assume so. Match the model, serial number and fitted equipment. A similar appearance or shared part does not establish that an entire adjustment procedure transfers between them.
Should I Replace the Net Knife First?
Only when inspection establishes that it needs service or replacement. Describe whether the net fails to feed, spread or cut; those are separate stages with different possible explanations.
Does a Monitor Error Mean the Monitor Is Faulty?
No. Preserve the message and check the indicated circuit using the correct diagnostic procedure. Power supply, wiring, mechanical movement and feedback all need consideration before buying a control unit.
Can I Keep Baling If a Bearing Starts Making Noise?
Stop and investigate. New noise, heat or smell may precede a more serious failure. Continuing until the end of a field can turn a repairable fault into extensive damage or a fire.
What Is the Best First Step?
Identify the first stage that fails and record what changed since the last successful bale. Then make the accessible checks safely and use the matching manual or a qualified repairer for testing and adjustment. A precise description is more useful than a collection of replacement parts chosen from similar-looking symptoms.