
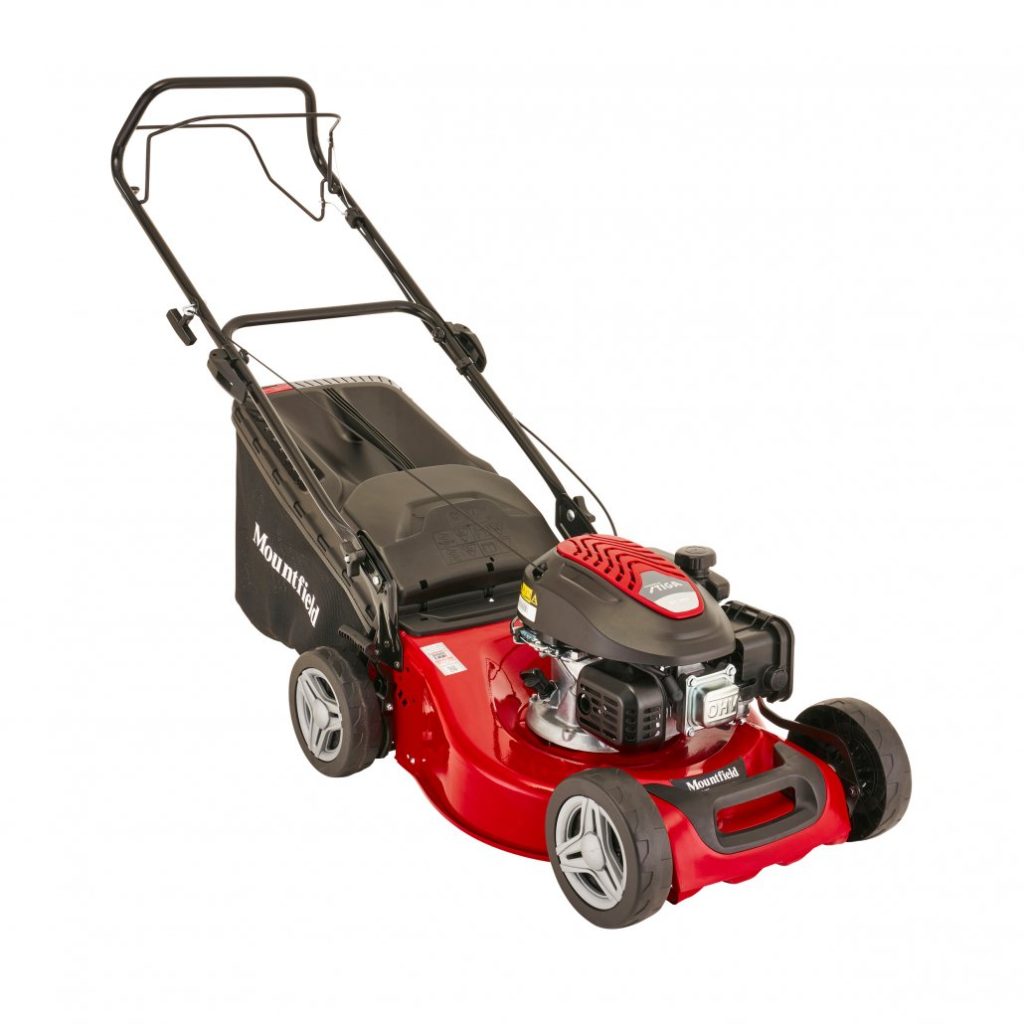
When a Mountfield SP185 stops cooperating, first separate the engine from the jobs it powers. An engine that will not start, a mower that runs but will not propel itself, and a collector that leaves clippings behind are three different diagnostic paths. Treating all of them as a carburettor problem wastes time and can leave the real fault untouched.

This guide covers petrol SP185 mowers, with attention to the different engines sold under that name. It explains what an owner can reasonably inspect, what a symptom suggests and when testing or repair needs a service dealer. The problems are possibilities to investigate, not evidence that every SP185 suffers them or that a particular part has a proven high failure rate.
Start with the product label, not just the SP185 badge
The model name alone does not identify the engine or every service part. Older SP185 documentation includes Briggs & Stratton 300 Series machines, while the current petrol specification uses a STIGA ST140 OHV Autochoke engine. Mountfield also sells an SP185 Li battery mower, which needs a different troubleshooting guide.
Record the mower’s product code and serial number, then photograph the engine identification. Use Mountfield support to find the matching mower and engine instructions. Both matter: the engine manual explains engine care, while the mower manual covers controls, deck, blade and drive arrangements.
| Identification on the machine | What it changes | What not to assume |
|---|---|---|
| Older petrol SP185 with Briggs & Stratton 300 Series | Engine parts, starting controls and service procedure | That current ST140 instructions apply unchanged |
| Petrol SP185 with STIGA ST140 Autochoke | Cold-start enrichment and engine maintenance details | That it needs repeated manual priming because an older SP185 did |
| SP185 Li | Battery, motor and electrical troubleshooting | That petrol, carburettor or spark-plug advice applies |
| Replaced engine or unclear identification | Parts must be matched to the fitted equipment | That the deck badge identifies the replacement engine |
The current petrol SP185 specification lists a 139cc ST140 engine, recoil starting and rear-wheel self-propulsion. It also lists no washing link. Do not follow generic website advice about connecting a hose unless your actual machine has that facility and its manual describes how to use it.
This is a fixed-speed mower in its current specification. Do not expect a dashboard-style throttle adjustment to cure poor cutting or a walking pace you dislike. Changing a governor setting to raise engine speed can create a dangerous operating condition.
Make the first inspection useful
Before removing anything, establish what happens when you try to use the mower. Does the starter rope move normally? Does the engine briefly fire? Does it run steadily until it reaches grass? Does the engine remain healthy while the rear wheels stop pulling? These distinctions determine the next useful check.
Write down what happened immediately before the fault. Storage, a fresh fuel purchase, folding the handle, striking a hidden object, cleaning underneath the deck and transporting the mower on its side each suggest different inspection priorities.
For inspection, stop the engine, let hot parts cool and disconnect the spark-plug lead as directed by the manual. Keep hands away from the blade and remember that turning the blade can turn the engine. Do not defeat the operator-presence control or hold it closed with a strap.
- Fuel leaking, a damaged blade or a badly corroded deck means stop using the mower.
- New severe vibration after an impact needs inspection before another start.
- A rope that suddenly locks should not be forced with repeated hard pulls.
- A drive control that fails to release must be repaired before mowing resumes.
Work on level ground with suitable ventilation, away from flames and other ignition sources. A short inspection done safely is more useful than a long test run with a loose guard or an unexamined mechanical fault.
1. The SP185 will not start
Confirm the controls can do their job
Follow the starting sequence for the fitted engine. On a petrol walk-behind mower, the operator-presence control must operate correctly for normal starting and stopping. If a handle has recently been folded or reassembled, inspect the cable routing for trapping, kinks or a cable housing that has come out of its seating.
Holding the handlebar control does not prove the mechanism at the other end moves correctly. With the engine stopped, an owner can look for an obviously detached or damaged cable. Adjustment or replacement should follow the mower’s instructions, rather than tightening it until the engine happens to start.
Do not confuse the drive lever with the operator-presence control. One governs self-propulsion; the other is part of the engine’s operating and stopping arrangement. Identify them from the manual and keep the drive disengaged during starting unless the manufacturer’s procedure explicitly says otherwise.
If a safety control is faulty, repair it. Bypassing it may make the engine run while removing the reliable stop function you need when releasing the handle.
Verify the fuel supply and its age
Look beyond whether there is liquid in the tank. Fuel left from a previous season, or poured from an old can, may no longer provide a useful starting supply. Adding a little fresh petrol on top does not remove water or deterioration already present.
Use fresh fuel that meets the engine manufacturer’s specification. Petrol SP185 engines discussed here are four-stroke engines with a separate oil supply; do not add a two-stroke oil mixture. If the wrong fuel has been added, stop and have the system dealt with appropriately rather than trying to burn it through.
Safe draining depends on the engine and carburettor fitted. Let the engine cool, use an approved container and follow the matching instructions or ask a service dealer. Do not identify a drain fastener solely by its resemblance to a photograph of another engine. Loosening the wrong bolt can create a leak or disturb the carburettor assembly.
After storage, fresh fuel in the tank may not remove deposits in a carburettor passage. If the basic checks pass but starting remains poor, targeted cleaning and fuel-flow checks can be appropriate. Replacing the complete carburettor without establishing the fault is not the automatic next step.
Use the right cold-start method
An older primer-equipped engine and an ST140 Autochoke engine do not call for the same starting routine. Use the primer only where fitted and only as instructed. Repeated priming after several unsuccessful attempts can make an already rich starting condition worse.
On an Autochoke engine, a cold-only or hot-only starting problem can justify inspection of the enrichment mechanism, but the symptom alone does not prove that mechanism is defective. Fuel quality, ignition and mechanical condition still matter. Avoid bending linkages or adding an improvised manual choke.
If the engine smells strongly of fuel after repeated attempts, stop the cycle of pulling and adding more fuel. Follow the applicable flooded-engine procedure and allow any spilled fuel or vapour to clear before further starting. Do not use an open flame or an improvised spark test near petrol.
Check the plug connection, then the plug
A loose spark-plug cap can cause an apparent no-start after servicing or cleaning. With the engine off and cool, inspect the connection and visible lead damage. Use the proper procedure if removing the plug, keeping dirt out of the plug opening.
The plug’s condition helps guide diagnosis. Wetness may accompany unsuccessful ignition or excessive fuel; deposits may reflect running conditions. Neither observation independently proves the plug is the original cause. Fit the specified replacement and use the correct installation instructions, including the required gap where applicable.
Do not transfer a plug number or tightening torque from another SP185 engine. If a sound fuel supply and proper ignition checks do not explain the no-start, a dealer can assess compression, valve operation and other mechanical causes. That is more useful than continuing to replace inexpensive parts at random.
2. The starter rope is unusually hard to pull
First distinguish ordinary compression resistance from a sudden solid stop, a scraping sensation or a rope that will not retract. Describe that difference to the repairer. A recoil mechanism fault and an engine that cannot rotate are different problems even though both appear at the handle.
Confirm that the operator-presence control is fully operated as the manual requires. A control or cable problem can leave the engine brake arrangement engaged. Do not compensate by pulling harder or by securing the control permanently in the running position.
With the machine safely isolated, look for obvious obstruction around the deck. Packed material or an object caught at the blade can prevent normal movement. Access the underside only in the position and by the method permitted for your model. Avoid putting fingers between a blade and a trapped object; releasing it may allow movement.
If the mower was tipped, overfilled with oil or transported incorrectly, liquid may have reached places where it should not be. Stop forcing the starter and seek the appropriate inspection. Removing a plug and pulling the rope can eject liquid, so it is not a casual remedy to perform beside fuel or people.
A sudden recoil kickback or new difficulty immediately after striking a solid object needs mechanical assessment. Blade mounting, alignment and engine-related damage may need checking. Fitting a new starter rope does not resolve a fault farther down the mechanical chain.
3. The engine starts, then stops again
Note how quickly it stops
An engine that fires briefly and dies differs from one that mows normally for twenty minutes and then cuts out. Record whether the stop is abrupt, preceded by surging, or associated with entering heavier grass. Those details help distinguish a control interruption, fuel-supply problem, heat-related issue or overload.
If it stops as soon as the operator-presence handle is released, that is expected operation, not evidence of a carburettor fault. If it stops while the control is properly held, inspect cable condition and operation as well as fuel and ignition. Never bypass the stop circuit to test the mower during use.
When the engine dies only as the self-drive is engaged, determine whether it is also entering long grass at that moment. Test the distinction only in a safe open area and without an unsafe symptom present. A cutting overload and a dragging drive system should not be treated as the same fault.
Investigate warm-only failure while it is present
A mower that restarts only after cooling needs a repeatable description. Note the run time, temperature, fuel level and whether it stops while cutting or while running without a heavy cutting load. A service dealer may need to test ignition or fuel supply during the warm failure rather than after the mower has cooled overnight.
Check cooling-air areas for debris with the engine stopped and cool. Air-cooled engines depend on clear passages and intact covers; removing a cover permanently is not a cooling improvement. Clean by the manufacturer’s method and avoid driving water into the engine or electrical components.
Tank ventilation, fuel delivery and heat-related ignition trouble are possible investigative paths. Do not mow with a loose cap to test a vent theory. Nor should every hot stop be labelled vapour lock: the engine manual may mention it as a possibility, but the actual fault still needs evidence.
If the engine is unusually hot, smells of burning, loses oil or makes a new mechanical noise, stop testing and arrange inspection. Continuing until it fails completely does not make the diagnosis cheaper.
4. Hunting, surging and uneven running
Surging means the engine speed repeatedly rises and falls. Start by establishing whether it occurs from cold, after warming, at little load or only while cutting. A brief response as cutting load changes is different from continuous hunting on clear ground.
Fuel condition and restricted delivery are sensible early checks, especially after storage. Also inspect the air filter and accessible intake connections. An element that has become wet with oil after tipping may restrict airflow even if it is not dusty.
Filter care depends on construction. A foam component may have a specified washing and oiling process, while a cartridge may require a different method or replacement. Do not wash every filter, blow it out aggressively or oil it simply because another mower’s filter needed oil.
If the filter requires replacement, match the engine and ensure the housing seals correctly. Running without it can let abrasive dirt enter the engine. A temporary change in running with the intake disturbed is not permission to mow that way.
Leave governor springs, linkages and factory speed settings alone unless servicing them to the correct technical procedure. Bending a spring to suppress hunting may disguise a fuel fault and raise operating speed. A dealer can distinguish mixture, linkage and mechanical issues with the equipment assembled correctly.
After repair, evaluate steady running and cutting response. An engine that sounds smooth while stationary may still lose power when the blade meets an ordinary load. Conversely, a mower working through grass far beyond its sensible cutting capacity is not a valid test of normal performance.
5. It runs well but self-propulsion has stopped
Follow the drive path in order
The engine, drive control, cable, belt, transmission and driven-wheel components form a chain. Loss of movement can originate at different points along it. If the engine maintains normal speed while the mower stops pulling, begin with that chain rather than immediately servicing the carburettor.
With the engine off, inspect the drive lever and visible cable. Look for a detached end, a broken strand, damaged outer housing or routing disturbed by folding the handle. A cable that appears to move at the handle may still fail to operate its mechanism fully.
Mountfield’s troubleshooting FAQs identify cable, belt and gearbox faults as possible reasons for loss of self-propel. That provides a useful diagnostic order, not proof that the gearbox must be replaced whenever the mower will not move.
Cable adjustment has a limit
If the model provides an adjustment, follow its exact procedure. Excess slack can prevent proper engagement, but removing all free movement indiscriminately can leave the drive engaged or prevent full release. The goal is correct engagement and disengagement, not the tightest possible cable.
Do not use adjustment to compensate for frayed strands, a damaged housing or a worn component farther along the drive path. A cable close to failure needs replacement. If the drive control does not release predictably, stop using the mower even if it now pulls strongly.
After any authorised adjustment, check that the mower remains stationary when self-drive is released and operates normally when commanded. Keep the cutting area clear and use the normal operating position. Do not test engagement while kneeling beside exposed moving parts.
Inspect the belt without running exposed machinery
A displaced, worn or broken belt can interrupt drive. Inspection requires safe access, correct isolation and any necessary cover removal specified by the mower instructions. Do not run the engine with a belt guard removed to watch what happens.
If the belt has come off, establish why before refitting it. Incorrect routing, obstruction, worn or damaged components and the wrong replacement part may be involved. A belt that repeatedly comes off is evidence of an unresolved cause, not a maintenance routine to accept.
Match the belt to the mower product code, rather than choosing one because its length looks close. Do not apply belt dressing, oil or grease to restore grip. Contamination can worsen slipping and make the next inspection less informative.
When wheels or the gearbox need attention
If the control and belt operate correctly but propulsion remains poor, the transmission and wheel-drive components need inspection. Clicking, intermittent pulling or a difference between the rear wheels is useful information, but it does not identify a specific gear without examining the mechanism.
Some drive components work differently when rolling forward and backward. Follow the correct parts diagram and procedure before dismantling wheels or changing washers and clips. An incorrectly reassembled wheel can create a new fault even if the original belt problem was repaired.
Ask a dealer to explain whether the quoted work addresses a cable, external drive component or internal transmission problem. Those repairs have different costs and implications. Approve a gearbox replacement on the strength of diagnosis, not merely because pushing the mower by hand became necessary.
6. The mower is hard to pull backwards
Release the self-drive control completely before trying to reverse the mower. Check that the cable and lever return freely. If the drive has just been adjusted and reversing becomes difficult, inspect the adjustment rather than assuming the gearbox failed at the same moment.
Do not force the mower backwards against an engaged drive. Stop the engine before looking for packed grass, tangled material or visible wheel damage. A wheel that is obstructed can create resistance unrelated to the engine.
Compare the behaviour of the two rear wheels under a proper inspection procedure. One-sided binding or clicking suggests a different investigation from uniform resistance. Do not dismantle a drive mechanism without recording its arrangement and using the correct service instructions.
Persistent resistance with the control released, especially if accompanied by unwanted forward movement, warrants repair before further mowing. Reliable release is as important as effective pulling power.
7. Clippings are left behind instead of entering the collector
Think about airflow as well as blade sharpness
A collection mower must move cut material through a clear path into a collector that allows air to escape. A restricted chute, dirty fabric or incorrectly fitted bag can spoil collection even when the engine runs well. Start with the whole path instead of sharpening the blade automatically.
With the engine stopped and isolated, empty and inspect the collector. Clean it using the permitted method and let it dry. Check its frame, attachment points and condition. A bag that is collapsed, incorrectly assembled or damaged may not provide its intended capacity or airflow.
If your version has a mulching plug, remove it when setting up for collection as the manual describes. The plug deliberately changes the discharge path. Do not assume a blocked rear opening is a defect when the mower is configured for another cutting method.
Inspect the chute and accessible deck for accumulated clippings. Never reach into a discharge opening while the engine runs, even if the blade seems far away. Restart only after the guards and collector or appropriate discharge arrangement are correctly in place.
Reduce the cutting demand before blaming the machine
Wet, long or dense grass can overwhelm an otherwise serviceable mower. Try a higher first cut once conditions are suitably dry, then make a later pass at the desired height. Avoid repeatedly pushing into a clogging situation until the engine stalls.
The appearance of the clippings helps. Heavy damp clumps point toward conditions and obstruction; ragged grass tips suggest a cutting-edge issue; an engine that labours strongly suggests excessive load or reduced power. These observations can overlap, so inspect rather than assigning a single cause from appearance alone.
Empty the collector before it is packed solid. Consider whether the problem affects the entire lawn or only a particularly heavy patch. A controlled comparison on ordinary dry grass gives a more useful baseline than testing only in the worst corner of the garden.
Do not increase governed engine speed to improve throwing force. Restore the intended airflow, blade condition and operating conditions first. If collection is still poor, ask a dealer to check that the correct blade and components are fitted.
8. Uneven cutting, scalping and missed strips
Check the selected height and look for damage or looseness in the height-adjustment mechanism. Uneven ground can produce scalping even when the mower is correctly assembled. Raising the cut and changing the route across a rough patch may help distinguish ground conditions from a mower fault.
Inspect the wheels and deck for obvious distortion. A bent or damaged component can alter the blade’s relationship to the ground. Do not continue using a mower with a structurally weakened deck or a wheel mounting that is failing.
Blade condition matters, but sharpening alone is not always appropriate. A bent, cracked or badly worn blade needs the correct replacement. A sharpened blade must retain the proper profile and balance, and installation requires the correct orientation and tightening specification.
Avoid judging a new blade solely by whether its centre hole fits. Width, length, lift shape and mounting details affect operation. An unsuitable blade can create poor collection, vibration or unsafe clearance. Match the part to the mower product code.
If strips are missed only between passes, review overlap and mowing pace after mechanical checks pass. If the same uneven band persists within every pass, inspect the machine more closely. That distinction is more useful than changing height repeatedly without observing where the defect occurs.
9. Vibration after striking a stone or stump
Stop immediately after a significant impact or the onset of new severe vibration. Shut down, disconnect the plug lead and allow the machine to become safe to inspect. Do not restart simply to decide whether the vibration is still there.
Possible damage includes the blade, its mounting components and other parts of the rotating assembly. A visibly damaged blade is enough reason for service, but a blade that looks acceptable does not exclude less obvious damage. Crankshaft or mounting problems may require measurement.
Do not straighten a bent blade, weld a cracked one or add washers to compensate for an incorrect fit. Reassembly must use the correct parts and torque. Tightening “as hard as possible” can be as inappropriate as leaving a fastener loose.
If the impact also changed starting behaviour, tell the dealer. A mower that now kicks back, refuses to start or stops abruptly may have more than a cutting-edge problem. That sequence can help the repairer choose the right tests before ordering parts.
10. Smoke, oil leakage and problems after tipping
Smoke beginning after transport or underside cleaning should prompt a review of how the mower was positioned. Oil may have migrated into the intake or another area. Restore the machine to the correct level position and inspect it by the manufacturer’s procedure before starting again.
Do not use a universal “always tip it left” rule. Different engines and mower instructions can prescribe different access methods. Some older SP185 instructions specifically warn against side tipping. Follow both applicable manuals or let a dealer perform the work if the required orientation is unclear.
Check oil on level ground using the dipstick method specified for the engine. The way the dipstick is inserted during a reading matters. A nominal capacity is not an instruction to pour that quantity into an engine that already contains oil.
Too much oil needs correction, just as too little does. If the level rises unexpectedly or the oil smells strongly of petrol, stop and arrange investigation. Do not assume topping up or changing the oil alone has addressed the cause.
Brief residual smoke after a properly assessed tipping incident and persistent smoke during ordinary operation require different responses. Persistent smoke, significant oil use, leakage near hot parts or mechanical noise warrants inspection. Smoke colour can be a clue, but it does not identify a failed internal component on its own.
A practical order for diagnosis and repair
| Symptom | First useful distinction | Next step if basic checks pass |
|---|---|---|
| Will not start | Rope turns normally versus engine cannot rotate | Verify fuel and ignition, then mechanical condition |
| Starts then stops | Immediate cut-out versus repeatable warm failure | Test the relevant control, fuel or ignition path while fault is present |
| Engine runs, no self-drive | Control movement versus actual belt and wheel response | Inspect drive components with guards and safety procedures respected |
| Poor collection | Airflow obstruction versus excessive cutting load | Check correct blade and engine performance |
| Difficult reversing | Released control versus continuing drive engagement | Inspect adjustment, wheels and transmission |
| New vibration | Recent impact or service versus gradual deterioration | Check rotating assembly and mounting before restarting |
| Smoke after tipping | Position-related contamination versus persistent running fault | Correct level and inspect affected systems before further use |
Use this sequence to avoid changing several systems at once. For example, if self-drive stopped after folding the handle, inspect the cable route before buying a gearbox. If collection worsened after blade replacement, confirm the fitted blade and installation before blaming the engine. The timing of a symptom often provides the most useful starting point.
After a repair, perform a controlled check in a clear area. Confirm correct starting and stopping, predictable drive release and normal cutting under a modest load. Stop at the first sign of a fuel leak, severe vibration, unexpected movement or abnormal noise. A repair is complete when the original symptom is resolved and the mower’s controls still work properly.
Preventing a repeat after the next winter
Follow the engine’s service schedule and adjust maintenance for dusty or demanding use as instructed. Record the oil, filter and plug actually fitted, together with the date. That record is more useful than assuming every annual service involved the correct parts.
Plan fuel storage before leaving the mower unused. Follow the manufacturer’s draining or storage instructions for the fitted engine, and use suitable fuel containers. Stabiliser cannot restore already contaminated fuel. Do not leave the mower with a tank of questionable petrol and expect fresh topping-up in spring to solve everything.
Clean clippings and debris away before storage, let the machine dry and keep it in the permitted level position. Avoid pressure-washing the engine, cables and drive components. Folding the handle should not trap or sharply bend cables; check their route when reopening it next season.
Before the first cut after storage, inspect the blade area, controls, wheels, fuel system and oil level. Test the stop control and self-drive release in normal safe operation. Small faults discovered at this stage are easier to address than a failed cable or fuel leak halfway through mowing.
Is an older SP185 worth repairing?
Make the decision from the complete mower’s condition. A cable, correctly diagnosed belt issue or ordinary engine service can be a sensible repair. A major engine or transmission fault combined with a badly corroded deck changes the calculation.
Ask for an estimate that separates the confirmed fault, essential safety repairs and optional servicing. Include labour and any components needed to restore correct assembly. Comparing only the price of an online part with a complete replacement mower understates the actual repair cost.
The most useful SP185 troubleshooting starts with identification and an accurate symptom. Match instructions to the fitted engine, distinguish poor running from lost drive, and check collection as an airflow and cutting problem. Those habits make repairs more focused and help avoid replacing good parts while the original fault remains.