
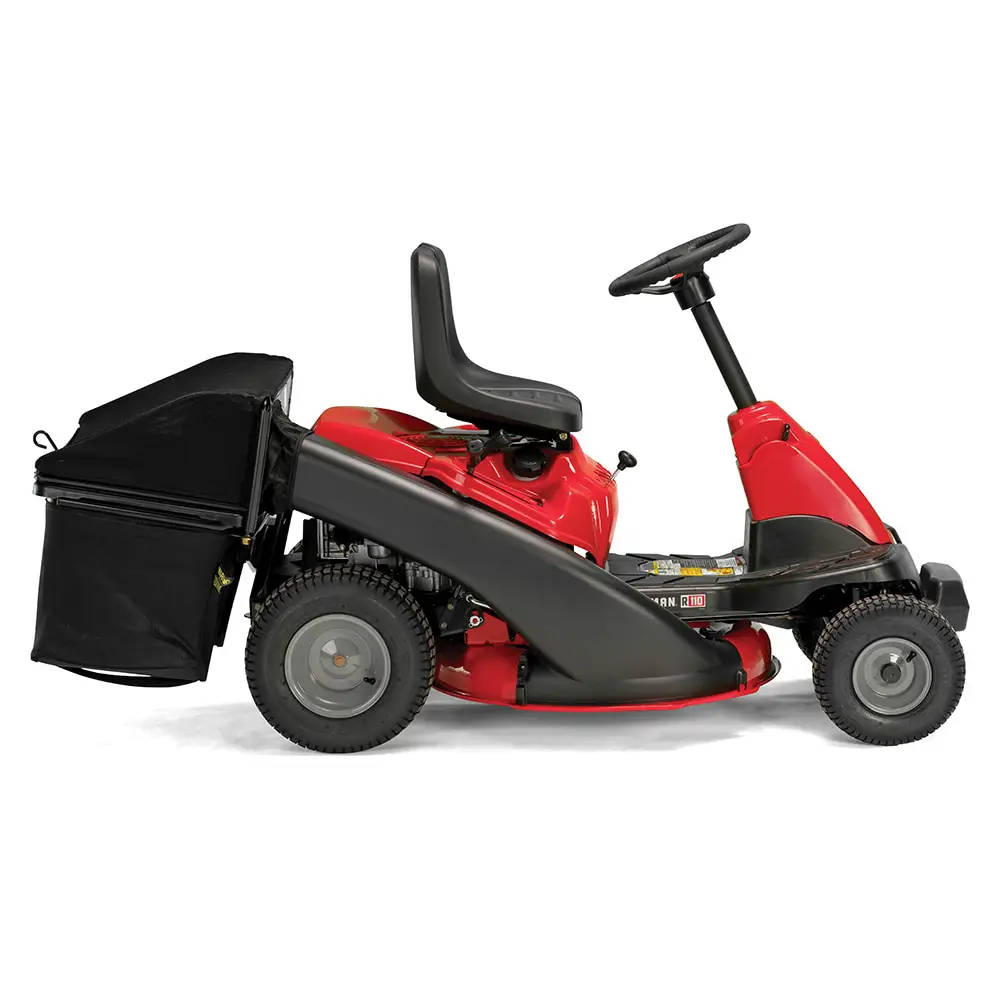
A Craftsman R110 that will not crank needs different checks from one that turns over normally but refuses to fire. Similarly, an engine that stops when the blade is engaged presents a different problem from an engine that keeps running while the blade remains stationary. Those distinctions are the quickest way to avoid buying parts for the wrong system.

The R110 is a compact rear-engine riding mower. Craftsman’s specification for model CMXGRAM1130035 identifies a 10.5 HP Briggs & Stratton engine, a 30-inch single-blade deck and a six-speed gear-drive arrangement. It should not be diagnosed as though it were a larger hydrostatic lawn tractor. Generic advice about topping up hydrostatic oil or replacing an electric PTO clutch can send an R110 owner in the wrong direction.
The checks below explain how to narrow down a symptom, recognise a normal control response and decide when measured testing is needed. They are not a ranking of failure rates, and they do not mean every R110 will experience these problems.
Identify the mower and engine before ordering parts
Record the mower model and serial numbers, then record the Briggs & Stratton engine identification separately. The R110 badge is a starting point, not a complete parts reference. A used mower may also have a replacement engine, battery, belt or deck component that differs from its original equipment.
Start with the Craftsman R110 product and manual page. Match its downloadable instructions to the machine’s label. The linked R100-series manual covers several models, so a feature described in that booklet is not automatically present on every mower covered by it.
Use the engine manual for oil specification, quantity, spark plug and engine service settings. Do not use a horsepower figure to choose a valve clearance or a generic online engine photograph to choose a carburettor. The engine identification resolves those questions more reliably.
Before dismantling anything, write down four observations:
- Whether the engine stays silent, clicks, turns slowly or cranks normally.
- Whether the fault appears cold, after warming, while driving or only while cutting.
- Whether it began after storage, an impact, cleaning or a recent repair.
- Whether the engine loses speed or continues normally when travel or cutting stops.
Add a photograph of the controls and any displaced component. A repairer can make better use of a clear symptom sequence than a list of parts already replaced without testing.
Choose the right diagnostic path
| Symptom | Start here | Avoid this assumption |
|---|---|---|
| Nothing happens when the key turns | Starting conditions, battery connections and electrical protection | The ignition switch must be defective |
| Starter clicks or turns slowly | Battery condition under load and cable connections | A voltage reading alone proves the battery is sound |
| Engine cranks but never fires | Starting procedure, fuel, ignition and engine condition | Every no-start needs a carburettor |
| Engine stops as the blade is engaged | Control conditions versus a mechanical load | The blade engagement mechanism always causes the stall |
| Engine runs but mower does not travel | Drive controls, belt path and linkage | It needs hydrostatic transmission oil |
| Engine runs but grass is not cut | Deck engagement, belt and cutting assembly | Travel proves the deck drive is working |
| Cut is uneven | Tyres, blade condition and deck position | The lawn must be the only cause |
| New vibration or grinding | Stop and inspect before another run | Continuing will identify the fault safely |
Carry out inspections with the mower secured on level ground, engine off, key removed and moving parts stopped. Follow the manual’s isolation instructions before working around the blade or belts. Never crawl under a mower supported only by a jack, and never run it with guards removed to watch a suspected fault.
When the R110 will not crank
Check the starting conditions first
The documented R100-series starting arrangement requires the blade engagement lever off and parking brake engaged. Its safety system also responds to the operator’s seat and, where applicable, correct installation of the discharge or mulch equipment. A displaced chute or a seat disturbed during other work therefore belongs in the initial inspection.
Confirm that controls actually reach their intended positions. A lever that looks nearly disengaged may not operate its mechanism fully. Look for an obvious obstruction or loose attachment with the engine stopped. Do not wedge a switch closed, unplug a safety device or bridge wiring to make the starter operate.
Pay particular attention to what changed. If the mower started normally until the seat was removed, inspect that work before ordering a starter. If the fault followed a mulch-kit change, check the installation rather than immediately condemning the battery. Timing does not prove causation, but it gives a sensible order for inspection.
An interlock problem needs repair, not permanent defeat. The fact that bypassing a device might allow the engine to turn would not establish that the mower is safe to drive or mow.
Separate a weak supply from a failed starter
A battery can show voltage and still be unable to deliver useful starting current. Inspect accessible terminals, cable ends and the ground connection for looseness, corrosion or damage. A cable can look acceptable along its length while having a poor connection at one end.
Charge a serviceable battery using the charger and procedure appropriate to the installed battery. A battery that is cracked, leaking, swollen or otherwise damaged needs professional handling, not repeated charging attempts. If starting remains weak after charging, arrange a battery load test and starting-circuit checks.
Briggs & Stratton’s starter troubleshooting guidance distinguishes slow cranking, no cranking and a starter that spins without turning the engine. Those are useful categories when describing the fault. None of them independently proves that a new starter motor is required.
Avoid bridging the starter or solenoid with a screwdriver. It can create a high-current short and bypass the normal operating controls. A workshop can measure supply and voltage loss without turning the test into an uncontrolled start attempt.
A repeated fuse failure is evidence of another problem
Inspect the specified fuse only after switching off and securing the machine. Replace a failed fuse with the correct rating for that mower. A larger fuse is not a repair: it allows more current through wiring that the original fuse was intended to protect.
If a replacement fails again, note when it happens. Turning the key, moving a harness or operating a control may expose different faults. Do not deliberately keep reproducing a short. Report the sequence and have the damaged circuit located.
Previous accessory installations deserve attention too. Loose wires, improvised connectors or a cable rubbing against metal may have nothing to do with the original factory system. Diagnose what is actually fitted, including any modifications, rather than assuming the wiring remains original.
When it cranks normally but will not start
Establish a useful fuel baseline
Check both fuel quantity and fuel history. Petrol left in the mower or a storage container through an off-season can create starting trouble. A full tank is not proof that the fuel is suitable, and adding a little fresh petrol does not remove water or deposits already present.
If contamination is suspected, follow the engine and mower instructions for safe fuel-system service. Let the engine cool and use approved containers outdoors, away from ignition sources. Do not drain petrol onto the ground or use an unsuitable household container to collect it.
A clean supply in the tank may still leave a restriction or contamination downstream. That is a reason to examine delivery and the carburettor properly. It does not mean the carburettor must automatically be replaced. If the problem returns shortly after cleaning, investigate the fuel source and system condition instead of repeating the same cleaning indefinitely.
Use fuel approved for the fitted engine. Avoid turning a starting problem into a second fault by adding unapproved mixtures or chemicals. A petrol engine that has received the wrong fuel should be assessed before another start attempt.
Check the choke without using it to hide a fault
Use the cold-start procedure for the mower and move out of the starting-enrichment setting as instructed once it runs. Excessive enrichment can make an engine run poorly, while an unsuitable cold-start setting can prevent it firing readily.
An engine that requires enrichment after it has warmed is providing a clue about mixture or delivery. It is not asking for a permanent choke adjustment. A restriction or intake issue is among the possibilities a technician can check. Randomly turning screws or changing linkages can obscure the original symptom.
The linked R100-series manual describes its carburettor as non-adjustable. Do not assume there is an owner-accessible mixture screw that needs a standard number of turns. Match the actual engine and carburettor before attempting service.
Repeated long starting attempts drain the battery and heat the starter. Follow the manual’s cranking limit and pauses. If the same attempt keeps producing the same result, stop and reassess rather than treating persistence as a diagnostic method.
Use the spark plug as evidence rather than a verdict
Check the plug lead and connection with the engine safely isolated. If removing the plug is within your ability and the manual’s procedure, keep dirt out of the opening and use the correct replacement specification.
A wet plug can accompany unsuccessful ignition or repeated starting; a fouled plug may reflect another running problem. Installing a new plug may help, but it does not always explain why the old one became fouled. Record whether the improvement lasts.
Ignition tests should use suitable equipment and safe conditions. Holding a loose plug near spilled petrol is not an acceptable spark test. If fuel and ignition checks pass, mechanical testing may be needed. Compression and leak-down results must be interpreted for the fitted engine, including any starting decompression mechanism.
An engine that suddenly stops turning, makes a hard mechanical noise or appears to contain liquid should not be forced through repeated cranking. Those observations need a different investigation from an ordinary fuel-related no-start.
When the engine stops as the blade is engaged
Distinguish an immediate cut-out from a struggling engine
An abrupt stop at the instant a control moves can suggest a safety-control response. An engine that labours, slows and then stalls can suggest excessive load or reduced available power. The sound and timing help guide diagnosis, although neither alone identifies the failed component.
Check the documented operating conditions first. On the arrangement described in the linked manual, engaging the blade while reverse is selected stops the engine. Leaving the seat with the blade engaged also triggers shutdown. Do not interpret those intended responses as proof of a faulty carburettor.
Do not assume the mower has another tractor’s reverse-mowing override. Use only the controls and procedures actually documented for the machine. A generic video showing a different ignition switch is not a reason to alter this mower’s safety circuit.
If the engine cuts out despite correct operation, report the precise control position and sequence. A technician can then test the relevant circuit rather than replacing every switch or adding a jumper wire.
Check for an abnormal deck load
With the engine off and the machine isolated, inspect for packed clippings, foreign objects or visible damage around the cutting system. Do not put a hand into a discharge opening or underneath the deck while the engine runs.
A deck obstruction, damaged rotating part or bearing problem can impose a load the engine cannot overcome normally. Squealing, burning-belt smell or a new scraping sound makes continued testing inappropriate. The correct next step is inspection, not more throttle or repeated engagement.
Consider whether the stall occurs on clear ground or only when entering heavy grass. If it happens only under a much heavier cutting load, reduce the mowing demand within the machine’s intended use. If it stalls immediately even before cutting, the investigation should not stop at blaming long grass.
After repair, verify engagement under the normal procedure and ordinary cutting conditions. The deck should also disengage correctly. A blade that does not stop as specified needs service even if it now cuts well.
When the engine runs but the blade does not cut
The R110’s blade engagement lever and deck drive need to be assessed as the system fitted to this mower. Do not begin by buying an electric PTO clutch simply because many larger tractors have one. A blade-drive problem can involve the lever mechanism, belt, pulleys or cutting assembly.
First confirm that grass is genuinely not being cut, rather than merely being cut poorly. A stationary blade, a slipping drive and a blunt blade can all leave unsatisfactory results, but they require different repairs. Do not reach underneath to check rotation.
Inspect accessible belt areas with the mower isolated. Look for a belt that is displaced, visibly damaged or contaminated. If the fault began after deck removal, compare assembly and routing with the correct diagram. A new belt can still be incorrect or incorrectly routed.
Do not spray belt dressing or lubricant onto a slipping drive. Restoring grip temporarily would not explain why the drive lost tension or alignment. Repeatedly fitting a belt that comes off again is also a sign that the underlying cause remains.
Use the exact application when ordering a blade or belt. Dimensions alone do not establish compatibility: profile, construction, mounting and routing matter. Ask the supplier to match the mower identification rather than accepting a broad “fits Craftsman” description.
When the R110 will not move or loses travel speed
Separate engine weakness from drive loss
Listen to the engine when travel slows. If engine speed falls sharply, investigate the load and engine response. If the engine continues normally while movement disappears, the drive controls, belt path and transmission deserve attention.
Make comparisons only on a clear, level area and only if brakes and steering work correctly. Do not test a suspected drive fault on a slope, near traffic or by holding the mower against an obstacle. A machine that may stop or move unexpectedly needs a controlled environment.
Confirm that the parking brake is released and the direction and speed controls are in the intended positions. Check for obvious linkage obstruction with the engine off. A control that moves at the handle but fails to move its connected mechanism fully is useful evidence.
The R110’s gear-drive design means hydrostatic purging and oil-top-up procedures are not the default remedy. Use the actual transmission identification and service information if internal work becomes necessary. Do not open an unidentified plug because another mower has a similar-looking case.
Belts and linkage come before an untested transmission replacement
A drive belt, tensioning component or linkage fault can interrupt travel without requiring a complete transmission. Inspection should distinguish a worn part from an incorrect recent installation. Record whether the symptom began gradually or immediately after belt work.
The mower’s manual directs transmission drive-belt service to a repair centre because access involves component removal and tools. That is especially relevant if you cannot support the machine safely or identify the routing confidently. Watching exposed drive components with the engine running is not a substitute for that procedure.
If a repairer proposes a transmission replacement, ask what tests separate internal failure from the external drive. A useful diagnosis identifies what receives power and where motion is lost. “It will not move” describes the complaint, not the conclusion.
Grinding, repeated jumping out of the selected direction or an abnormal mechanical knock warrants stopping. Continuing to operate may damage components that were initially repairable. Do not force a stiff control to compensate for an unresolved mechanical problem.
Brake drag can imitate a power problem
A brake that does not release properly can make the mower feel weak or reluctant to travel. It can also create heat. If the mower’s stopping behaviour or pedal return changed at the same time as its drive performance, include that in the diagnosis.
Do not alter brake adjustment experimentally until the mower rolls more easily. Restoring travel at the expense of stopping ability is not a repair. The parking brake must hold and the service brake must stop the machine as intended.
A fault in either function means the mower should stay out of use until serviced. Do not conduct a hill test to see whether a questionable parking brake will hold.
When the cut is uneven or the mower scalps
Establish a level reference before adjusting the deck
Use a firm, level inspection surface and check tyres against the mower’s specified pressures. Unequal tyre condition or pressure can change how the entire mower sits. Adjusting the deck before correcting that baseline can leave it wrong once the tyres are restored.
Look at the pattern in the lawn. A consistently low side across successive passes suggests a different investigation from occasional scalping over bumps. A narrow missed strip between passes may involve overlap, while ragged tips may indicate a cutting-edge issue.
Do not try to “level” the ground by cutting it with a brush cutter. Cutting vegetation does not remove the underlying bump or hollow. Raise the cutting height where appropriate and assess the terrain separately from mower adjustment.
Deck setup is a measured procedure. Follow the manual for the actual mower rather than making the deck look level by eye. If a blade is bent or a mounting component is damaged, adjustment will not reliably correct the resulting cut.
Inspect the single-blade cutting assembly
The specified R110 has one cutting blade, so advice about synchronising or comparing multiple blades from a larger deck is misplaced. Inspect the correct blade, mounting components and deck structure using the manufacturer’s access and isolation procedure.
A cracked or bent blade needs replacement with the correct part. Do not straighten it, weld it or grind away enough material to conceal damage. Sharpening a serviceable blade requires maintaining its proper profile and balance; fitting it requires the specified orientation and fastening torque.
If the cut worsened immediately after blade replacement, verify the application and installation first. A blade that bolts on is not necessarily the correct blade for the deck. Incorrect fit can also affect discharge and vibration.
After correcting the cause, compare a short strip of ordinary dry grass with the previous result. Change one operating variable at a time. Otherwise, improved weather, a different height and a repair may be mixed together, making it difficult to know what actually helped.
When mulching leaves clumps or overloads the engine
Mulching asks the cutting system to handle material differently from open discharge. Long, wet or dense growth can impose more demand than a light maintenance cut. Consider conditions before assuming the engine has developed a fault.
Check that the correct mulch equipment is fitted and intact. Do not remove required guards or defeat an installation switch to improve discharge. If using another approved cutting arrangement, assemble it exactly as instructed rather than leaving an opening unprotected.
Use the documented mowing engine setting and select an appropriate travel speed. Slower travel reduces how much new material reaches the deck at once; reducing engine speed is not automatically the equivalent solution. A higher first pass can also help with grass that has grown beyond an ordinary maintenance cut.
Inspect for buildup only after shutdown and isolation. If clumps appear despite suitable conditions and a clean deck, inspect blade condition and correct parts. If the engine struggles in modest grass as well, investigate reduced engine output rather than treating every stall as excessive growth.
When it runs roughly or stops after warming up
Record whether the engine hunts, gradually loses power or stops sharply. Also note how long it takes to restart. A consistent warm-only failure may need testing while the symptom is present, rather than after the machine has cooled at the repair shop.
Fuel delivery, ventilation, ignition and mechanical condition are possible investigative paths. The pattern narrows the work, but it does not justify immediately replacing a coil. A component that fails only when warm can be missed by a cold test; conversely, a warm engine can stall for a non-electrical reason.
Inspect the air cleaner using the fitted engine’s instructions. A paper element and a foam pre-cleaner do not necessarily receive the same treatment. Do not oil every filter or run without one to make a restricted engine appear healthier.
Cooling-air obstruction also deserves attention. Inspect accessible areas when the engine is cool and remove debris by the permitted method. Keep cooling covers in place. An air-cooled engine does not become better cooled simply because an owner removes a shroud that directs airflow.
Do not drive with a fuel cap loose to investigate ventilation. Fuel leakage introduces another hazard. A service technician can check the appropriate system without turning ordinary mowing into an improvised test.
Oil smoke and unexpected oil-level changes
White or blue exhaust smoke can be associated with oil entering combustion, but colour alone does not identify the failed part. Overfilling, an incorrect operating position and internal engine problems require different responses. Start with the service history and a correct oil-level check.
Park level and use the engine’s specified dipstick procedure. The nominal capacity is not the amount to pour into an engine that already contains oil. Briggs & Stratton’s oil guidance makes the engine model and operating conditions central to oil selection.
If smoke began immediately after an oil change, verify the amount and product used before assuming major engine wear. If the level unexpectedly rises or the oil smells of fuel, stop and have the cause investigated. Simply draining back to the mark may leave the underlying fault unresolved.
Persistent smoke, substantial oil consumption, leakage onto hot areas or new knocking requires service. Do not keep mowing to burn off a problem whose cause has not been established. Equally, avoid approving an engine replacement based solely on a brief cloud following a documented servicing error.
The battery keeps going flat
A battery that starts the mower after charging but is flat again later needs a more precise description. Does it fail after sitting overnight, after several weeks, or during a mowing session? Each pattern points toward a different testing priority.
A load test assesses the battery’s ability to deliver current. Charging-system tests assess whether the engine restores charge appropriately. Key-off current checks investigate unwanted consumption while parked. These tests answer different questions; one successful start does not answer all of them.
Inspect added accessories and previous wiring repairs. A fault that appeared after an accessory installation should include that circuit in the investigation. Do not disconnect the battery while the engine runs as an alternator test, and do not assume every engine uses the same regulator arrangement.
For storage, use the maintenance procedure appropriate to the installed battery. Repeatedly allowing it to discharge and then buying another one can hide an unresolved drain or charging problem. Keep a dated record of charging and starting behaviour to make intermittent faults easier to assess.
Decide what you can inspect and what needs service
| Reasonable owner observations | Work needing the correct procedure and equipment |
|---|---|
| Record model numbers and the exact symptom sequence | Electrical supply and control-circuit diagnosis |
| Check control positions and obvious displaced attachments | Repair or adjustment of safety interlocks |
| Inspect accessible connections with the machine isolated | Starter, charging and battery load testing |
| Check fuel history and oil level correctly | Carburettor, ignition and internal engine diagnosis |
| Check tyres and visible deck damage | Blade installation, deck measurements and bearing assessment |
| Note when travel or blade operation fails | Transmission belt access and internal drive repairs |
| Stop after vibration, leakage or braking trouble | Inspection and repair before returning to operation |
For a service visit, provide the mower and engine numbers, recent work and the conditions that reproduce the fault. Separate observations from conclusions. “The engine stops immediately when I move this lever” is useful; “it needs a carburettor” may steer the repair away from the evidence.
Ask an estimate to distinguish the confirmed repair from optional maintenance. A worn blade or overdue service may be worth addressing, but it should not be presented as the established cause of an untested electrical fault. Retain replaced-part details and the final diagnosis for the next service.
Confirm the repair before returning to normal mowing
Begin on clear, level ground with guards and attachments correctly installed. Confirm normal starting, stopping, braking, steering and blade disengagement. Then assess a modest cutting load. Stop if the original fault or any new unsafe behaviour appears.
Do not accept a repair simply because the engine starts once. A charging complaint needs evidence that charge is maintained; a warm-stall complaint needs appropriate warm operation; a blade-drive repair needs correct engagement and release. The verification should match the symptom that brought the mower into service.
Keep the next maintenance cycle tied to the correct manuals and actual use. Clean away clippings, inspect for leaks and attend to changes before they become breakdowns. The most effective R110 troubleshooting combines accurate identification, a clear symptom and a measured repair, rather than a succession of plausible replacement parts.