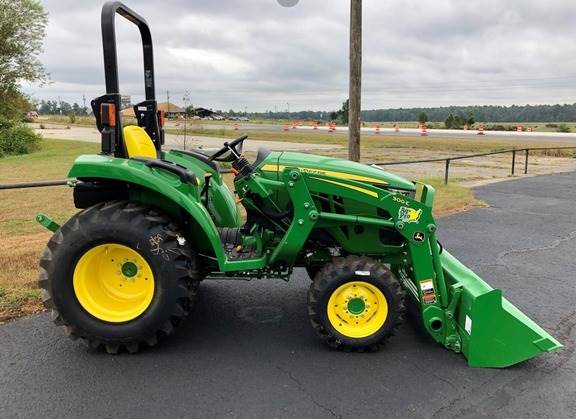
The John Deere 3025D is a compact utility tractor in the 3D Series, designed primarily for hobby farmers, rural property owners, landscapers, and light commercial operators across the United States. It is powered by a 24.4-horsepower (gross) Yanmar 3TNV88F-EPJT three-cylinder, naturally aspirated, direct-injection diesel engine of 1.642 L displacement, paired with an 8F/8R gear-drive mechanical shuttle transmission, a single dry traction clutch, transmission-driven (non-live) 540-rpm rear PTO, open-center hydraulics, and a Category 1 three-point hitch. According to published 3025D specifications, the tractor is manufactured at the John Deere India Private Limited facility in Pune, India, and was introduced to the North American market in 2019 as a simpler, lower-cost alternative to the more electronically equipped 3E and 3R series.

Although owners broadly describe the machine as durable, mechanically straightforward, and well suited to gravel-road maintenance, light tillage, brush hogging, and front-end-loader work, the 3025D is not without its problems. The following article presents a structured, diagnostic-oriented review of the issues that owners and technicians most frequently encounter, drawing from John Deere technical documentation, owner forum discussions, and detailed 3025D engine and transmission data. Each major category is broken down by Symptoms, Causes, Troubleshooting Steps, and Solutions to provide owners in the United States with a practical reference they can use in the shop or in the field.
Table of Contents
Engine and Starting Problems
The Yanmar 3TNV88F-EPJT engine is regarded as a robust and reliable power unit, but it is also the area where new owners encounter the largest number of complaints. Most of these are tied to fuel quality, the cold-start aid system, the safety-interlock circuit, or the simple reality that the 3025D is a Tier 4 Final diesel engine that does not tolerate poor maintenance well.
Symptoms
Owners commonly report that the engine will crank but not fire, that it cranks slowly or will not crank at all, that it starts and then quickly dies, that it surges or hunts at idle, that it produces excessive white or black smoke at startup, or that it loses power under load. A subset of 3D-series owners on Green Tractor Talk has additionally reported that, after the warranty period or following dealer service, the engine refused to shut off when the key was turned to the off position, indicating a failure of the fuel-shutoff solenoid or its supply circuit.
Causes
The most common root causes can be grouped into five categories. First, fuel-system problems, including a clogged primary fuel filter, a saturated water separator, contaminated diesel from long storage, gelled fuel in cold weather, or air trapped in the fuel lines after a filter change. Second, cold-start aid issues, since the Yanmar 3TNV88F engine in the 3025D uses an intake-air grid heater rather than individual cylinder glow plugs; if the heater element, its relay, or the associated fusible link fail, cold starting becomes very difficult. Third, battery and starting circuit issues, including loose terminals, low electrolyte, undercharging by the 55-amp alternator, or a corroded cable to the starter. Fourth, safety interlocks: the 3025D will not crank unless the forward/reverse lever, range lever, and gear lever are all in neutral, the operator is on the seat, and the PTO is disengaged. A failure or misadjustment of any of these switches will produce a no-crank condition. Fifth, injection-system wear, where dirt-contaminated fuel damages the injection pump or injector nozzles, leading to surging, hard starting, and grey or white smoke.
Troubleshooting Steps
Begin diagnosis by verifying the basics. Check the fuel level, look for water in the sight bowl on the fuel water separator, and drain it if any milky or amber-colored water is visible. Replace the primary fuel filter if it has been more than 400 hours or one year since the last change. Bleed the fuel system after any filter or line work. Verify battery voltage at rest (12.6 volts or higher) and during cranking (a healthy battery should not drop below approximately 9.5 volts). Inspect both battery cables for corrosion and tightness, and verify the chassis ground at the engine block. With the ignition in the run position, listen for the click of the intake-air heater relay and feel for warmth on the intake manifold; a cold manifold after 10 to 15 seconds suggests a failed grid heater or relay. Confirm that the seat switch, the F/R neutral switch, the range neutral switch, and the PTO disengagement switch all signal correctly using the Service Advisor diagnostic system referenced on the official 3025D product page. If the engine starts then dies, suspect a clogged fuel filter, an air leak on the suction side of the lift pump, or a fuel solenoid that is failing intermittently. Black smoke under load most often indicates a clogged air filter or worn injectors, while heavy white smoke at startup most often points to weak compression, a failed intake heater, or moisture in the fuel.
Solutions
Replace the primary fuel filter and water separator element with genuine John Deere parts on schedule and never let the tractor sit for long periods with partially full or untreated fuel. Use a quality diesel fuel stabilizer for seasonal storage and consider a winter blend or anti-gel additive when temperatures drop below approximately 20 degrees Fahrenheit. If the intake-air heater fails, the heater element, the relay, and the fusible link feeding the relay should all be checked; in many forum-reported cases, the actual failure is the eyelet on the fusible link breaking at the alternator stud rather than the heater itself. Replace the battery if it tests below specification; the 3025D requires a 12-volt battery rated at 600 cold-cranking amps. If a safety interlock switch is at fault, do not bypass it; replace the offending switch and verify proper adjustment. For chronic cold-start difficulties, a block heater is offered as a factory-installable accessory and is strongly recommended for owners in northern climates. Finally, if injection components are suspected, do not attempt overhauls in the field; the high-pressure injection pump and nozzles require dealer-level service per the John Deere periodic maintenance schedule, which calls for injection-nozzle service every 2,000 hours.
Clutch and Transmission Issues
The 3025D uses an 8-forward / 8-reverse gear-drive transmission with a synchronized mechanical power shuttle (column-mounted F/R lever) and a fender-mounted gear shift lever. The clutch is a single dry traction clutch. There is no hydrostatic transmission option on the D-series, which is a fundamental difference from the 3025E.
Symptoms
Owners report several distinct symptoms: hard or grinding shifts between gears or ranges, a clutch pedal that has lost free play or feels spongy, the tractor creeping forward with the clutch fully depressed, the PTO slowing or stopping when the clutch is pressed, slipping under load, and an inability to start the engine because the transmission is not fully in neutral. Some owners on owner forums have also reported that shifting from forward to reverse causes the PTO to slow noticeably, which is a normal characteristic of the single-stage transmission-driven clutch rather than a fault.
Causes
Hard shifting on the 3025D is most often caused by attempting to change gears at too high a ground speed, by improper double-clutching technique, by low or contaminated transmission-hydraulic oil, or by misadjusted clutch linkage. Slipping is generally a function of clutch disc wear, oil contamination of the dry clutch from a leaking rear main seal, or improper free play. The lack of a live or independent PTO is not a defect but a design characteristic: the 3D series uses a transmission-driven PTO with a single-stage clutch, which means depressing the clutch pedal stops the PTO at the same time it disconnects engine power from the transmission. As discussed in detail on TractorByNet, this contrasts with the 3R series tractors that use an independent electrohydraulic PTO clutch.
Troubleshooting Steps
Verify the transmission-hydraulic oil level using the dipstick on the rear of the transmission housing, with the tractor parked on level ground and the three-point hitch fully lowered. Inspect for external leaks at the rear axle housing, the rockshaft cover, and the loader supply lines. Measure clutch pedal free play, which should typically fall between 1 inch and 1.5 inches at the pedal pad according to the operator’s manual; insufficient free play means the throwout bearing is constantly riding the pressure plate fingers, accelerating wear. Test for clutch slippage by setting the parking brake firmly, placing the transmission in a high gear, and slowly releasing the clutch with the engine at low throttle. The engine should stall promptly. If the engine continues to run, the clutch is slipping. For shifting issues, ensure the operator is bringing the tractor to a complete stop before changing range, since the 3025D’s range shift is collar-shift and is not designed to be shifted on the move. The synchronized power shuttle does permit direction changes without stopping, but full clutch engagement is required.
Solutions
Adjust clutch pedal free play according to the procedure in section 95 of the operator’s manual. If the clutch is slipping despite proper adjustment, the pressure plate, friction disc, and throwout bearing should be replaced as a set; this is a clutch-split job that most owners will want to delegate to a dealer. Change the transmission-hydraulic oil at the recommended interval (1,200 hours when using genuine John Deere Hy-Gard or 400 hours when using equivalent fluids). For owners who find the lack of an independent PTO objectionable, no field retrofit is available; the only remedy is to step up to the 3R series or 5E series, which is an important consideration before purchase rather than after. Owners learning the gear-drive layout should practice double-clutching between range changes and should expect to bring the tractor to a complete halt for any range or gear change.
Hydraulic System and Three-Point Hitch Problems
The 3025D uses an open-center hydraulic system supplied by two single-section external gear pumps with a combined output of approximately 8.9 gallons per minute total flow, of which approximately 5.1 gpm is dedicated to the implement (rockshaft and SCV) circuit and 3.8 gpm to power steering. System pressure is 2,500 psi. The Category 1 rear three-point hitch is position-control only and is rated to lift 1,670 pounds at the lift points 24 inches behind the hitch.
Symptoms
The most frequently reported hydraulic and hitch complaints include a three-point hitch that lifts slowly or will not lift fully, a hitch that lifts only when the engine is at full throttle, a hitch that drops slowly under load when the engine is shut off, jerky or chattering motion as the rockshaft cycles, an audible whining sound from the hydraulic pump, slow loader response, and external leaks at the hydraulic filter head or supply lines.
Causes
Slow or weak lift is almost always traceable to one of the following: low transmission-hydraulic oil level, a clogged hydraulic suction screen or filter, contaminated fluid from infrequent changes, an improperly adjusted rate-of-drop or rate-of-lift control under the seat, a worn hydraulic gear pump losing internal volumetric efficiency, an internal leak across the rockshaft piston seals, or a sticking control valve spool. Jerky operation is typically caused by air entrained in the system after fluid service, by contamination, or by control-valve wear. External leaks usually start at the hydraulic filter base, at the loader supply hoses, or at the rear SCV connections. The exposed hydraulic filter housing on the 3025D, which is mounted low on the right side of the tractor, is a known vulnerability: it is not protected by a substantial skid plate and can be cracked by stumps, rocks, or debris.
Troubleshooting Steps
First, check the transmission-hydraulic oil level on a level surface with the hitch fully lowered and the loader bucket on the ground. Top up only with John Deere Low Viscosity Hy-Gard or an equivalent meeting Deere J20D specification. Inspect the rate-of-drop knob located beneath the seat; if it has been turned fully clockwise, the hitch will not drop. If it has been turned excessively counterclockwise, the hitch will drop in a free-fall manner. Inspect the rockshaft control lever linkage for binding or bent components. Listen for the hydraulic pump; a high-pitched whine combined with a foamy or aerated appearance in the dipstick reservoir indicates that the pump is sucking air, often through a damaged or loose suction hose. If the hitch lifts at full throttle but not at idle, this is a strong indicator of internal pump wear or an internal leak past the rockshaft piston seal. If the hitch drops on its own after shutdown, the fault lies in the lift cylinder packing or in the load-check valve in the rockshaft control valve.
Solutions
Replace the hydraulic filter and clean the suction screen at the prescribed 400-hour interval. Always use the correct fluid: improper viscosity or non-compatible additives will degrade pump life and seal compatibility. If the symptoms persist after a fluid and filter change, have a dealer place a flow meter on the implement circuit; pump output well below the specified 5.1 gpm at 2,500 psi indicates a worn pump that should be replaced. For internal leaks past the rockshaft piston, replace the piston packing and the load-check valve assembly; this requires removing the rockshaft cover and is described in the official service manual. For owners who routinely operate in heavy brush or where the underside of the tractor is exposed, a dealer-installed or aftermarket skid plate covering the hydraulic filter head is a worthwhile preventive investment. Bleed any air from the system by cycling the loader and rockshaft through full strokes after fluid service.
Power Steering Problems
The 3025D uses a hydrostatic power-steering system supplied by a dedicated section of the hydraulic pump with a flow rate of approximately 3.8 gpm at rated engine speed.
Symptoms
Hard steering, particularly at low engine rpm or with the loader fully loaded; excessive free play in the steering wheel; whining noises from the steering column area; uneven turning effort to the left versus the right; or a steering wheel that turns fully but the front wheels do not respond.
Causes
Causes include low transmission-hydraulic oil (which feeds the steering pump), a clogged hydraulic suction screen, a worn steering pump, internal leakage past the steering orbital valve, worn tie-rod ends, worn front-axle king-pin bushings, or air trapped in the steering circuit after fluid service.
Troubleshooting Steps
Check transmission-hydraulic oil level first. With the engine running at 2,000 rpm, turn the steering wheel from lock to lock several times and listen for whining or moaning. Inspect the front axle, tie rods, and king pins for play by raising the front of the tractor and rocking each front wheel. If the steering wheel turns indefinitely without moving the wheels, the orbital steering valve has failed internally.
Solutions
Top up fluid and bleed by cycling the steering lock-to-lock several times with the engine at moderate rpm. Replace worn tie-rod ends and grease all front-axle pivot points at the service intervals specified in the manual. A failed orbital valve or steering pump should be replaced as a unit by a dealer.
PTO and Implement-Related Issues
The 3025D’s PTO is a transmission-driven, single-stage, mechanical PTO operating at 540 rpm at 2,400 engine rpm. The PTO is engaged with a lever, and because it shares the traction clutch, depressing the clutch pedal also stops the PTO.
Symptoms
PTO will not engage; PTO engages but stalls the engine; PTO disengages on its own; the PTO output shaft turns when the lever is in the off position; and PTO speed slows when shifting between forward and reverse.
Causes
Failure of the seat-presence interlock, which shuts down the engine if the PTO is engaged and the operator leaves the seat, is the most common cause of unexpected PTO disengagement. A seized PTO clutch pack or a damaged PTO shifter fork can cause failure to engage or disengage. Implement matching is also a frequent cause of stalling: as confirmed in 3025D performance data, the tractor’s 20.7 PTO-horsepower rating is sufficient for a 5-foot rotary cutter under most conditions, but a heavy 6-foot brush hog, dense vegetation, or steep terrain will overload the engine. The slowing of PTO speed during a forward-to-reverse shift is normal behavior of the single-stage clutch and is not a defect.
Troubleshooting Steps
Verify all safety interlocks: the seat switch, the PTO engagement switch, and the operator-presence circuit. Inspect the PTO output shaft and shielding for damage. Check the implement’s gearbox and driveline for binding before assuming the PTO is at fault. Match the implement to the tractor: a 5-foot rotary cutter is the practical maximum for the 3025D, and operators should expect to lower their gear or ground speed in heavy material. If the PTO will not engage at all, the dealer can perform a PTO clutch pack inspection; this is internal to the rear axle housing.
Solutions
Replace failed safety switches with genuine parts. For implement matching, use a properly sized rotary cutter, post-hole digger, tiller, or rear blower. Owners frequently using PTO-driven implements who feel the 3025D is underpowered should consider the 3035D, which has a 34.2-horsepower engine, or step up to the 3R series with independent PTO.
Electrical and Sensor Problems
The 3025D has a relatively simple electrical system compared to its 3E and 3R siblings, with a 12-volt negative-ground architecture, a 55-amp alternator, a 600-CCA battery, and a wiring harness that supports the safety interlocks, the cold-start aid, the lighting, and the instrument cluster.
Symptoms
Reported electrical problems include intermittent no-crank conditions, blown fuses, flickering or dead lights, the engine running with the key turned off, the engine refusing to start despite all interlocks being correctly positioned, instrument-panel warning lights that remain on, and corrosion-related connectivity issues at the seat switch, F/R neutral switch, and PTO switch.
Causes
The most common electrical causes are corroded battery terminals; corroded or loose ground connections at the chassis, engine block, or alternator; failed safety interlock switches; rodent damage to wiring under the dash or near the rear wiring harness; failed fuel shutoff solenoid (which is the cause of an engine that will not stop when the key is turned off); a failed key switch; and water intrusion into connectors after pressure-washing.
Troubleshooting Steps
Begin with battery voltage and connection inspection. Move on to fuse inspection in the fuse panel; replace any blown fuse with the correct amperage and observe whether it blows again, which would indicate a short. Use a digital multimeter to verify continuity through each safety interlock switch. Inspect the wiring harness visually, paying particular attention to areas where the harness passes near hot or moving components and to areas accessible to rodents. For an engine that will not shut off, with the engine running and the key turned to off, listen and feel for the fuel shutoff solenoid clicking; if no movement is detected, the solenoid is at fault.
Solutions
Clean and tighten all battery and ground connections, and apply a thin film of dielectric grease to prevent recurrence. Replace failed switches, the fuel shutoff solenoid, or sections of the wiring harness as required. Avoid pressure-washing directly into electrical connectors; use compressed air or a damp rag for sensitive areas. The Service Advisor diagnostic tool, available to John Deere dealers, can read the onboard self-diagnostic codes and is the fastest method for isolating intermittent electrical issues.
Cooling System and Overheating Problems
Although the 3025D is generally regarded as having more than adequate cooling capacity for its rated power, overheating complaints surface on owner forums, particularly during sustained loader work, heavy mowing in dense material, or operation in dusty environments.
Symptoms
Coolant temperature gauge climbing toward the red zone; coolant boiling out of the overflow reservoir; loss of power under heat; visible steam from the engine compartment; or warning lights illuminated on the instrument cluster.
Causes
Causes are nearly always one of the following: a clogged radiator core packed with chaff, grass clippings, or dust on the front face; low coolant level; a stuck thermostat; a loose or glazed accessory belt driving the water pump; a failed water pump; a leaking radiator cap that fails to maintain system pressure; or an air pocket in the cooling system after coolant service. Notably, Green Tractor Talk owners have observed that the 3025D and 3035D do not come with a radiator screen, listing this as one of the design oversights and noting that the open grille allows debris to pack the radiator quickly in dusty conditions.
Troubleshooting Steps
Open the hood and visually inspect the radiator core from the front. Use compressed air or a soft brush to remove debris; do not use a high-pressure water jet, which will bend the cooling fins. Verify coolant level in both the reservoir and, when cool, in the radiator itself. Check the radiator hoses for swelling or cracks. With the engine cool, inspect the radiator cap seal; replace if corroded. Test the thermostat opening temperature, which should fall between approximately 157 and 163 degrees Fahrenheit per Deere specifications referenced in the operator’s manual. Inspect the water pump weep hole for evidence of leakage and the impeller pulley for play.
Solutions
Establish a routine of cleaning the front of the radiator before each use in heavy or dusty work. Consider installing an aftermarket radiator screen; several aftermarket suppliers offer mesh screens specifically for the 3D series. Flush and refill engine coolant every 1,000 hours or annually as recommended by the John Deere compact tractor maintenance schedule. Replace the thermostat if test results fall outside the specified range, and replace the water pump if it shows leakage or bearing play. Bleed any air from the cooling system after refilling.
Fuel and Air Intake System Problems
The fuel system on the 3025D consists of a 9.7-gallon rear-mounted tank, a fuel water separator, a primary fuel filter, a mechanical lift pump, an inline injection pump, and three direct-injection injectors. The air intake system consists of a dry-type primary air filter and a corresponding intake manifold equipped with a grid heater for cold-start assistance.
Symptoms
Hard starting; rough idle; surging at part throttle; loss of power under load; black smoke under load; visible water in the fuel water separator sight bowl; persistent fuel odor under the hood; or a clogged-air-filter warning indicator on the dash.
Causes
The fuel side is most often compromised by water condensation in the tank, off-road diesel containing more particulate, microbial contamination after long storage, or simple lack of regular filter replacement. The air side is most often compromised by operating in dusty conditions without checking the air filter often enough, by a damaged element from improper cleaning, or by a leaking intake hose downstream of the filter that allows unfiltered air into the engine.
Troubleshooting Steps
Drain the fuel water separator daily during heavy use or weekly otherwise. Replace the fuel filter at the 400-hour or annual interval. Inspect the air filter element by removing the side cover (held by quarter-turn fasteners per Deere’s product description); a dirty element should never be tapped or compressed-air-cleaned aggressively, since this can crack the paper element. Inspect the rubber intake boot for cracks. After any work on the fuel system, bleed air from the system using the bleed screw at the secondary filter housing.
Solutions
Use only clean, fresh, low-sulfur diesel fuel from a reputable supplier and store fuel in clean, sealed containers. Use a fuel stabilizer for periods of inactivity longer than 30 days. Replace the air filter primary element at 600 hours, or sooner if operating in heavy dust. Replace the secondary (safety) air filter element at 1,200 hours. If unfiltered air intrusion is suspected, replace cracked intake hoses immediately; a single mouthful of dirt past the air filter can score cylinder walls and ruin the engine.
Loader and Implement-Related Complaints
The 3025D is most commonly sold paired with the John Deere 300E front-end loader, which has a non-self-leveling base configuration and an optional Mechanical Self-Leveling (MSL) version. The standard 300E has a stated lift capacity of approximately 845 pounds, while the MSL variant lifts approximately 1,283 pounds.
Symptoms
Slow loader cycle times; loader will not lift to full height with a heavy load; bucket curl or dump action that is jerky; loader leaks down overnight; whining from the loader-mounted SCV; or the bucket fails to dump fully when commanded.
Causes
Most loader complaints are hydraulic-supply complaints in disguise: the 5.1-gpm implement-circuit flow is shared between the loader and the rockshaft, and operators coming from larger tractors often perceive the cycle time as slow. The 845-pound lift rating of the non-self-leveling 300E reflects the front-axle capacity of the 3D series chassis rather than a hydraulic limitation. Leak-down overnight indicates worn cylinder packings or a worn loader control valve. Jerky operation often indicates air in the system or contaminated fluid.
Troubleshooting Steps
Verify hydraulic fluid level and condition first. Cycle the loader from full down to full up and back down several times to bleed any trapped air. Inspect all loader supply hoses for chafing or external leaks. With the loader in the air and a known weight in the bucket, mark the cylinder rod position with a piece of tape and check after several hours; significant retraction indicates worn cylinder packings. Verify that the engine is at the rated 2,400 rpm during loader work; loader cycle times at low rpm will always feel slow.
Solutions
Operate the loader at full throttle for normal cycle speed. Replace cylinder packings if leak-down is excessive. For owners who want greater lift capacity and the ability to keep the bucket level through a full lift, the MSL option is widely praised for its smooth, quick action. Owners pairing the 3025D with grapples, pallet forks, or other heavy attachments should add a rear ballast box or filled rear tires to maintain front-axle stability.
Maintenance-Related Failures
A significant fraction of the problems reported with the 3025D are not design defects but the predictable consequence of skipped or improperly performed maintenance. The 3D series benefits from John Deere’s published service intervals.
Symptoms
Symptoms of maintenance-related failure include premature engine wear, hydraulic system contamination, transmission noise, clutch failure before the expected service life, electrical corrosion, fuel-system fouling, and seal degradation.
Causes
Skipped fluid changes, improper fluids, dirty filters, lack of grease at pivot points, ignored daily walk-around inspections, pressure-washing into electrical connectors, and failure to clean the radiator and air filter in dusty conditions are all primary causes.
Troubleshooting Steps
Compare actual maintenance history with the published schedule. The 3D-series quick reference guide lists the engine oil filter (Deere part M806419) for replacement every 400 hours or annually. The fuel filter and primary air filter follow similar intervals. The hydraulic oil filter should be replaced every 400 hours. Hydraulic and transmission oil should be changed every 1,200 hours when using genuine Hy-Gard, or 400 hours otherwise. Engine coolant should be flushed at 1,000 hours or every two years. Front-axle oil should be changed and thrust-bolt torque verified at 600 hours. Engine valve clearance is to be checked by a dealer at 1,000 hours, and fuel injection nozzles serviced at 2,000 hours.
Solutions
Establish a written maintenance log and follow the schedule rigorously. Use only genuine John Deere fluids, filters, and parts where possible; many seemingly inexplicable failures trace to a non-OEM filter that does not seal properly or that has the wrong micron rating. Grease all loader pivot points, three-point hitch lift links, and front-axle fittings at the recommended intervals. Perform the daily pre-operation check listed in the operator’s manual: engine oil, transmission-hydraulic oil, coolant, water separator, air filter restriction indicator, tire pressure, and a visual walk-around for leaks.
Model-Year and Variant Differences
Although the 3025D has been produced as a single, relatively stable configuration since its 2019 introduction, there are still variations and considerations that owners should understand.
The 3D-series shares its drivetrain with two larger siblings, the 3035D (34.2 horsepower) and the 3043D (approximately 43 horsepower). Owners have noted that the 3043D appears to use a two-stage clutch that allows the PTO to continue spinning while the clutch pedal is pressed partway, while the 3025D uses a true single-stage clutch in which any depression of the clutch pedal stops the PTO. This is an important distinction for owners considering the use of mowers, tillers, or chippers where keeping the PTO spinning while disengaging traction is desirable.
The 3025D is sold exclusively with the gear-drive shuttle transmission. There is no hydrostatic option in the D-series; the closest hydrostatic alternative is the 3025E, which uses the same 24.4-horsepower Yanmar engine but routes power through a hydrostatic transmission and has a lower 17.4 PTO horsepower rating. The 3025D’s gear-drive layout favors operators who do significant ground-engaging work, towing, or rotary cutting, while the 3025E favors loader work and tasks involving frequent direction changes.
The 3025D is offered exclusively with a two-post folding ROPS open-station configuration; no factory cab is available. An optional canopy is available for sun protection. The lack of a cab is a significant operating consideration for owners in regions with very cold winters or very hot summers.
The PTO on the base 3025D is mechanical, transmission-driven, and non-live. By contrast, the 3R-series tractors of similar horsepower offer an independent electrohydraulic PTO clutch. Owners selecting between these series should consider the PTO design carefully before purchase.
Owner sentiment regarding the 3025D is generally favorable. Criticisms cluster around three points: the lack of a radiator screen, the lack of a live or independent PTO, and the relatively small front-axle lift capacity that limits the standard 300E loader to 845 pounds. Forum commentary comparing the 3025D and 3035D generally favors the 3025D for owners prioritizing simplicity, mechanical durability, the cast-iron rear axle (versus the aluminum housing of the 3025E), and the absence of complex emissions equipment.
Preventive Maintenance and Recommended Servicing
Reliable long-term operation of the 3025D is overwhelmingly a function of disciplined preventive maintenance. The following schedule synthesizes the published John Deere intervals with the practical experience of owners and technicians.
Daily, before operation, the operator should check engine oil level, transmission-hydraulic oil level, coolant level, fuel level, and the fuel water separator sight bowl. The operator should also walk around the machine to inspect for fluid leaks, loose bolts, tire condition, and damaged hoses. The radiator screen and grille should be checked for debris before each use in dusty or grassy work.
After the first 50 hours, the break-in service should be performed: engine oil and filter change, hydraulic filter inspection, wheel-nut torque verification, and a thorough leak check.
Every 50 hours, the operator should grease all loader pivots, three-point hitch lift links, drive shafts, and steering components. Greasing the front-axle pivots is required less frequently but should not be ignored.
Every 200 hours, the engine oil and oil filter should be changed.
Every 400 hours or annually, the fuel filter, the engine oil filter (M806419), the hydraulic oil filter, and the primary air filter should be replaced. The water separator should be drained and inspected.
Every 600 hours, the air filter element should be inspected and replaced if needed, the front-axle oil should be changed, the thrust-bolt torque should be checked, and brake adjustment should be verified.
Every 1,000 hours or annually, the engine coolant should be flushed and refilled, and a dealer should check engine valve clearance.
Every 1,200 hours (when using genuine John Deere Hy-Gard), the transmission-hydraulic oil should be changed.
Every 2,000 hours or every two years, the fuel-injection nozzles should be serviced.
Beyond the scheduled items, owners should pay particular attention to several practical points. First, fuel quality is the single largest determinant of injection-system longevity; never put fuel of unknown age or origin into the tractor. Second, hydraulic fluid contamination is the leading cause of pump and valve failure; keep the dipstick area, the filler cap, and the filter housing clean during service. Third, electrical connections benefit greatly from dielectric grease on every connector that is opened during service. Fourth, the air filter element is inexpensive and the engine is unforgiving; replacing it on a generous schedule is cheap insurance. Fifth, after a long day of brush work, blow out the radiator with compressed air rather than waiting until the next morning; impacted chaff is much harder to remove once it has been compressed by airflow during operation. Sixth, store the tractor under cover whenever possible to protect the seat, wiring harness, and exposed hydraulic fittings from weather.
Owners contemplating extended winter storage should treat the fuel with stabilizer, run the engine long enough to circulate treated fuel through the injection system, top up the battery and disconnect the negative terminal, fully grease all fittings, raise the loader and three-point hitch off the ground if practical, and store the tractor on a dry, covered surface.
Closing Practical Guidance
The John Deere 3025D is, by the consensus of owners and technicians, a fundamentally sound compact utility tractor whose problems are manageable, predictable, and largely preventable. The Yanmar engine is durable when fed clean fuel and clean air. The gear-drive transmission is robust and well suited to ground-engaging work, although it requires the operator to come to a complete stop for range changes and to use proper clutch technique. The hydraulic system is straightforward and serviceable, although it is sensitive to fluid cleanliness and to physical damage on the exposed filter housing. The electrical system is comparatively simple, and most electrical complaints trace to corroded connections or failed safety interlocks rather than to deeper architectural problems.
The most important steps any 3025D owner can take to prevent problems are these: follow the published John Deere maintenance schedule, use only genuine fluids and filters or fully equivalent products, keep the radiator and air filter clean, inspect for external leaks during every operation, and address minor issues promptly before they compound. When problems exceed the owner’s diagnostic capability, the dealer’s Service Advisor diagnostic system can read the onboard self-diagnostic data and isolate faults much more quickly than trial-and-error parts replacement.
Pre-purchase awareness of the single-stage clutch, the lack of an independent PTO, the open-station configuration, the lack of a factory radiator screen, and the 845-pound base loader rating will prevent the disappointment that drives many of the negative reviews. Configured properly, maintained diligently, and used within its design envelope, the John Deere 3025D will provide many years of dependable service to U.S. owners on small farms, rural properties, and light commercial operations.