
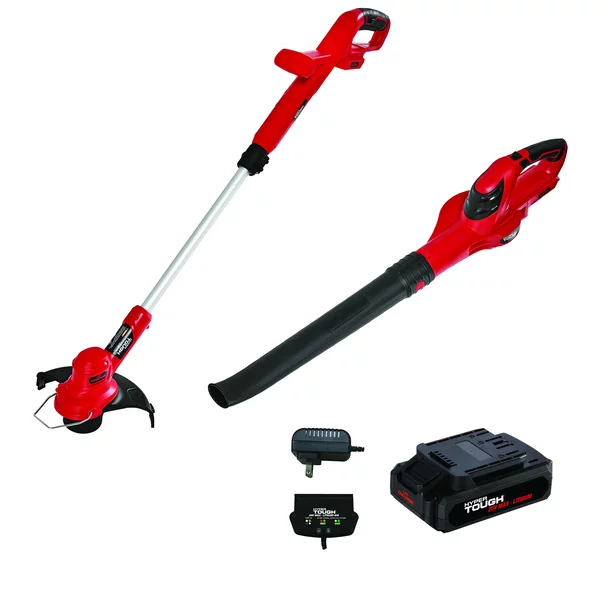
A Hyper Tough weed eater that will not start does not always need a new motor, battery or carburettor. First establish whether the machine has lost its power supply, whether the cutting head is obstructed, or whether it runs normally but has too little line to cut. Those are separate problems, and treating them as one often leads to unnecessary parts purchases.

The name covers different machines. A petrol trimmer, a corded electric model and a cordless model require different starting checks. Even two battery trimmers can use different cutting heads. This guide separates those systems and explains what each symptom can tell you. The faults discussed are diagnostic possibilities, not measured failure rates or a claim that every Hyper Tough model develops them.
Identify your trimmer before following a repair guide
Copy the complete model number from the machine rather than relying on its colour, cutting width or the words “20V Max.” Record the battery and charger numbers separately. If you bought the trimmer used, check whether its head, guard or battery has been replaced. Instructions for the original assembly may no longer describe what is fitted.
The differences are practical. Walmart lists the HT21-401-003-02 as a 20V, 12-inch cordless trimmer with 0.065-inch single line. Its Hyper Tough replacement-spool listing identifies a particular group of compatible automatic-feed models. The HT22-401-03-02 operator’s manual instead describes a brushless trimmer with a bump-feed head and 0.080-inch nylon twist line. Neither specification should be applied across the entire brand.
| Trimmer type | Start your checks with | Advice that does not apply automatically |
|---|---|---|
| Cordless battery model | Correct pack, charge, seating and trigger controls | Petrol, spark plug or carburettor repairs |
| Corded electric model | Outlet, suitable extension cable and tool cord | Battery charging or fuel mixture |
| Petrol model | Correct starting procedure, fuel history and ignition | Charger lights and battery-platform compatibility |
| Automatic-feed head | Correct spool, winding and feed mechanism | Repeatedly striking the head against the ground |
| Bump-feed head | Documented bump operation and correct loading | Assuming line advances exactly like an automatic head |
Use the Hyper Tough compatible-spool listing as a model cross-check, not as permission to fit that spool to every trimmer. Its named models include HT19-401-003-06, HT21-401-003-02, HT21-401-003-03 and HT22-401-03-05. The similar-looking ending “03-02” is not interchangeable with “03-05.”
If a listing combines several products or its photograph differs from your head, resolve the discrepancy before ordering. A spare that snaps into place can still feed incorrectly, rub against its cover or fail to retain the line properly. Keep the original part and packaging until the replacement has been identified and checked.
Make the first inspection with the power disconnected
Release the trigger and wait until the head stops. Remove the battery from a cordless machine, unplug a corded machine, or stop and cool a petrol machine and follow its spark-plug isolation instructions. A switch in the off position is not adequate protection while fingers are around the head.
Look for wrapped grass, string, wire, cracked plastic, a loose guard and damage to the supply connection. Do not reach into an operating head to check whether it is turning. Keep hands clear of the guard’s line-cutting blade even when the tool is isolated; that small fixed blade remains sharp.
Before dismantling anything, note:
- Whether the tool is completely silent, starts briefly, runs slowly or runs normally without cutting.
- Whether the fault happens immediately, after warming up or only in heavy vegetation.
- Whether it began after fitting line, changing a battery, storing the tool or striking an object.
- Whether the same fault occurs with an approved, known-good power source.
These observations help separate cause from coincidence. For example, a tool that stopped immediately after a spool change deserves a head inspection before a battery replacement. A petrol trimmer that became difficult to start after several months unused deserves a fuel-history check before an adjustment to its carburettor.
A cordless Hyper Tough trimmer does nothing when you squeeze the trigger
Check battery seating and contacts
Remove the pack and inspect its mounting rails and accessible contacts for debris, damage or signs of overheating. Refit it using the normal latch action. A pack that feels attached but has not fully engaged may fail to maintain contact when the tool moves.
Do not force a battery into the housing or use an adapter simply because its advertised voltage matches. Mechanical fit, electrical connections and protection arrangements all matter. The correct battery is one approved for that specific tool, not any pack carrying the Hyper Tough name.
A cracked latch, burnt connector or loose battery mount needs repair. Holding the battery firmly against the tool to keep it running is not a useful long-term solution and can hide an intermittent electrical connection. Stop if a pack becomes swollen, leaks, smells unusual or is visibly damaged.
Establish whether the battery is charged
Charge a serviceable pack with its approved charger and follow that charger’s instructions. A light on the charger does not necessarily mean charging is complete. Different models can use different indications for charging, a temperature delay, a connection fault or a failed pack.
Record the exact light pattern and charger number. Check the charger supply and whether the pack has been inserted correctly. If the pack has just been worked hard or stored in a cold shed, allow it to reach the permitted charging conditions naturally. Do not heat it, refrigerate it or attempt to defeat a charging delay.
A charge indicator also does not prove that a battery can deliver sufficient current under load. If an approved, known-good pack makes the trimmer work normally, the original pack or its charging path becomes the next area to investigate. If both packs produce the same fault, inspect the tool and cutting load before buying a third battery.
Confirm the trigger and lock-off sequence
Follow the control sequence in the tool’s manual. A lock-off button exists to prevent unintended starting; it should not be taped down or bypassed. Check whether the controls move freely and return normally when released.
If the trigger sticks, the housing is cracked or the tool starts unpredictably, stop using it. Spraying lubricant into the switch area or opening the handle to bridge contacts is not an appropriate owner test. Electrical diagnosis should establish where power is lost without disabling the controls.
A completely silent tool with a sound battery can have a switch, wiring, electronic-control or motor fault. Silence alone cannot distinguish them. Provide the repairer with the model number, battery comparison and any history of impact or water exposure rather than describing the problem simply as a dead motor.
The cordless trimmer starts and then cuts out
Separate a power interruption from excessive cutting load
Observe what happens immediately before the stop. Does the line slow noticeably in dense grass, or does power disappear abruptly while the head is barely loaded? Does the tool restart immediately, or only after resting? These details determine the next sensible test.
Inspect for vegetation wrapped around the head and shaft area with the battery removed. Check line size, exposed length and spool installation. A change to thicker line or an incorrectly assembled head can increase the demand on the tool even though the motor itself has not changed.
Where the manual describes protective shutdown, a stop may be the system responding to an unsuitable load or temperature. That does not establish that every shutdown is harmless. Repeated cutting out in light work, after the head has been checked and the pack is properly charged, needs investigation.
Compare like-for-like working conditions
After correcting an obvious obstruction, try a short period in ordinary dry grass, with the guard fitted and the correct line installed. Feed the tool gradually into the work instead of burying the whole head in a thick clump. Stop if it cuts out again or develops abnormal heat, noise or smell.
Compare batteries under similar conditions. A small patch of short grass and an overgrown boundary are not equivalent runtime tests. Neither are different line sizes, different temperatures or different speed settings. Write down the conditions so an apparent improvement can be assessed fairly.
Do not repeatedly reset a tool to finish a job it cannot handle comfortably. A heavier-duty machine may be appropriate for dense growth, but first establish that this trimmer is correctly assembled and functioning normally. Reduced performance caused by a fault should not be mistaken for the normal limits of the model.
Short battery runtime is not always a charging fault
Separate how long the tool runs from whether the battery accepts a charge. A charger can complete its normal cycle while an ageing pack has less usable capacity than it once did. Conversely, a healthy pack can deliver a shorter session when the cutting job becomes harder. Record actual trigger-on work as well as elapsed time, because frequent pauses make casual comparisons misleading.
Check the approved pack’s capacity marking and compare it with the pack used in any advertised runtime example. Voltage alone does not describe stored energy. Do not promise yourself the same runtime from every compatible pack, and do not assume a larger pack will fix binding in the head or an electrical defect in the tool.
A practical comparison uses the same spool, similar grass, the same operating method and packs charged under the permitted conditions. If one pack consistently performs much worse, have its condition assessed. If every approved pack now performs poorly, inspect the trimmer and load. Avoid running batteries repeatedly to shutdown solely to collect a runtime figure; stop when performance becomes abnormal.
A corded Hyper Tough weed eater will not run
Work from the supply toward the tool
Unplug the trimmer before inspecting its cord and extension cable. Look for cuts, crushed sections, damaged plug pins, loose connections and discolouration at sockets. Do not use a cable with exposed conductors or repair an outdoor power cord by wrapping damaged insulation in tape.
Check that the outlet is available and that the extension cable is appropriate for outdoor use and for the tool’s current requirement and cable length. Use the selection guidance in the exact trimmer manual. A long, undersized cable can contribute to voltage loss; there is no single cable gauge suitable for every distance and load.
If a protective device trips, disconnect the equipment and investigate the cause. Repeatedly resetting a GFCI or breaker while leaving a suspected fault connected is not troubleshooting. Wet connectors, damaged cables and a defective tool require different corrective action, and none is resolved by removing electrical protection.
Intermittent operation needs a stopped inspection
If the tool cuts in and out as the cord or handle moves, stop. Do not flex a live damaged cable repeatedly to locate a break. Record where movement appeared to affect operation and have the cord, strain relief or internal connection assessed.
Use the tool’s cord-retention arrangement where provided so normal movement does not continually pull at the plug. Keep the extension cable behind and away from the cutting path. If you cannot manage the cable safely around the work area, change the approach rather than balancing the connection on a wet surface or running it through the cutting zone.
Walmart’s HT21-401-002-04 product listing identifies a corded 4.6-amp, 13-inch model. It is a useful example of why battery troubleshooting cannot be applied to every Hyper Tough trimmer. Check the rating plate on your own machine before selecting a cable or replacement component.
A petrol Hyper Tough weed eater will not start
Verify the fuel requirement before adding anything
Identify the engine and read its fuel instructions. A two-stroke engine that requires premixed fuel must receive the specified petrol and suitable two-stroke oil in the correct proportion. Do not assume straight petrol is acceptable, and do not choose a mixture solely from the brand printed on the tank.
The original cap or nearby label may identify a ratio, but a replaced cap can mislead. Use the model’s manual when there is any doubt. MTD’s guide to identifying two-cycle and four-cycle engines explains why the engine type must be established first.
Measure a mixture accurately in an approved fuel container. If a manual specifies a petrol-to-oil ratio of 40:1, for example, 1,000 millilitres of petrol divided by 40 gives 25 millilitres of oil. This is an arithmetic example, not a universal Hyper Tough specification. Follow the actual ratio and oil specification for your engine.
Check the history of the fuel already present
Ask how long the petrol has been in the trimmer and its storage can, whether it was mixed correctly, and whether water or dirt could have entered. A recently filled tank can still contain old or contaminated fuel if the storage container is the source.
If the fuel is unsuitable, replace it using the manual’s safe handling procedure with the engine cool and away from ignition sources. Do not attempt to correct an unknown mixture by adding an estimated splash of oil or petrol. Starting with a known mixture makes the next diagnosis more meaningful.
Fresh fuel does not automatically clear a blocked filter, hardened fuel line or contaminated carburettor. If the engine still will not run, the fuel path may require service. Repeatedly emptying and refilling the tank without inspecting a persistent restriction wastes fuel and leaves the cause in place.
Use the correct cold-start or warm-start procedure
Check the stop control and follow the specified primer and choke sequence. Priming counts, choke positions and starting arrangements vary. Copying the sequence from a different engine can create a flooded condition or fail to supply the mixture needed for a cold start.
If the engine fires briefly and then dies, note the choke position and whether the response changes as it warms. Do not keep applying the full cold-start sequence to a warm engine without checking its instructions. Follow the model’s flooded-start procedure if repeated attempts have supplied too much fuel.
Inspect an accessible spark-plug lead for a loose connection with the engine off. A damaged or heavily fouled plug may need replacement with the specified part and gap. Do not choose a plug by thread fit alone. Avoid open spark tests near spilled petrol; proper ignition testing belongs in a controlled service procedure.
A starter rope that suddenly locks, an engine that makes a hard mechanical noise or a machine that was run with the wrong fuel needs assessment before further starting attempts. Pulling harder is not a repair for a seized engine or obstructed drive.
The petrol engine starts but stalls or will not accelerate
Record whether it fails at idle or under load
An engine that stops as the trigger is released presents a different problem from one that idles normally but dies when cutting. Note whether it only runs with some choke, whether it surges, and whether the fault developed after storage or fuel-system work.
Running only with choke can be consistent with a mixture or delivery problem, but it does not prove that a particular carburettor screw needs adjustment. Restrictions, air leakage, deteriorated parts and incorrect assembly can produce similar behaviour. Leaving the choke partly on may hide the fault without resolving it.
Inspect the air-cleaner arrangement as directed in the manual. Foam and paper elements can require different treatment. Do not oil every element, wash one that is not washable or operate without the filter to make the engine appear stronger. Keep dirt out of the intake during inspection.
Inspect the fuel and exhaust systems without improvising repairs
A cracked primer bulb, damaged hose or loose connection can affect fuel delivery. If hoses were recently replaced, verify their specification and routing against the correct diagram. Similar-looking tubes can have different purposes; reconnecting them by guesswork can prevent proper priming.
A restricted exhaust or spark-arrestor screen can contribute to poor performance where that equipment is fitted. Allow the engine and exhaust to cool before inspection and follow the service instructions. Do not remove required exhaust components permanently or burn deposits out with an open flame.
Carburettor adjustment should follow diagnosis, not substitute for it. Avoid generic “turn both screws this many times” instructions. They may not suit the fitted carburettor and can produce a damaging mixture. If adjustment requires special tools, speed measurement or emissions-related procedures, have it done correctly.
If the cutting head rotates when the machine is supposed to idle stationary, stop and arrange service. Raising idle speed to prevent stalling can create a second problem. Idle, clutch operation and throttle return must all be correct before the trimmer is returned to use.
Fuel leaks and smoke require different responses
Any visible fuel leak means stop, let the machine cool and keep it away from ignition sources. Inspect the cap, tank, bulb, grommets and hoses without running the engine. Replace defective fuel-system parts with the correct components; do not seal a leaking hose with glue, tape or an improvised patch.
Check the surrounding parts as well as the obvious leak. A new hose fitted through a deteriorated grommet can still leak, and a cap that fits the threads may not have the correct sealing or venting arrangement. Confirm the complete repair before refuelling and restarting.
Distinguish exhaust smoke from smoke emerging from a motor housing, battery, cable or melting head. A petrol exhaust symptom calls for fuel-mixture and engine assessment. Smoke from electrical equipment or a battery calls for immediate shutdown and appropriate handling, not a fuel change.
With a petrol model, record whether smoke began after refuelling or appears with loss of power. An incorrect mixture or another engine fault may be involved, but smoke colour alone is not enough to identify a replacement part. Do not continue running a severely smoking or overheating engine just to empty the tank.
The cutting line will not advance
Confirm the head’s feed mechanism
Automatic feed and bump feed are different mechanisms. Use the exact manual to establish how fresh line is released. Do not repeatedly strike an automatic-feed head against hard ground because a different trimmer used that method.
Conversely, a bump-feed head may need its documented bump action to release line. Check that the fitted head is the original type before following loading instructions. A previous owner may have replaced it with an aftermarket assembly whose operation differs.
Remove the power source before opening the head. Check whether there is usable line left, whether it has retracted inside, and whether the spool can sit correctly in the housing. A full-looking spool with crossed turns can be less functional than a nearly empty one that is correctly wound.
Reload methodically
Remove loose fragments and compacted grass using the permitted cleaning method. Inspect the eyelets, cap tabs and spool surfaces for damage. Rewind in the direction shown on the correct spool or load the head according to its instructions. Do not assume all spools wind clockwise when viewed from above.
Use the specified line diameter, profile and amount. Overfilling can jam the spool against its housing. Too much free line outside the head can increase load, while too little may prevent satisfactory cutting or feeding. Preserve the guard and its line-limiting blade rather than extending the cutting circle by removing them.
Check that the cover is fully retained before reconnecting power. If it cannot latch securely, do not run the tool. A broken tab, worn cap or incorrect spool must be corrected; cable ties and tape are not suitable substitutes for the head’s retention mechanism.
A new spool does not rule out a head fault
If the same symptom remains after a correct reload, examine the feed mechanism and housing. A worn or damaged mechanism can prevent release or allow uncontrolled release. Replacing line repeatedly will not correct a broken component that governs spool movement.
If the problem began immediately after fitting a replacement, compare its identification with the approved application. Keep compatibility checks separate from customer reviews: a statement that a spool worked in someone else’s Hyper Tough does not identify their model or establish that it fits yours.
Line disappears quickly, breaks or feeds too much
Note whether the tool is consuming line while cutting grass or mainly when contacting brickwork, paving and fencing. Hard surfaces abrade line rapidly. Use the line tips to cut and keep the head itself from scraping along the obstacle.
If line repeatedly breaks at one eyelet, inspect that area for a burr or damage with the tool isolated. If it retracts inside the head after every short use, inspect winding, spool fit and feed operation. If large lengths escape without the normal feed action, check for a damaged or incorrectly assembled mechanism.
Do not use wire, cable, metal-reinforced line or an unapproved blade as a way to reduce line consumption. A string trimmer is not automatically a brush cutter, and a motor that can spin an attachment has not thereby been shown safe with it.
Old, damaged or unsuitable line can complicate diagnosis. Establish a baseline using fresh line of the approved specification before deciding that the whole tool is defective. If a new correct spool works well but a hand-wound one jams, inspect the loading technique rather than replacing the motor.
Poor cutting, vibration and a head that will not turn
If the motor runs normally but grass is left standing, check available line length first. Then assess whether the vegetation exceeds the tool’s intended duty. A reduced cutting circle can make an otherwise healthy trimmer feel weak.
For long grass, work progressively rather than wrapping the lower shaft in a single heavy pass. Keep a stable stance and the head at the intended working angle. Edging should only be done on models designed for it and with the documented conversion or adjustment; do not force a fixed assembly into another orientation.
New vibration following an impact needs a stopped inspection of the head, guard, shaft and fasteners. Unequal line, debris and broken components are different possibilities. Do not keep running it to see whether the vibration clears, and do not straighten a visibly damaged shaft without an approved repair procedure.
If a petrol engine revs while the head remains stationary, the drive path or clutch may need assessment. If an electric motor hums without rotation, release the trigger immediately. In either case, do not hold the trigger while trying to free the head by hand. Isolate the tool and arrange service if an accessible obstruction does not explain the problem.
Decide whether to repair, replace a consumable or request service
| Finding | Sensible next action | What to avoid |
|---|---|---|
| Empty or incorrectly wound spool | Fit or reload the correct consumable | Buying a motor before checking the head |
| Damaged cap or guard | Obtain the correct replacement assembly | Operating with tape or missing protection |
| Works normally with an approved known-good pack | Assess the original battery and charger | Assuming every pack with the same voltage fits |
| Damaged mains cable or repeated electrical trip | Stop and have the electrical fault assessed | Live cable-flexing tests or bypassing protection |
| Petrol leak | Replace the defective fuel-system components | Glue, sealant or tape on fuel hoses |
| Repeated shutdown in light work | Diagnose tool, battery and head condition | Repeatedly restarting to finish the job |
| Hard mechanical noise or severe vibration | Stop and inspect professionally | Continuing until another part fails |
A useful service request includes the full model number, exact symptom, power source, head identification and recent work. Explain what you observed rather than prescribing a repair: “it starts with this pack but cuts out in light grass” is more useful than “it needs a controller.”
Compare the total repair cost with a suitable replacement only after the fault is identified. A spool or cap problem is different from a damaged housing and motor. If warranty coverage may apply, keep the receipt and ask the seller or listed service provider about the process before dismantling the tool further.
Check the repair and prevent a repeat
Reassemble the machine with all guards and handles secure. Confirm that the trigger returns and the head stops normally when released. Test first in a clear area, then in ordinary vegetation. Stop if the original symptom returns or if a new noise, smell or vibration appears.
Keep ventilation openings and the head area clear using the manual’s cleaning method. Avoid washing electrical components with a hose or pressure washer. Store batteries, chargers and fuel according to their separate instructions, and address deterioration before the next session.
For petrol machines, plan fuel storage and servicing around the engine’s actual requirements. For electric machines, inspect supply connections and keep the correct spool information with the manual. The best way to avoid repeat purchases is a simple record of what failed, what was fitted and whether the original symptom was actually resolved.