
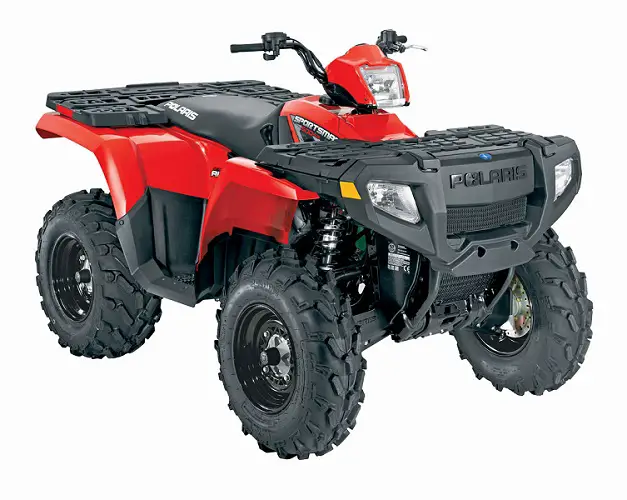
A Sportsman 500 that will not start does not necessarily need a carburettor, and one that revs without moving does not necessarily need an engine rebuild. The useful first question is what stopped working: the starter, combustion, cooling, belt transmission or drive to the wheels. Separating those systems can prevent an expensive collection of replacement parts that never addresses the original fault.

This guide covers the older Polaris Sportsman 500 family, including carburetted 500 H.O. and fuel-injected versions. Equipment and service procedures vary with year and specification. It does not cover the newly introduced 2027 Sportsman 500 as though it were mechanically identical to the older machines. The symptoms below are diagnostic possibilities, not a claim that every Sportsman 500 develops these faults or that one component fails most often.
Identify the Sportsman before ordering anything
Write down the VIN, model year and full model designation. Add whether the machine is an H.O., EFI, X2 or Touring version where applicable, and check whether the engine or other major components have been changed. A used ATV can carry replacement plastics or decals that do not reliably identify what is underneath them.
Use the Polaris owner resources to locate the matching manual and parts information. A parts listing that merely says “fits Sportsman 500” is not enough evidence for a carburettor, belt, electrical component or front-drive part. Match the actual application before dismantling the vehicle.
The distinction between carburettor and injection matters immediately. A manual choke or fuel tap, where fitted, belongs in the starting checks for that machine. It does not become an instruction to adjust an EFI throttle body. Similarly, an EFI fuel pump making a sound does not establish that it delivers the correct pressure under load.
Keep a short fault record before beginning work:
- Does the starter remain silent, click, turn slowly or turn the engine normally?
- Does the problem occur cold, fully warm, on slopes, after washing or only when pulling a load?
- Does engine speed fall when the ATV slows, or does the engine race while road speed disappears?
- What changed just before the fault: fuel, storage, a battery, a belt, an impact or a water crossing?
These observations are more useful than describing everything as “not running right.” Change one thing at a time and keep the original symptom in view. A fresh battery may restore cranking while leaving a separate stale-fuel problem unresolved.
A quick route from symptom to system
| What happens | Where to begin | What would justify deeper investigation |
|---|---|---|
| Starter is silent or clicks | Battery condition, terminals, grounds and correct starting controls | Properly tested supply is present but starter circuit still fails |
| Engine turns normally but never fires | Correct starting procedure, fuel quality and ignition checks | Basic checks pass but fuel delivery, spark or compression remains unconfirmed |
| Starts, then stalls as it warms | Choke operation where fitted, fuel supply, ventilation and temperature | Repeatable warm-only failure requiring tests while the fault is present |
| Bogs under load | Engine response, air intake and fuel supply | Engine cannot maintain power despite appropriate load and maintenance |
| Revs rise but vehicle barely moves | Belt/PVT system and drivetrain | Burning smell, damaged belt, clutch fault or internal drive noise |
| Temperature warning appears | Stop, cool down and check cooling-system condition | Coolant loss, failed fan, recurring warning or evidence of overheating damage |
| Difficult to select a gear | Stationary idle conditions, linkage and possible belt drag | Creep at idle, grinding or persistent resistance |
| Front wheels do not help in poor traction | Correct AWD operation and model-specific electrical checks | No engagement under the correct conditions despite verified controls |
Treat grinding, a stuck throttle, a serious brake fault, fuel leakage and a temperature warning as reasons to stop. Riding farther to see whether a problem clears can turn a diagnosis into recovery from a breakdown.
1. The starter clicks, turns slowly or does nothing
Start with the electrical supply
A bright instrument display is not proof of a healthy starting battery. The starter asks for far more current than the display. A weak battery or resistive connection can operate lights and then collapse when the start button is pressed. Rapid clicking is consistent with inadequate supply, although the noise alone does not identify which part is responsible.
Inspect the accessible battery connections with the ignition off. Look for loose terminals, corrosion, damaged cable insulation and a ground connection that has loosened or deteriorated. Check the cable attachment as well as the visible terminal surface. Cleaning the top of a connection does little if corrosion remains between the mating faces.
Charge the battery with equipment suitable for its chemistry and follow its manufacturer’s instructions. Then have it load-tested if the symptom persists. An unloaded voltage reading is only one piece of evidence. Comparing voltage at the battery with voltage reaching the starter during a controlled test can reveal cable losses, but that test belongs with someone comfortable working around high-current circuits.
Do not bridge starter terminals with a screwdriver. Apart from arcing and burn risks, unexpected movement becomes possible if the vehicle is not properly secured. The shortcut also bypasses parts of the circuit that may contain the original fault.
Separate control problems from starter problems
Confirm the exact starting procedure in the vehicle’s manual: ignition and engine-stop controls, gear position and any required brake operation. Inspect the relevant fuse with the ignition off and replace it only with the specified rating. If a replacement immediately fails, locate the short rather than installing a larger fuse.
A silent starter with a known-good battery needs a circuit diagnosis. A clicking relay with a stationary starter needs a different sequence. Neither symptom, by itself, proves the starter motor is defective. Give a technician the observations and ask for supply, ground and control-circuit checks before authorising major parts.
If the starter turns but the engine itself does not appear to turn, stop treating the sound as normal cranking. A starter-drive problem is possible. Repeated attempts may add damage without producing any useful evidence about fuel or ignition.
When the battery keeps going flat
A replacement battery that also goes flat suggests an unresolved charging or storage-load issue. Note how long the ATV sits, what accessories remain connected and whether it receives mostly very short runs. Inspect accessory wiring, especially additions made by a previous owner, without assuming every connection is factory equipment.
Charging output and key-off current draw should be checked against the correct service information. Do not disconnect the battery while the engine runs as a charging test. Also avoid condemning a regulator solely because a newly charged battery starts the engine once. That proves the starting supply improved, not that the charging system works.
2. The engine cranks normally but will not start
Check fuel history before buying fuel-system parts
Ask when the fuel was purchased, not just when it was put in the tank. Petrol transferred from a container that stood through the winter is still old fuel. Water, debris or deterioration can leave a machine unwilling to start even though the gauge shows plenty in the tank.
If the fuel is suspect, arrange safe removal and replacement according to the applicable manual. Work outdoors, with a cool engine and approved containers, away from ignition sources. Adding a small amount of new petrol to a tank of questionable fuel does not establish that the system now contains a useful test supply.
After a long period of storage, fresh fuel in the tank may still leave contamination farther downstream. A carburettor bowl or injection system may need inspection. That is a reason for a targeted fuel-delivery check, not a reason to assume every no-start requires a replacement carburettor.
Carburetted versions: starting enrichment is not a repair
On machines with a fuel valve, confirm it is in the operating position specified by the manual. Use the documented cold-start procedure and adjust the choke as the engine warms. Excessive choke can create an over-rich condition; insufficient enrichment can make a cold engine reluctant to fire.
An engine that runs only with the choke partly applied after warming may be receiving an unsuitable mixture. Restricted fuel flow or an intake leak are possibilities, but the observation does not identify a jet size or prove that a bigger jet is needed. Changing jetting before checking contamination and intake condition can obscure the original fault.
Inspect visible intake connections for looseness or damage. Leave internal carburettor cleaning and adjustment to the correct procedure. Do not force wire through calibrated openings, turn unidentified screws or copy settings from another year because the engines look similar.
EFI versions: distinguish a pump sound from measured delivery
An EFI machine needs adequate electrical supply as well as fuel. A battery can turn an engine yet perform poorly enough during cranking to complicate diagnosis. Note warning indicators and record any displayed information exactly, rather than clearing it before it can help.
If the pump can be heard during the normal key-on sequence, that establishes only that something is operating. It does not confirm fuel pressure, injector operation or the quality of the fuel. Use the model’s pressure-test procedure and suitable equipment instead of loosening a pressurised line to see whether petrol emerges.
Do not apply carburettor remedies to the throttle body or adjust a factory stop screw to disguise a no-start. An injection fault may need electrical or pressure testing, and improvised adjustments can introduce a second problem that remains after the first one is repaired.
Ignition and compression come next
Check that the spark-plug connection is secure and inspect the plug using the specified service procedure. A wet or heavily fouled plug provides a clue but not a complete diagnosis. It may reflect failed ignition, repeated unsuccessful starting or an over-rich mixture. Use the specified plug rather than selecting one by appearance.
Do not hold a loose plug near spilled fuel while someone cranks the engine. A suitable ignition tester and safe working conditions are needed. If fuel and ignition checks do not explain the failure, compression or leak-down testing can help assess mechanical condition. Interpretation must suit the engine, including any starting decompression arrangement.
An engine that stopped suddenly with a hard mechanical noise deserves inspection before more cranking. Likewise, a machine that has taken in water should not be repeatedly restarted in the hope of drying itself out.
3. It starts but stalls, hunts or loses power
Establish whether the engine or transmission loses performance
Listen to engine speed when the vehicle slows. If the engine labours and speed falls, investigate power production and the load being imposed. If engine speed rises freely while forward motion falls away, move to the belt and drive sections instead. These observations are not laboratory tests, but they prevent starting in the wrong system.
A useful comparison is a short, safe run under light load followed by ordinary operation, provided no warning or unsafe behaviour occurs. Do not reproduce a fault by towing an excessive load or holding the vehicle against an obstacle. Record the conditions that naturally produce it.
Check the intake for an obstructed or incorrectly fitted filter and inspect accessible ducting. Filter construction varies, so identify the element before cleaning it. A washable prefilter does not mean that every main element can be washed or oiled. Running without the filter to compensate for a restriction risks introducing dirt into the engine.
A warm-only stall needs a warm-fault diagnosis
A machine that starts cold, stops after a predictable interval and restarts after cooling presents a different problem from one that dies immediately when the choke is removed. Record the approximate run time, ambient conditions, warning lights and whether it stops sharply or gradually loses power.
Possible paths include fuel restriction, tank ventilation, heat-related electrical trouble and cooling problems. A workshop may need to test while the failure is present. Replacing a coil simply because the engine is hot skips the evidence needed to distinguish those paths.
Inspect visible fuel-vent routing for pinching or damage without opening a hot tank as an experiment. Do not ride with the cap loose. Fuel vapour and spillage create a separate hazard, and a cap arrangement intended for one year may differ from another.
Check controls when power disappears abruptly
Some Sportsman versions include throttle-related safety controls and reverse limiting functions. A cut in power can therefore involve a control input rather than a fuel restriction. Check the manual’s description of normal operation and inspect damaged or binding throttle controls promptly.
Never bypass a throttle safety switch to keep riding. A switch, cable or adjustment fault requires proper repair because the same system may help prevent an unintended engine-speed condition. The throttle should move and return as specified; if it sticks, stop using the ATV.
After a repair, test cold starting, warm restarting and ordinary load response separately. Solving one does not prove that all three are correct. This is particularly important when several maintenance problems accumulated while the machine was stored.
4. Overheating and coolant problems
Stop when the temperature warning appears
A temperature warning is a signal to stop operating and follow the manual’s shutdown and cooling instructions. Do not keep moving solely because the engine still runs. Allow it to cool before checking the cooling system, and never remove a pressure cap while hot.
Once cool, inspect for visible leakage, damaged hoses and obstruction around the cooling airflow path. Check the coolant level by the procedure for the actual model. An expansion tank level alone may not explain a system that has lost coolant elsewhere; recurring loss needs investigation.
Avoid pouring cold liquid into an overheated engine as an improvised recovery step. If the machine has lost substantial coolant, shows steam, makes abnormal noise or repeatedly overheats, recovery to a workshop is safer than another trial run.
Mud can restrict cooling without looking dramatic
Inspect both the visible face and accessible areas behind the radiator for packed debris. A surface that looks acceptable from a distance may still have restricted passages. Clean gently with the engine off and cool, protecting delicate fins and electrical connections. High-pressure blasting can bend fins and create new problems.
Check for obvious fan obstruction without reaching into a fan that could start. Fan operation, wiring and temperature controls need proper testing if cooling remains suspect. A fan that happens to be stopped during a brief look at a cold engine is not, by itself, evidence of failure.
Consider the operating conditions as well. Slow work, restricted airflow and a heavy load make existing cooling weaknesses more apparent. They do not make overheating normal. Once the obstruction or other fault is repaired, verify that the warning does not return in appropriate ordinary use.
Repeated coolant loss needs more than topping up
Record how much coolant is being added and whether there is a visible leak, unusual exhaust behaviour or oil contamination. A pressure test and further engine checks may be needed. Do not diagnose a head gasket from one symptom alone, but do not ignore a repeated need to refill either.
Use the specified coolant and filling procedure. Mixing unknown products or leaving trapped air after service can complicate diagnosis. The goal is a sealed, correctly filled system that maintains a stable operating temperature, not simply a full bottle before every ride.
5. The engine revs but the ATV will not pull properly
Recognise possible PVT belt or clutch trouble
Poor take-off, slipping under load, a burning smell and engine speed rising without matching movement point toward the belt transmission or downstream drivetrain. Stop if there is smoke, significant burning or abnormal mechanical noise. Continuing to slip the belt generates heat and can damage more than the belt itself.
Before blaming a worn belt, review how the vehicle is being used. Sustained slow pulling in an unsuitable range can make the drive work harder than necessary. Use low range for the applications specified in the owner’s manual, including appropriate slow heavy work, and stay within the vehicle’s rated limits.
A belt replacement should be based on inspection and correct application. Polaris’s 2006–2013 Sportsman belt guidance distinguishes equipment differences and describes damage to look for. It is useful for matching machines, but it is not a universal parts instruction for every Sportsman 500 ever built.
Look for fraying, damaged cogs, glazing or localised narrowing using the proper inspection procedure. Also consider why the damage occurred. A contaminated housing, clutch problem, wrong belt or persistent overheating can quickly spoil a replacement.
Do not lubricate away a slipping-belt problem
The working belt and clutch friction surfaces are not places for general-purpose lubricant. Spraying them can reduce grip and attract contamination. Use only cleaning and servicing methods specified for the assembly. Clutch work can involve stored spring energy and specialised tools, so disassembly is not an appropriate guess-and-check repair.
Never run the engine with the transmission cover removed for an improvised observation. Keep covers, seals and ducts correctly installed before testing. A cover is part of the protection around moving components, and poor sealing can contribute to later contamination.
After fitting the correct parts, assess engagement, ordinary acceleration and warm operation. If a fresh belt still slips, investigate rather than repeatedly buying belts. Note whether the symptom exists in every selected range, because that can help separate belt transmission behaviour from a downstream gear or linkage problem.
6. Hard shifting, grinding and creeping at idle
Select gears only under the conditions specified by Polaris, generally stationary with the engine at the appropriate idle. Forcing a lever while moving or while the drivetrain remains loaded can damage the mechanism. Stop and reassess instead of treating force as the remedy.
If the ATV tries to creep at idle, or selection becomes easier only after shutting the engine off, that is useful diagnostic information. Excessive idle speed, belt drag, clutch trouble or adjustment issues are possible. It does not establish that the gearbox needs replacement.
Inspect accessible linkage for damage or obstruction with the engine off. Avoid adjusting it until the correct procedure and neutral positions are known. Changing linkage length to overcome a clutch-drag problem can leave gears incompletely selected without removing the actual cause.
A transmission that grinds, jumps out of gear or makes a new internal noise needs professional inspection. Check fluid condition and level only by the appropriate procedure, using the correct product for that compartment. Engine oil, transmission lubricant and front-drive fluid are not automatically interchangeable.
7. AWD does not seem to engage
Understand the operating conditions first
On the documented older on-demand system, selecting AWD allows front drive to engage when the system’s traction conditions require it. It is not necessarily the same as a permanently locked four-wheel-drive arrangement. Rear traction returning can change how the system behaves.
An illuminated indicator confirms a displayed selection, not mechanical torque at every wheel. Conversely, front wheels that do not visibly pull on firm ground do not alone prove a fault. Read the model’s engagement and reverse-operation instructions before deciding what should happen.
Do not switch modes while wheels are spinning aggressively to force engagement. Ease out of wheelspin and follow the manual. Avoid unsafe tests with the vehicle perched on improvised supports or someone standing beside rotating wheels.
Investigate the actual front-drive system fitted
The Sportsman name spans changes in hardware and controls. Do not apply instructions for another generation’s front-drive arrangement merely because an online video uses a 500 badge. Verify the parts diagram and service information before buying hubs, switches or internal components.
Accessible checks include damaged wiring, connectors disturbed during maintenance and evidence of fluid leakage. Correct fluid level and specification matter, but changing fluid cannot repair every electrical or mechanical failure. If engagement remains absent under the proper conditions, a technician can separate command, electrical supply and mechanical response.
Also inspect CV boots and listen for abnormal axle or joint noise. A torn boot is worth addressing before dirt and water damage the joint. Clicking, binding or visible looseness should not be dismissed as an AWD switch issue without examining the driveline.
8. Steering, brakes and suspension symptoms
Pulling to one side is not automatically an internal steering fault. Begin with tyre condition and the pressures specified on the vehicle label, measured consistently. Unequal tyres, damage or a dragging brake can influence handling. Do not inflate by a car-tyre habit or copy another ATV’s pressure.
Inspect for obvious loose, bent or damaged components and have abnormal play assessed properly. Use approved lifting and support methods if inspection requires lifting. A machine that wanders, binds or changes direction unpredictably is not suitable for a test ride until the cause is understood.
Brake leakage, a lever that feels wrong, poor stopping and brakes that fail to release require prompt attention. Topping up fluid does not repair a leak. Use the specified fluid, keep contamination out and have the system serviced if its integrity is uncertain.
These checks matter to a power complaint too. A dragging brake can make an otherwise functioning engine and transmission feel weak. Finding heat, drag or unequal wheel behaviour under safe workshop conditions can prevent unnecessary fuel-system work.
9. Trouble after washing, deep water or long storage
If a fault begins immediately after washing, inspect the areas exposed to water: accessible electrical connections, intake components and transmission sealing. Do not assume that every post-wash fault will disappear harmlessly. Locate trapped moisture or damaged sealing using the correct procedure, and avoid pressure-washing sensitive areas in future.
Actual submersion is different from a damp connector. Water ingestion can damage an engine if it is cranked or run, and contaminated lubricants may require service in several compartments. Stop, recover the machine and follow the model-specific submersion procedure with professional help where needed.
Do not confuse a PVT drying procedure with permission to start an engine that may contain water. Those are different problems. Establish which systems were exposed before attempting any recovery procedure.
After storage, inspect fuel, battery condition, wiring damage and evidence of animals in the intake or cooling areas. A clean-looking exterior says little about those hidden restrictions. Resume operation with a pre-ride inspection rather than assuming that last season’s running condition still applies.
A repair plan that avoids replacing parts twice
| Finding | Sensible next step | What it does not prove |
|---|---|---|
| Starts after proper battery charging | Test battery condition and charging behaviour | That the regulator or battery is definitely the only fault |
| Runs better with choke after warm-up | Check fuel delivery and intake condition on carburetted model | That a larger jet is required |
| New belt soon slips again | Inspect correct application, clutch condition and contamination | That every replacement belt is defective |
| Stops hot and restarts after cooling | Arrange testing during the warm failure | That the ignition coil must be replaced |
| Front-drive indicator lights but traction is absent | Verify operating conditions, then test the system | That the front mechanical components are receiving drive |
| Coolant needs repeated topping up | Locate the loss and test the cooling system | That adding coolant is an adequate long-term fix |
Before authorising a repair, ask what observation or measurement supports it. A useful estimate distinguishes the diagnosed fault from maintenance that is sensible while access is available. Replacing worn service items can be worthwhile, but it should not be presented as proof of an untested diagnosis.
For an older machine, inspect the overall condition before committing to major engine or transmission work. Frame condition, brakes, tyres, suspension and previous modifications affect whether the repair makes practical sense. Compare a complete estimate with the cost and condition of realistic alternatives, not just an optimistic resale figure.
Keep records of the belt and fluids fitted, the work performed and the symptom after repair. A short dated note can prevent the next technician from repeating tests or assuming an incompatible part is original equipment.
Maintenance checks that make future faults easier to spot
Use the service intervals and severe-use provisions for your exact year. Mud, dust, water and sustained heavy work can require closer attention than occasional clean, light use. Avoid presenting one oil quantity, valve clearance or belt number as universal across the entire Sportsman 500 range.
Before riding, make the following checks part of a consistent routine:
- Check fluid levels by the correct cold or warm procedure and look for new leaks.
- Inspect tyres, steering, suspension and brakes before evaluating engine performance.
- Check intake and cooling areas for obstruction, especially after dusty or muddy use.
- Confirm that throttle and stop controls operate correctly and that covers remain secure.
Check the VIN through the Polaris recall information as well. A recall involving another Sportsman model is not proof that a 500 is affected, and a familiar model name is not a substitute for the actual vehicle check.
The best troubleshooting result is a fault that has been identified, repaired and retested under normal operating conditions. Start with the symptom, identify the exact machine, and move from accessible checks to measured diagnosis. That approach is more reliable than turning every reluctant start into a carburettor purchase or every loss of traction into a front-drive rebuild.