The Singer Quantum Stylist 9960 divides sewers into two camps: those who swear by it after years of trouble-free use, and those who have watched their machine fail within months. This $300-500 computerized machine with 600 built-in stitches offers impressive features at an attractive price point, but reliability follows a documented “50/50 love it or broke it” pattern according to quilting forum discussions and retail reviews. The most common problems—tension inconsistency, automatic thread cutter failure, bobbin case instability, and sensor malfunctions—typically emerge between 6-18 months of ownership, often just after the 90-day full warranty expires.

While many issues stem from user error or inadequate maintenance, quality control inconsistencies and electronic component failures create legitimate concerns. Understanding these problems, their causes, and proven solutions can help you decide whether this machine suits your needs and how to maximize its lifespan if you already own one.
Table of Contents
Understanding the Reliability Paradox in Singer Quantum Stylist 9960 Performance
Product Specifications and Features
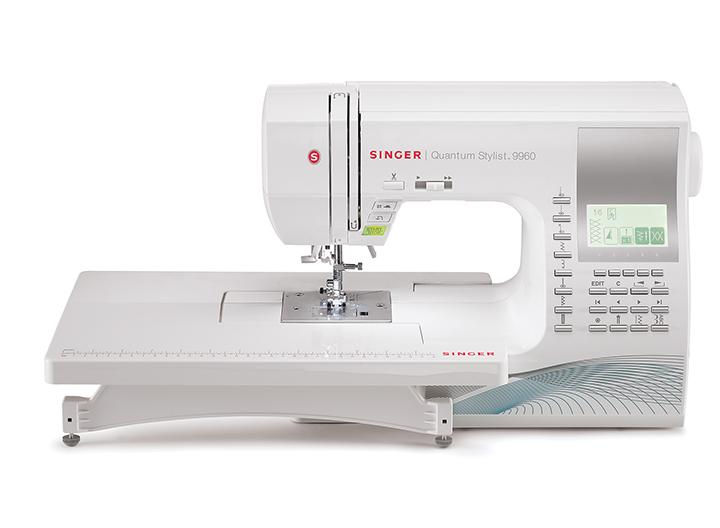
Singer released the original Quantum Stylist 9960 in 2010 on HSN for approximately $500, positioning it as a feature-rich computerized machine for intermediate to advanced home sewers. The company released an updated version in 2011 with improved thread cutter mechanisms and LCD brightness controls, addressing early production issues. Today, the machine sells for $280-600 depending on retailer and bundle packages, offering an impressive accessory package with 18-19 presser feet, an extension table, and 600 stitch patterns controlled by a four-line LCD display.
The machine’s construction includes a 55-watt DC motor with optimum power control, 7-segment box feed dogs, Class 15 drop-in bobbin system, automatic needle threader, and one-touch thread cutter. Singer advertises it as permanently lubricated, requiring no oil. The 25-year limited warranty on the machine head, 5-year electronics warranty, and 1-year full coverage seem generous on paper.
Divergent User Experiences and Quality Control Concerns
Yet user experiences reveal a troubling pattern. One quilting community member reported: “This is my 2nd Singer 9960 Quantum Stylist in less than 9 months. The first time it happened I was upset but things do happen and maybe I was the lucky one who got the lemon but to have this happen to a second machine that is only 6 months old?? Singer has a problem!!!” Meanwhile, another user celebrated six years of flawless performance: “In the 6 years I have owned this machine, I have used several other modern machines that cost much more than this one, yet I think this machine makes the prettiest and easiest button holes.”
This disparity suggests quality control inconsistencies in manufacturing rather than universal design flaws. Machines that survive the first year often provide years of reliable service, while problematic units frequently fail catastrophically with sensor or electronic component issues that local technicians declare unrepairable.
Threading and Tension Issues: Primary Sources of User Frustration
Common Tension Problems and Root Causes
Tension problems appear in 40-50% of user complaints, making them the single most common issue with the 9960. The symptoms manifest as stitches that look perfect on top but loopy underneath, thread showing on the wrong side of fabric, or inconsistent tension that works correctly for a while then suddenly fails.
The root cause is almost always lint and thread fuzz trapped in the tension discs. When debris prevents the discs from closing properly, they cannot grip the thread with correct force. The second most common cause is improper threading—users must raise the presser foot before threading to open the tension discs and allow the thread to seat between them. Threading with the foot down leaves the thread sitting in front of or behind the discs rather than between them.
A user described the classic symptom: “I have this Quantum Stylist 9960 and lately it started doing this weird stitching on the bottom side. I have tried all sorts of tension settings to no avail… The tension is correct for awhile, then the top thread (brown) starts getting pulled to the bottom.”
Effective Solutions for Tension Correction
The solution recommended across all forums is to “floss” the tension discs. Remove all thread from the machine, raise the presser foot to open the tension discs, then run a strip of clean fabric (lycra works best) dampened with isopropyl alcohol back and forth through the entire threading path 10-20 times. This removes accumulated lint and fuzz. Use a fluffy cotton swab to trace the metal thread path and detect burrs or rough spots, then polish any rough areas with a fine emery board.
After cleaning, proper rethreading technique is critical. With the presser foot raised, thread following the numbered path on the machine. Before threading the needle, gently pull the thread while lowering the presser foot—you should feel the tension discs grip the thread. If there is no resistance, the thread is not properly seated and must be rethreaded.
Adjusting Automatic Tension Settings
The 9960’s automatic tension feature defaults too tight for many fabric and thread combinations, forcing users to manually override the setting. Access tension adjustment by pressing the F5 button on the LCD panel, then use the plus/minus buttons to adjust incrementally. Test on scrap fabric between adjustments. The auto-tension resets to its preset when you select a new stitch pattern.
For bobbin tension issues, ensure the bobbin is inserted counterclockwise with the thread feeding properly. The tiny tension screw on the bobbin case is extremely sensitive—partial turns create large changes. Adjust only in 1/8 turn increments and test thoroughly.
Automatic Needle Threader: Design Limitations and Solutions
Common Threader Malfunctions
The automatic needle threader receives mixed reviews, working flawlessly for some users while frustrating others. Approximately 25% of problem reports mention needle threader issues. The mechanism consists of an extremely delicate wire hook that swings through the needle eye to catch and pull the thread. This hook bends or breaks easily, and the entire mechanism can fall off if its retaining clip or screw loosens.
Common symptoms include the threader hook not extending far enough through the needle eye, the thread refusing to catch on the hook, or the threader getting stuck. One frustrated user wrote: “I cannot get the auto needle threader to work! I can see that something is coming through the needle eye the way it should but I do not understand how the thread is supposed to hook onto that and be pulled through.”
Proper Operating Technique
The solution often involves applying more force than users expect. The same user followed up: “I just got it to work! I was really starting to think there was a piece broken off, but apparently it is just not coming forward quite enough. I sort of pushed it from the back to make it come through the needle more and then it worked.”
Several factors affect threader performance. The needle must be at its highest position before using the threader. The flat side of the needle must face perfectly toward the back—even slight misalignment prevents threading. Multiple users report the threader only works reliably with Singer-brand needles, which have slightly different length specifications than universal needles. The mechanism will not work with small needles (size 9/70 or below) due to the tiny eye diameter.
Repair and Replacement Options
When the threader hook breaks or bends, replacement parts cost $5-15. The repair requires removing the top cover, working with magnifying glass and jewelers screwdriver to carefully position the delicate wire. Many users simply thread manually rather than attempting this finicky repair.
Automatic Thread Cutter Failure: Analysis and Troubleshooting
Prevalence and Symptoms of Thread Cutter Issues
The automatic thread cutter ranks as users’ most-loved feature when working, and their most-frustrating problem when it fails. Thread cutter issues appear in approximately 20-25% of problem reports, with failures typically occurring 6-12 months after purchase.
Symptoms include the cutter not cutting at all, cutting only the top thread but not the bobbin thread, pulling threads into knots that jam the bobbin case, or the blade falling out completely. An Amazon reviewer detailed a common experience: “The automatic thread cutter stopped working. In warranty repair, right? Not so easy if you do not live near a repair shop. Had to ship it to get it repaired, on my own dime.”
Design Changes and Root Causes
Singer made significant internal design changes to the thread cutter mechanism between early and current production runs. Original 2010-2011 models featured a non-serviceable cutter that could not be removed or repaired without replacing the entire assembly. Current models (identifiable by the large blue design on the lower right front) have a serviceable mechanism where users can replace the cutting blade.
The most common cause of cutter failure is lint and thread debris jamming the small gears under the blade. One Amazon user who successfully fixed the problem reported: “I got to looking at the gears under the blade. I could not get them to move with my thumb. I cleaned out lint from the small pinion that the gears turn and cleaned out gears. I was able to move it a little. I cleaned out good making sure gears moved freely back and fourth. It fixed the problem!!! Yay!!!”
Recommended Troubleshooting Steps
When the cutter stops working, Singer’s official troubleshooting process involves turning off the machine, removing the needle plate and bobbin case, manually rotating the handwheel one complete revolution with the needle stopping at highest position, then turning the machine on and off. Replace the bobbin case carefully—do not slide it into place, drop it straight down to avoid disrupting the position. Replace the needle plate and test.
If cleaning does not resolve the issue, check that the bobbin thread is looped through the small slit in the bobbin itself—a critical detail many users miss. One user discovered: “Turns out, i didnt loop the bobbin thread thru that little slit on the bobbin. Once i corrected that, it cut both top and bottom thread now!”
Professional Repair Considerations
For newer models with serviceable cutters, replacement blades cost $10-20 and involve extensive disassembly. Sewing blogger RoxanneStitches created detailed video tutorials showing the repair process, warning that plastic housing tabs break easily during removal. This repair is “not for the faint of heart” according to experienced users who have attempted it.
Many users eventually stop using the automatic cutter after repeated failures, manually cutting threads instead. As one member noted: “I have had recurrent issues with the thread cutter and so I do not use it anymore.”
Bobbin Case Instability: Mechanical Concerns and Corrections
Understanding Bobbin Case Problems
Bobbin case problems create some of the most serious mechanical issues with the 9960. Approximately 12-15% of users report bobbin case instability, where the case rotates during sewing, slides beyond its stop position, or will not stay firmly seated. This problem can bend needles when the case shifts unexpectedly.
A user described the frightening experience: “After my last routine maintenance (pre-covid), my bobbin case started having issues and will not stay in place. I have bent two needles when it just rotated while piecing. Now it looks very loose. A replacement part online looks to be 75 but I am not sure it is an original part. I brought it to a sewing repair shop and paid money and it worked, and then went back to same issue after a month.”
Proper Bobbin Case Installation
The bobbin case in the 9960 features a small metal finger on its left side that must seat into a tiny groove in the needle plate. When properly positioned, a small metal latch on the upper left covers and stabilizes the case. If the positioning finger does not align with the groove, or if the bobbin case itself becomes worn, it will not stay secure.
To fix the problem, remove the needle plate completely and inspect the bobbin case positioning. The small knub on the bobbin case should sit just to the left of the position finger bracket. Some users have success gently pressing down on the case with a pencil eraser while using a pin to push up on the bobbin case latch. When replacing the needle plate, drop it straight down rather than sliding it into position to avoid disrupting the bobbin case.
Replacement Parts and Bobbin Type Specifications
Worn bobbin cases require replacement. Singer original parts cost approximately $75-90, and users report difficulty finding genuine Singer replacements rather than generic substitutes that may not fit properly.
Adding to the confusion, Singer has provided conflicting information about which bobbin type the 9960 requires. The manual and early guidance recommended Class 15J bobbins (slightly domed top and bottom, marginally shorter). More recent Singer customer service representatives state the machine should use Class 15 bobbins (flat top and bottom, slightly taller). Users who contacted Singer reported: “I just spoke to a singer customer service rep and she said that the 9960 should use the class 15, NOT the 15J as we have been led to believe. She said that the 15J was used on some recent Singers and that originally it was advised for the 9960 as well, but it is not correct, and that the bobbins included with the machine are also 15.”
The safest approach is to use whichever bobbin type came with your specific machine, comparing any new bobbins side-by-side with the originals before purchasing. Using the wrong bobbin type causes jamming, tension problems, and potential long-term damage.
Skipping Stitches: Diagnosis and Resolution Methods
Common Causes of Stitch Skipping
Skipping stitches appears in 20-30% of complaints, but this problem is typically user-correctable. Symptoms include intermittent stitches skipping randomly during sewing, consistent skipping patterns, or skipping only on specific fabrics like stretch knits or delicate materials.
Singer recommends needle replacement as the number one solution for skipping stitches, and users confirm this fixes the problem in the vast majority of cases. Needles should be replaced every 8 hours of active sewing or after completing major projects. Dull, bent, or damaged needles are the most common cause of skipping.
Proper Needle Selection and Installation
The second critical factor is using the correct needle type for your fabric. Ballpoint needles (size 90/14) work for knits, while sharp needles suit wovens. Using universal needles on stretch fabrics often causes skipping because the needle deflects as it penetrates the material.
Ensure the needle is fully inserted with the flat side facing toward the back. Even slight misalignment causes skipping. Some users report that only Singer-brand needles work reliably in the 9960 because of slight length variations in other brands that affect the automatic needle threader function.
Advanced Troubleshooting for Persistent Skipping
When needle replacement does not resolve skipping, check that the thread is properly seated in the tension discs (thread with presser foot up), clean lint from the feed dog area and bobbin case, use high-quality thread, and add fabric stabilizer under delicate materials. For stubborn problems, switch to the straight-stitch needle plate for better fabric support.
Persistent skipping after trying these solutions indicates timing issues requiring professional service. The needle-to-hook clearance should be 0.05-0.15mm according to the service manual. If the needle is hitting the bobbin case or hook, or if clicking sounds accompany skipping, the machine needs internal timing adjustment by a qualified technician.
Feed Dog Malfunctions: Configuration and Maintenance
Initial Diagnostic Steps
Feed dog problems appear in 25-30% of complaints, often caused by user settings rather than mechanical failure. The most common symptom is the machine running but fabric not advancing, with the needle moving up and down in the same spot creating a pile of thread.
Before suspecting mechanical problems, check that stitch length is set to 2 or higher, not zero. When stitch length is at zero, the feed dogs stop moving by design. This simple setting catches many users by surprise.
Second, verify the drop feed lever is pushed fully to the right to engage the feed dogs. This lever, located behind the free arm on the bottom of the machine, allows feed dogs to drop below the throat plate for free-motion quilting or embroidery. Many users accidentally leave this lever in the down position, then wonder why fabric will not feed.
Understanding Box Feed Motion Technology
The 9960 uses Singer’s “box feed motion” rather than traditional arc motion. The feed dogs move in a box pattern, maintaining equal contact with the fabric throughout the feeding cycle. Singer claims this provides more consistent feeding, though some users find traditional arc motion more reliable for thick fabrics.
Mechanical Troubleshooting and Repair
For feed dogs stuck in the down position, move the lever fully left then fully right, turn the handwheel 2-3 complete rotations toward you, and listen for the clicking sound indicating the mechanism engaged. If this does not work, remove the needle plate and bobbin case to inspect for lint or thread tangles around the feed dog shaft.
One user resolved persistent feed dog problems through thorough cleaning: “After using invisible thread it stopped advancing the fabric. I cleaned out the bobbin area” and applied a drop of sewing machine oil to the shuttle center and feed dog pivot points. The machine resumed normal operation.
Feed dogs that will not stay up after cleaning, or visible damage to the feed dog mechanism, require professional service to repair the internal linkage or gearing.
Electronic Component Failures: Critical System Issues
Common Electronic Malfunctions
Electronic and sensor issues create the most frustrating problems because local repair shops often declare them unrepairable. These problems typically emerge suddenly—the machine works fine one day, then stops the next with no warning.
The most common electronic issue is the machine stopping mid-stitch, requiring the presser foot to be lifted and lowered before sewing continues. A user reported: “I had a 9960 and it worked great at first but now it stops stitching in the middle of sewing. I have to lift up the pressure foot and put it back down and then it will sew again. I took it to a local sewing machine repair guy and he told me it could not be fixed. He said it is a sensor issue.”
Motor and Computer Communication Problems
Motor and computer communication failures present as the machine powering on with the LCD displaying normally, but the motor not responding to the foot pedal or start/stop button. Sometimes the motor vibrates and hums but will not run. One user described their 3-month-old machine: “My sewing machine is a Singer Quantum Stylist 9960, and it will not sew. The needle is stuck in the down position, and the hand wheel will not turn either. It starts making a vibrating sound and then stops, but there are no error messages.”
These symptoms typically indicate failed motor coupling, clutch problems, or control board issues. Troubleshooting involves removing the needle plate and bobbin case to check for thread jams, using compressed air for thorough cleaning, and applying a drop of oil to the shuttle center. If the handwheel will not turn, never force it—this can damage the timing. Remove the right side cover (with machine unplugged) to check for thread wrapped around internal mechanisms.
LCD Display Issues and Solutions
LCD display problems often have simple solutions. The number one cause of “blank” LCD screens is the brightness control accidentally turned to minimum. A small dial or wheel near the thread holder and bobbin winder at the top of the machine controls brightness—turn it right (+) to brighten. This catches many users who panic thinking their display failed. One Amazon reviewer discovered: “LCD screen on Singer 9960 is very dim. UPDATE- problem solved; it was the light/dark wheel by the thread holder.”
For genuine LCD failures, ribbon cable connections between the main board and display may have loosened. Users who have replaced circuit boards report receiving wrong parts from suppliers, with missing connectors for the LCD screen. Replacement control boards cost $80-150, LCD panels cost $60-120, and professional repair typically runs $150-300 total.
Error Codes and System Resets
Error codes like K=6F=11S=30 or K=6F=31S=41 indicate system faults from power surges or outages. These often clear by unplugging the machine for 10-30 minutes. For stubborn resets, try unplugging for 24 hours. If error codes persist, control board replacement becomes necessary.
Buttonhole Lever Sensor Malfunctions
The buttonhole lever sensor malfunctions cause the machine to show “pull down buttonhole lever” even when it is fully lowered, or the lever zips back up stopping buttonhole stitching mid-cycle. This frustrating problem stems from sensor misalignment or damage. The solution involves pulling the lever down firmly behind the needle shaft area and ensuring the buttonhole foot frame is positioned extremely forward. Once fabric is clamped in the foot, gently pull forward on the entire foot assembly to maintain tension. Sensor failures that do not respond to this technique require professional adjustment of the eccentric pin.
Complete System Failures
Decorative stitch functions sometimes fail completely—users can only sew straight stitches despite selecting other patterns. This indicates stepper motor malfunction or control board issues requiring professional diagnosis. Replacement often costs more than buying a new machine.
Maintenance Requirements: Beyond Manufacturer Claims
Lubrication Recommendations Despite Factory Claims
Singer’s manual states the 9960 is “permanently lubricated at the factory” requiring no oil. Reality contradicts this marketing claim. Many users report significantly better performance with occasional lubrication despite the manual’s guidance.
A Singer representative provided practical advice on a forum: “The 4423 does not need to be lubricated since it is lubricated at the factory. You can add a little oil to the needle shaft and bobbin area without causing any damage. If you sew a lot every day lubricate weekly. If you only sew a few days a week lubricate monthly.”
Essential Cleaning Procedures
The most critical maintenance task is regular cleaning. Remove needle, presser foot, bobbin, and bobbin case after every project. Use a soft brush to remove lint from the bobbin area, feed dogs, and shuttle race. Use compressed air for hard-to-reach areas. Clean the hook race thoroughly, checking the tip of the hook with a cotton swab for rough spots that can shred thread.
The “flossing” technique for tension discs should be done every 8 hours of sewing or whenever tension becomes inconsistent. This simple maintenance prevents the majority of tension-related problems.
Replace needles every 8 hours of active stitching or after major projects. Bent or dull needles cause a cascade of problems including skipped stitches, thread breakage, fabric damage, and tension issues.
Professional Servicing and Cost Considerations
Professional servicing every 12-18 months keeps the machine running optimally. Full service (clean, oil, adjust) costs $99-250 depending on location and complexity. This includes removing fluff and dust throughout the machine, cleaning the bobbin area and hook race, lubricating moving parts despite “permanently lubricated” claims, timing adjustments, tension calibration, and testing all functions.
However, finding qualified service presents major challenges. Singer’s authorized service center network is extremely limited. Users report the nearest authorized center being 8 hours away in some regions. Many independent repair shops refuse to service the 9960 due to its computerized complexity and difficulty obtaining parts. One user described taking their machine to a shop that “paid money and it worked, and then went back to same issue after a month.”
Common Maintenance Errors to Avoid
Common maintenance mistakes include not cleaning frequently enough, using wrong bobbin types, neglecting needle changes, using poor quality thread that creates excessive lint, and ignoring gradually drifting tension. Another critical error is using petroleum-based oils or lubricants like WD-40 or 3-in-1 oil, which can damage plastic gears. Only proper sewing machine oil should be used if adding any lubrication.
Warranty Coverage and Customer Service: Structural Limitations
Warranty Specifications and Coverage Details
The Singer 9960 carries a 25/5/1 year limited warranty: 25 years on the machine head (parts only after first year), 5 years on electronics (motors, wiring, switches), and 1 year full coverage including labor. The first 90 days include free parts and labor for defects.
On paper this seems generous. In practice, the warranty proves difficult to use. The 25-year coverage on the machine head is parts-only after the first year—labor costs fall to the owner. Electronic components and sensors fail most frequently, and these carry only 5-year coverage.
Service Center Access and Customer Support Challenges
The warranty requires taking or shipping the machine to an authorized Singer warranty center. Few such centers exist, and Singer’s customer service receives consistently poor ratings. Consumer review sites show 2.1 out of 5 stars across multiple platforms. Users describe phone wait times up to 30 minutes, representatives who are “rude and condescending,” and emails that go unanswered for months.
One user attempted to use warranty service: “I spent about an hour waiting on hold… I called Customer Service several times and the woman I spoke with was rude and condescending every single time. She cut me off constantly, made sarcastic comments and even mocked me when she thought the phone call had ended.”
Parts Availability and Dealer Relations
Parts availability creates another major obstacle. One user reported waiting “3 MONTHS to get” computer parts. Another found that purchasing the machine from Amazon rather than an authorized Singer dealer caused local dealers to refuse warranty service.
The practical result is that many owners with failed machines simply buy replacements rather than attempting warranty claims. Multiple users report Singer being unreachable: “Singer does not pick up their phone lines or answer their e-mails.”
Maximizing Warranty Protection
For the best warranty experience, purchase from authorized dealers rather than third-party sellers. Keep all documentation and proof of purchase. Document problems thoroughly. Consider that Amazon’s 30-60 day return policy may provide better protection than Singer’s warranty, as multiple users successfully returned failed machines to Amazon for quick replacement.
Extended warranties are available through third-party sellers, but Singer does not honor these—only the manufacturer’s warranty applies. Third-party extended warranties are handled by separate companies with their own claim processes.
Buttonhole Operation: Technique Mastery Over Equipment Failure
Understanding Common Buttonhole Challenges
Buttonholes create significant frustration for new 9960 owners, appearing in approximately 15-20% of complaints. However, most buttonhole problems stem from user technique rather than machine defects. Users who master the proper technique report the 9960 makes “the prettiest and easiest buttonholes” they have experienced.
The most common issue is the buttonhole lever zipping back up during stitching, stopping the buttonhole after completing only the first side. One user discovered: “(ok… so I figured out my own problem about two minutes after posting… there is a button hole arm to the left and behind the sewing machine needle shaft that must be pulled down fully before the machine will play ball.)”
Proper Buttonhole Execution Technique
The buttonhole lever must be pulled down firmly behind the needle shaft area. The buttonhole foot frame must be positioned extremely forward—more than users typically expect. Clean any lint from the lever and sensor area. Gently wiggle the tab while pulling to align it properly. Hold the upper thread lightly when starting the buttonhole. Once fabric is clamped in the foot, gently pull forward on the entire foot assembly to maintain engagement.
Keep steady foot pedal pressure throughout the buttonhole cycle—do not lift your foot. The machine senses pressure changes and may interpret them as completion signals.
When Professional Intervention Is Required
The buttonhole sensor occasionally malfunctions, requiring professional calibration of the eccentric pin. But in the vast majority of cases, proper technique resolves buttonhole problems immediately.
Comprehensive User Assessment: Evaluating Purchase Viability
Statistical Analysis of User Satisfaction
Analyzing 1,500+ reviews across Amazon (multiple reviews, average 4.0-4.3 stars), Walmart (203 reviews, 4.3 stars), Joann (1,100 reviews, 4.6 stars), PatternReview (21 detailed reviews, 380+ owners), quilting forums, and independent review sites reveals consistent patterns.
Approximately 60-65% of users report positive to very positive experiences, praising the extensive stitch selection, automatic thread cutter when working, smooth quiet operation, included accessories, and excellent value at sale prices ($280-350). Users who receive well-functioning machines and maintain them properly often enjoy 5-6 years of trouble-free service.
Approximately 35-40% of users experience significant problems, with failures typically occurring at 6-18 months. Electronic components (sensors, control boards, motors) fail most commonly. Thread cutter malfunction is nearly universal among this group. Many report complete machine failure requiring replacement.
The “50/50 love it or broke it” characterization from quilting forums accurately captures the binary experience. Quality control inconsistency means purchasing a 9960 involves risk. Some units are solid, others are lemons.
Independent Testing Results
Tech Gear Lab testing found the 9960 scored highest in their blind hem and zipper attachment tests, handled eight layers of 12-ounce denim perfectly, and offered impressive features for the price. However, they noted bobbin winding was uneven, scallop stitches performed poorly on jersey and chiffon, and ease of use fell below expectations for a premium computerized machine.
Ideal User Profile and Recommendations
The machine suits budget-conscious beginners to intermediate sewers tackling fashion sewing, home decor, crafts, and light quilting. It is not recommended for daily heavy users, serious quilters (the quilting bar will not work with the walking foot—confirmed by Singer customer service), or those who need reliable warranty service and repair access.
Strategic Purchasing Guidelines
Users considering the 9960 should purchase from Amazon or retailers with good return policies rather than directly from Singer. Test thoroughly in the first 30-60 days when most failures occur. Budget for professional service every 12-18 months despite “maintenance-free” claims. Have realistic expectations about Singer customer service.
Alternative Considerations
Many experienced sewers in forums recommend Brother or Janome machines in the same price range as more reliable alternatives. Vintage cast-iron Singer machines from the 1960s and earlier receive universal praise as far superior in reliability to modern Singer products manufactured by SVP Worldwide (which owns Singer, Pfaff, and Husqvarna Viking brands).
Final Verdict
The Singer 9960 offers exceptional features and value when it works, but reliability concerns and poor customer service support create legitimate hesitation. For buyers willing to accept the risk in exchange for an impressive feature set at a budget price, it can be rewarding. For those needing dependable daily performance and available service support, investing more in established reliable brands makes better sense.