
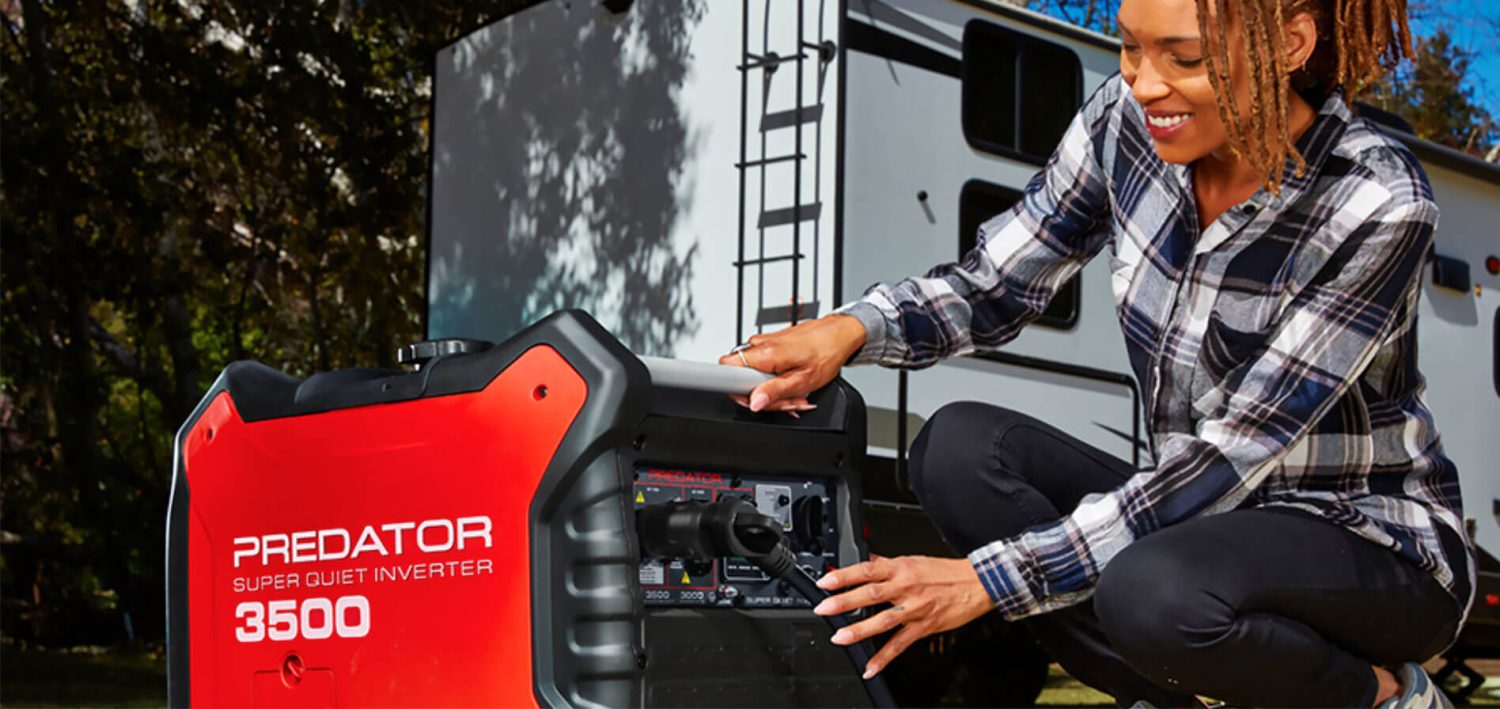
A Predator 3500 that refuses to start, shuts down unexpectedly or cannot run an appliance does not necessarily need a carburetor or inverter. Several very different faults produce similar symptoms. The useful first question is whether the engine is failing to run, the electrical output is being interrupted, or the connected equipment is asking for more than the generator can supply.

This guide separates those problems so you can make sensible checks before buying parts. It covers the 3,500-starting-watt class of Predator inverter generator, with particular attention to versions rated for 3,000 running watts. It is a troubleshooting guide, not evidence that every fault described is common or that all versions share identical components.
Record the item number, serial number and UPC from your own machine before ordering anything. Harbor Freight has sold several revisions under the Predator 3500 name. Controls, indicators, service parts and carbon-monoxide protection can differ. Use the manual associated with your exact label rather than assuming a video showing another red generator applies to yours.
Start With the Symptom, Not a Replacement Part
Notice what happens in the few seconds before the trouble. Does the engine crank normally? Does it stop cleanly or stumble first? Is an overload or CO indicator showing? Does a particular appliance trigger the problem? These observations determine which system deserves attention.
| What you notice | Start by checking | What it does not prove |
|---|---|---|
| Electric starter does not turn the engine | Battery connections, charge and starting controls | That the engine or inverter has failed |
| Engine cranks but never fires | Starting sequence, fuel, oil level and ignition connection | That the carburetor needs replacement |
| Runs briefly and then stops | Warning indicators, fuel supply and operating location | That every shutdown is a low-oil fault |
| Runs only with some choke | Fuel quality and possible restricted fuel delivery | That leaving the choke on is an acceptable repair |
| Speed rises and falls | Changing loads, economy mode and fuel condition | That all speed changes are abnormal |
| Engine runs but outlets have no power | Output indicators, breakers and disconnected-load test | That engine maintenance will restore AC output |
| Trips when a motor starts | Starting demand and other connected loads | That running watts alone establish compatibility |
| Trips with everything unplugged | Correct reset procedure and service assessment | That a larger breaker is the solution |
| Smoke, fuel leak or severe mechanical noise | Stop use and investigate safely | That another test run is worthwhile |
Before testing, unplug the appliances. A generator trying to start against connected demand makes diagnosis harder. Work through one change at a time and write down the result. Changing the plug, fuel, filter and several adjustments together may make the machine run, but leaves you unable to explain why or recognize a recurrence.
Make the Test Location Safe
Operate the generator outdoors, at least 20 feet from the home, with exhaust directed away from doors, windows and vents. A garage, shed, covered enclosed space or open doorway is not a suitable testing location. The CPSC generator safety guidance explains why outdoor positioning remains essential even when a generator has automatic CO shutdown.
Keep the machine level on stable ground and protect it from rain using a suitable arrangement that preserves ventilation. Do not improvise a close-fitting enclosure to make it quieter. Keep combustible materials away from the hot exhaust, allow cooling before refueling and never run it while working on fuel connections.
There are also electrical limits to owner troubleshooting. Inspect cords and plugs while disconnected. Do not remove the inverter cover to probe energized connections, defeat grounding arrangements or connect the generator to a household outlet. Supplying building circuits requires appropriate transfer equipment and a properly designed installation.
A useful starting record contains:
- The exact item number and UPC, plus operating hours if available.
- Whether the fault happens cold, after warming up, or only under load.
- The names and ratings of connected appliances, including anything cycling automatically.
- The indicator lights or display message visible immediately after the fault.
A photograph of the panel after a shutdown is often more valuable than a description such as “it just died.” Take it from a safe position without approaching an exhaust accumulation. Do not repeatedly recreate a hazardous shutdown simply to collect a better photograph.
Electric Start Does Nothing or Only Clicks
An electric-start problem is different from an engine that turns normally but will not fire. Listen for complete silence, a single click, rapid clicking or slow rotation. Those are observations, not final diagnoses, but they help separate a starting-circuit issue from a fuel or combustion issue.
With the engine stopped, inspect accessible battery terminals for looseness and corrosion. A connection can appear attached while making poor electrical contact. Check that the battery is the correct type for the particular revision and that any installation or storage disconnect has been restored according to its instructions.
Do not assume the battery is healthy because a panel light works. A small indicator draws much less current than a starter. A battery can support the light and still fail when asked to crank the engine. Charging and testing should use equipment compatible with the installed battery; guessing the charger setting can introduce another problem.
If the recoil starter turns the engine normally and the engine starts, that narrows attention toward the electric-start system. It does not by itself identify the battery as the failed component. Connections, switches, wiring protection and the starter circuit still need differentiation.
Check an accessible fuse only where the matching manual identifies it and specifies its rating. Different revisions are a reason to avoid copying a fuse value from an unrelated online repair. If a correct replacement blows again, stop replacing it. Repeated fuse failure calls for tracing the short or overloaded circuit, not increasing the fuse rating.
If neither starting method turns the engine normally, stop forcing it. Mechanical resistance, fluid in the cylinder or an internal fault needs investigation before more attempts. A hard pull cord is not an instruction to pull harder, and a stalled electric starter should not be held energized.
The Engine Cranks but Will Not Start
Confirm the Starting Sequence
Read the labels on your own panel and follow the cold-start procedure for that revision. A fuel control left closed, an incorrect choke position or a stop control still selected can imitate a more serious fault. Move controls deliberately rather than leaving a combined control somewhere between marked positions.
The choke enriches the mixture for starting. A warm engine may need a different setting from a cold engine. Repeated attempts with excessive choke can leave an overly rich mixture. Follow the manual’s restart procedure rather than alternating settings randomly or spraying starting fluid into the intake.
Separate the immediate history. A machine that ran yesterday and now fails after refueling points toward a different set of checks from one that has stood through a season. A machine that stopped during operation deserves a check of indicators and oil level before another start is attempted.
Check Oil Correctly Before Adding Any
Low-oil protection can prevent operation, but an illuminated warning does not justify pouring in oil without checking. Place the generator level, stop the engine and use the dipstick method specified for the exact model. Whether the dipstick is inserted or threaded during measurement matters; use the manufacturer’s method.
Read the level rather than adding a guessed quantity. Too much oil can create its own smoke and running problems. If the level was correct on level ground but the fault occurred on a slope, correct the operating position instead of overfilling to keep the sensor satisfied.
If oil is unexpectedly disappearing, identify the leak or consumption before relying on frequent top-ups. If the level rises or the oil smells strongly of gasoline, stop operating and have the cause assessed. A contaminated crankcase is not fixed by repeatedly draining it while leaving the underlying fuel fault unresolved.
Examine Fuel Quality and Delivery
Ask when the fuel was purchased and what has happened to it since. Fuel left in a vented small-engine system may deteriorate, and water or contamination can arrive in the storage container. Fresh gasoline added on top of suspect fuel does not remove contamination already in the system.
Use the fuel specification in the matching manual. For a machine that stopped after storage, replacement of stale fuel and appropriate fuel-system inspection are more logical first steps than changing electrical components. Handle drained fuel safely in an approved container and dispose of it appropriately.
Look for an obvious leak, damaged hose or closed fuel control without dismantling the system beside a hot engine. If fuel is leaking, the next action is repair, not a start attempt. A strong fuel smell also deserves investigation before you assume the engine simply needs more choke.
Inspect Accessible Ignition and Air Components
With the engine stopped and cooled, check whether the spark-plug cap is properly seated and whether its lead is visibly damaged. A loose connection after servicing is simpler to correct than a failed ignition component. Do not pull on the wire itself when removing a cap.
A dirty or damaged air filter can affect combustion, but the correct cleaning method depends on the filter material. Do not wash a paper element as though it were foam, and do not run without the filter to turn a temporary improvement into a working arrangement. Use the specified replacement where needed.
A plug inspection can provide clues, but deposits alone do not establish the cause. Use the correct plug specification and gap for your engine. If fuel quality, starting controls, oil level and accessible connections are satisfactory, a controlled ignition, compression or carburetor assessment may be the appropriate next step.
It Starts and Then Shuts Down
An abrupt stop and a gradual stumble are worth distinguishing. An abrupt stop can fit an electrical interruption or protective shutdown; stumbling may fit inadequate fuel delivery or an unsuitable mixture. Neither pattern proves a diagnosis on its own, especially when a load is changing at the same time.
Check the panel before switching everything off and losing the evidence, provided it is safe to do so. Note whether the engine stopped entirely or whether it continued running while AC output disappeared. Owners sometimes describe both events as “the generator shut down,” but the diagnostic paths are different.
Remove connected demand, review the indicated protection and correct the condition before restarting. If the same fault appears with no appliances connected, the appliances are less likely to be the immediate trigger. Do not keep repeating unloaded tests when warning lights or abnormal sounds already indicate a service issue.
Understand CO Shutdown on Equipped Versions
On CO SECURE versions, consult the label and matching manual for the warning pattern. In the cited 71358 manual revision, flashing red indicates a CO-related shutdown; persistent flashing yellow indicates a system malfunction. A brief yellow startup indication can be part of the self-check, so duration and context matter.
Do not cover, relocate or disconnect the sensor to prevent shutdown. A CO shutdown is a reason to leave the affected area and correct the operating location, not evidence that the sensor is inconvenient. If the malfunction indication remains, the protective system needs service before further use.
The Harbor Freight 71358 manual illustrates these distinctions, but check its UPC against your generator before applying its controls or reset instructions. An older machine without that system will not have the same diagnostic indicators.
Trouble Appears Only After Warming Up
Record how long the generator runs and whether that period changes with load or ambient conditions. Heat-related failures may involve cooling, ignition, fuel supply or electrical components. “It works again after cooling” is useful evidence, but it does not automatically identify an ignition coil.
Inspect external cooling openings and the operating clearance. A suitcase-style enclosure still needs unobstructed airflow. Dust, stored items beside the case or a homemade noise barrier can change operating conditions significantly. Clean only as directed, with the machine stopped and cooled.
Fuel-tank venting is another possible investigation when a machine gradually starves and later restarts. Do not drill the cap or run with an unsecured cap as a cure. Have the approved venting arrangement checked for the particular revision. Any test involving fuel-system opening belongs away from hot surfaces and ignition sources.
Hunting, Surging and Rough Running
An inverter generator can change engine speed with electrical demand, particularly when economy or electronic speed control is enabled. A refrigerator cycling or a charger changing its draw may produce a normal speed response. Listen for whether the change matches an identifiable load event.
Repeated hunting under a steady modest load is a different observation. Start with fuel condition, filter condition and the correct control position. A carburetor restriction, an intake leak or another mixture problem may be involved, but replacing the carburetor without confirming those basics can waste money.
If the engine only runs smoothly with some choke after warming up, treat that as a clue that the normal mixture may be too lean. Restricted fuel passages or unwanted intake air are possibilities. Keeping the choke partly closed can conceal the symptom while leaving the underlying fault in place.
Do not alter governor linkages or speed adjustments to mask hunting. Engine speed and inverter operation are part of a controlled system. Adjustments made by ear can create different problems and make the original fault harder to diagnose.
Compare the behavior unloaded and with a suitable known load only after the safety checks are complete. Avoid using expensive electronics as diagnostic equipment. If speed instability is accompanied by abnormal output indications, disconnect appliances and arrange a proper assessment instead of continuing experiments.
It Cannot Run the Appliance You Expected
The “3500” designation is easy to misread. On versions rated at 3,500 starting watts and 3,000 running watts, the higher number is not the continuous budget. A combination that needs 3,200 watts continuously is already above the running rating before a motor starts.
For example, two resistive appliances labeled 1,500 watts each use 3,000 watts in total. That leaves no allowance within the nominal running rating for another load. A third appliance need not be large to make that combination unsuitable. This example is arithmetic, not a recommendation to operate continuously at the limit.
Motor loads require another question: what happens during startup? A pump, compressor or air conditioner can need substantially more starting power than its normal running demand. A generator may run the appliance after startup yet fail to get it started while other equipment is connected.
Use the appliance manufacturer’s starting information where available. Do not invent a universal multiplier and assume it applies to every motor. Electronic controls, compressor conditions and soft-start arrangements can change behavior. A soft-start device must also be appropriate for that appliance and installed correctly.
At 120 volts, 3,000 watts corresponds to 25 amperes for a simple unity-power-factor calculation. A 30-amp-style receptacle does not turn the generator into a source of 30 amps continuously. Connector size, individual outlet limits and total generator capacity are separate constraints.
For an RV, include equipment that is easy to overlook: battery charging, refrigerator mode, water heating and other automatic loads. Turning off a visible appliance may not remove the largest background demand. Identify what is actually operating instead of relying on the number of plugs you can see.
Overload Light or Repeated Breaker Trips
Disconnect the loads and follow the matching manual’s shutdown and reset procedure. Reduce the demand before reconnecting equipment. A reset restores an opportunity to operate within limits; it does not increase the rating or repair a fault in the connected appliance.
Reconnect one suitable load at a time. If the same appliance consistently causes the fault when other loads are absent, inspect its cord and consult its requirements. If multiple individually acceptable appliances only fail together, their combined or overlapping startup demand may be the issue.
A damaged extension lead, wet connector or faulty appliance can also cause protection to operate. Do not replace a breaker with a higher-rated one or keep resetting it while the same fault remains connected. Stop using damaged equipment and arrange repair or replacement.
When overload protection activates with every external load unplugged, verify that the reset sequence has been completed correctly. If it recurs, further loading is not a useful test. The generator’s output electronics, wiring or protection system needs appropriate service.
| Test result | What the result narrows down | Sensible next action |
|---|---|---|
| Works unloaded, fails when several appliances are added | Combined load or startup overlap | Recalculate demand and separate starts |
| One appliance causes the same trip repeatedly | Appliance demand, cord or appliance fault | Check its specification and condition |
| Output returns after the prescribed reset and reduced load | Protection may have operated as intended | Monitor within the correct limits |
| Engine runs smoothly but every outlet remains dead | Output-side fault remains possible | Check panel protection, then seek service |
| Protection recurs with no external connection | Internal fault or unresolved protective condition | Stop repeated resets and obtain diagnosis |
| Failure follows a long or damaged extension lead | Connection or voltage-drop problem is plausible | Replace with a suitable sound lead |
This comparison is more useful than assuming a particular light identifies a failed inverter board. An indicator describes a condition detected by the machine. It may not identify the component that caused that condition.
Engine Runs but There Is No AC Power
First confirm whether the problem affects every receptacle or just one connected circuit. Use an appropriate known-working load only if the generator is otherwise operating normally and the outlets and cords are dry and undamaged. Do not rely on a single appliance that may itself have failed.
Inspect the panel’s output and protection indications. Check resettable protection only as described in the manual. Some faults require a particular shutdown or restart sequence; pressing a button repeatedly while leaving the original load connected can make the result difficult to interpret.
A smooth-running engine does not prove that the inverter is producing usable AC power. Conversely, a lack of output does not make a carburetor cleaning the obvious repair. Keep engine operation and electrical generation separate in your diagnosis.
Do not apply “field flashing” tricks copied from conventional alternator repairs to this inverter generator. Do not bridge terminals, feed power into an outlet or open energized electronics. Those methods can damage equipment and expose you to dangerous voltage.
If the exact manual’s external checks do not restore output, record the display indication and obtain qualified service. Give the technician the unloaded result, the affected receptacles and the original load that preceded the failure. That is more useful than ordering a board based only on a symptom description.
Extension Cords, RV Connections and Grounding Confusion
A long, undersized extension cord introduces voltage drop and can heat under load. The appliance may struggle even though its normal running rating appears to fit the generator. Choose a cord rated for the environment, current and length, and inspect the plugs as carefully as the cable.
Do not leave a high-load cord tightly coiled unless its manufacturer permits that use at the intended current. Keep connections protected from water without sealing them into an arrangement that traps heat. A warm, discolored or loose connector needs attention before more operation.
An RV power-management device may reject a supply for reasons that are different from generator overload. Read its error indication and the requirements for the RV and generator combination. Do not assume that defeating the protective device is an acceptable way to establish compatibility.
Neutral bonding and grounding depend on the generator design and how it is connected. Do not add a bonding plug or modify internal wiring merely because an online comment recommends it. Obtain guidance for the exact equipment and installation; a solution intended for one arrangement may be wrong for another.
Maintenance That Helps Diagnosis
Use the maintenance schedule associated with your item number and operating conditions. A generator used in dust, heat or frequent short sessions can require closer attention than one run occasionally in clean conditions. Keep dates and hours so maintenance is based on evidence instead of memory.
After a service, check the items that were disturbed before suspecting an unrelated major failure. A loose plug cap, incorrect filter installation, an oil-level error or a fuel control left closed can produce a new symptom immediately after otherwise routine work.
For storage, follow the manufacturer’s fuel and battery instructions. Stabilizer is a preventive measure when used appropriately; it is not a solvent guaranteed to reverse existing varnish or remove water. Label fuel containers with purchase dates and keep dirt out during refueling.
Keep a short service record:
- Oil and filter work, including the actual products used and the measured final level.
- Fuel age and storage preparation, rather than only the date you last started the engine.
- Any warning indication and the load present at the time.
- Parts replaced, their identifying numbers and whether the change actually resolved the fault.
Use Harbor Freight’s Predator parts selector to match the product revision before ordering. Similar-looking carburetors, switches and electrical assemblies should not be assumed interchangeable.
When to Stop Troubleshooting at Home
Stop for fuel leakage, damaged electrical insulation, persistent CO-system malfunction, repeated unloaded protection trips or severe mechanical noise. These are not situations where another appliance test adds useful information. Also stop if a required check would expose live electrical components or needs specialist equipment you do not have.
A service request should describe a repeatable condition: for example, “starts cold, runs without a load, then loses AC when this compressor starts.” Include the machine identification and warning pattern. Avoid deciding the replacement part in advance; ask for the test that distinguishes the suspected component from alternatives.
Before authorizing an expensive repair, ask whether the diagnosis includes both the failed component and the cause. Replacing an inverter without addressing a damaged connection or cooling problem can leave the machine vulnerable to another failure. Retain receipts and check applicable support terms before undertaking invasive work.
Check the Appliance Before Blaming the Generator
If a particular appliance has become harder to start, consider its own condition as well as the generator. A damaged cord, obstructed motor-driven mechanism or an appliance fault can change the demand compared with earlier use. Record whether the same appliance works correctly on a suitable supply, using its manufacturer’s instructions and avoiding repeated starts if it is overheating or making abnormal noise. A comparison is useful only when both supplies are appropriate for the equipment. Do not test a suspect appliance on another supply when its cable is damaged or it has already shown signs of an electrical fault. Have the appliance inspected first.
Frequently Asked Questions
Why Does My Predator 3500 Start With the Pull Cord but Not the Button?
That result points toward the electric-start system rather than proving a fuel problem. Start with the correct battery, charge and terminal condition, then the revision-specific fuse and controls. A battery load test and circuit diagnosis can separate a weak battery from poor connections or a starter fault. Do not short terminals as a substitute for testing.
Can It Run a 3,500-Watt Load Continuously?
Not if its label specifies 3,500 starting watts and 3,000 running watts. Use the running rating for continuous demand and account separately for startup. The rating of a receptacle or adapter does not increase generator capacity. Always use the figures on the actual machine when revisions differ.
Why Does It Run Better With the Choke Partly On?
Partial choke can compensate for a lean condition, so restricted fuel delivery or unwanted intake air are possible directions for diagnosis. That response is a clue, not proof of one failed part. Correct the cause rather than treating the choke setting as a permanent adjustment for a warm engine.
Is Surging Always a Carburetor Problem?
No. First distinguish normal response to changing electrical demand from repeated hunting under stable conditions. Fuel quality and intake condition deserve checks, but a changing load can explain speed changes without a carburetor fault. Keep the test conditions consistent before comparing results.
Should I Disconnect the Low-Oil or CO Sensor to Test It?
No. Check the actual oil level and operating position, and interpret CO indications using the matching manual. A suspected protection-system fault needs proper diagnosis. Bypassing protection removes a safeguard and can hide the condition that caused the shutdown.
What Is the Best First Step After a Shutdown?
Make the situation safe, disconnect the load and record the warning indication. Establish whether the engine stopped or only electrical output was lost. Then follow the relevant branch of the diagnosis. That small distinction often prevents a long sequence of unnecessary fuel-system or electrical parts replacements.