
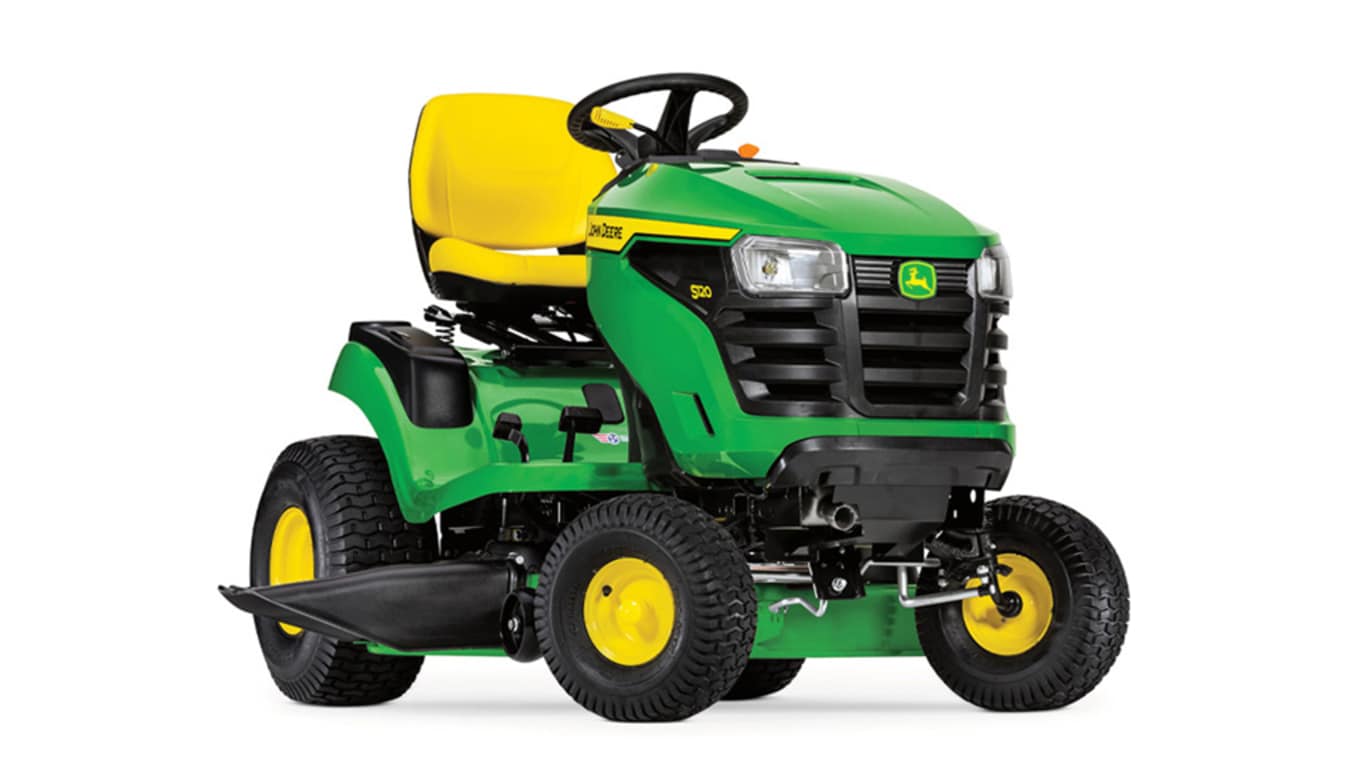
John Deere S120 problems are easier to diagnose when you separate the tractor into three systems: the engine, the drive system and the mower deck. An engine that loses speed in heavy grass needs a different investigation from a tractor that slows while the engine sounds normal. A deck that will not engage is different again.

This guide works through those distinctions, starting with checks that can prevent unnecessary parts replacement. It does not claim that every listed symptom is a widespread S120 defect. These are possible operating and maintenance problems, with practical ways to narrow their causes and recognize when professional diagnosis is warranted.
The S120 is a 100 Series lawn tractor with a 42-inch mower deck, a V-twin gasoline engine and pedal-controlled hydrostatic drive. Its standard mower engagement is manual. That last detail matters: advice about testing an electric PTO clutch on another Deere model should not be copied automatically to an S120.
Match procedures and parts to the tractor identification number and the engine actually installed. A similar-looking D120, E120 or S130 is not proof of compatibility. Deere’s S120 owner information page provides a useful route to the appropriate manual, maintenance information and parts resources.
Table of Contents
Match the Symptom to the System
Before changing anything, describe exactly what the tractor does. “It has no power” can mean the starter will not turn, the engine is weak, the tractor will not climb or the blades leave uncut grass. That phrase is too broad to justify replacing a battery, carburetor or transmission.
| Symptom | First area to investigate | Important distinction |
|---|---|---|
| Nothing happens when the key is turned | Starting controls, battery and connections | No cranking is different from cranking without firing |
| Starter clicks or turns slowly | Battery performance and cable connections | Working lights do not prove starting capacity |
| Engine turns normally but will not start | Fuel, starting procedure and ignition connection | Do not begin with the transmission |
| Engine stalls as mowing begins | Interlocks, deck resistance and available engine power | An abrupt cutout differs from gradual bogging |
| Engine sounds normal but tractor barely moves | Bypass control, drive belt and transmission input | This is not automatically an engine fault |
| Engine runs but blades do not turn | Manual engagement linkage, belt and deck | An electric clutch diagnosis may not apply |
| Uneven or scalped cut | Tires, blade condition and deck setup | Adjusting the deck before tire checks can mislead |
| Vibration begins after an impact | Blade, spindle and mounting damage | Stop rather than continuing to mow |
| Trouble appears after servicing | Components disturbed during that work | Recheck the recent work before buying unrelated parts |
Write down whether the problem is present cold or only after warming up. Note the terrain, grass condition, cutting height and any recent maintenance. A fault that appeared immediately after a rear wheel was removed deserves a different first inspection from one that developed gradually over a season.
Prepare for Checks Safely
Park on level ground, disengage the mower, secure the tractor with the parking brake, shut the engine off and remove the key. Let moving parts stop and hot parts cool. Follow the manual’s isolation procedure, including disconnecting spark-plug leads where required, before blade or belt work.
Never reach beneath a running deck or inspect a moving belt by removing its guard. Do not rely on the parking brake alone when a procedure requires lifting or working beneath the tractor. Use the prescribed lifting and support method; an unsupported jack is not a safe working support.
Keep children and other people clear of the test area. Perform running checks outdoors, and do not reproduce a fault on a slope simply because that is where it first happened. If steering or braking is unreliable, stop operation and repair it before doing driving tests.
Collect these details before ordering a part:
- The tractor model and product identification number.
- The engine identification, particularly if the engine has ever been replaced.
- The operating hours, maintenance history and date the symptom first appeared.
- Whether the engine, ground drive or blades stop, and what continues running.
Photographs of an accessible belt route or disconnected linkage before disassembly can help avoid mistakes. Keep them focused on the machine and do not dismantle a working assembly solely to produce a photograph. A parts diagram and the correct service procedure remain necessary when reassembly details are uncertain.
The S120 Will Not Crank
Check the Starting Conditions
Begin with the operating controls. Make sure the mower engagement control is fully disengaged and the brake/start conditions specified in the manual are satisfied. Sit properly in the operator position. A lever that looks close to its stop may not be fully in the required position.
Do not bypass a seat, brake or mower interlock to make the starter operate. Those switches are part of the safety system. If a correctly positioned control is not recognized, investigate its adjustment, connector or circuit using the appropriate procedure rather than wiring around it.
Notice whether the result is complete silence, a click or slow cranking. Silence can have several causes, including an open starting circuit or lack of power. A click shows that something is responding, but does not establish that the starter receives enough current to turn the engine.
If the fault is intermittent, note the control position when it occurs without repeatedly forcing the key. An intermittent connection or poorly seated connector can behave differently as the tractor vibrates. A technician can use that pattern to decide where to test instead of replacing switches at random.
Inspect the Battery and Cables
With the machine safely stopped, look for loose terminals, corrosion and damaged cables. Pay attention to the cable connection itself, not just the outside appearance of the battery post. A terminal can look clean on top while contact beneath it is poor.
A battery may power lights and still lack the current needed for starting. Likewise, a recently purchased battery is not proof that the charging and connection systems are healthy. It may have been undercharged, stored poorly or discharged by an unresolved fault.
Use a compatible charger and have the battery tested under appropriate conditions. Avoid deciding that a single resting-voltage reading settles every case. Voltage under load and losses across connections can be more informative, but those tests should be performed correctly by someone comfortable with the equipment.
If a fuse is involved, identify it in the matching manual and replace it only with the specified rating. Repeated failure calls for finding the underlying short or excess current. A larger fuse does not repair the circuit and can allow damage that the original protection was intended to prevent.
Distinguish Slow Cranking From Mechanical Resistance
If the starter turns slowly, battery condition and cable resistance are reasonable first checks. However, they are not the only possible causes. An engine that is unusually difficult to rotate needs further investigation, especially if the symptom appeared suddenly or follows an oil-level problem.
Stop repeated attempts if the starter stalls, cables become abnormally hot or there is an unusual mechanical sound. Continuing to hold the key can damage components without providing useful new evidence. Do not bridge starter terminals as an improvised diagnostic shortcut.
A proper starting-system assessment compares battery performance, circuit voltage drop and starter operation before condemning the engine. This sequence is particularly valuable when an owner has already installed a new battery but the original symptom remains unchanged.
It Cranks Normally but Does Not Start
Use the Correct Cold or Warm Starting Procedure
Check that there is usable fuel in the tank and that the throttle/choke control is positioned as directed for the engine temperature. A cold engine and a warm restart may need different settings. Repeatedly using a full cold-start enrichment setting on a warm engine can complicate the diagnosis.
If the engine starts and then runs roughly, make sure the choke returns to its normal running position. A control or linkage that does not travel fully can leave the mixture unsuitable even though the dashboard lever appears to have moved.
Avoid spraying starting fluid into the intake as a first response. It can obscure the fuel-system question and introduce fire or engine risks. Begin with fuel condition, correct controls and accessible connections rather than trying to force combustion.
Consider Fuel Age and Contamination
A problem that begins after storage should prompt a careful look at the fuel history. Gasoline can deteriorate, and water or debris may enter through storage containers. Adding a small amount of fresh fuel does not remove contaminated fuel already in the tank or carburetor.
Use the grade and ethanol limits specified for the installed engine. If the fuel is suspect, address it using a safe draining and disposal procedure. Fuel-system work should take place with the engine cool, away from ignition sources, using an approved container.
A restricted filter, damaged hose or carburetor contamination can limit delivery. Do not assume that a clear-looking filter proves adequate flow, or that a partly filled transparent filter alone proves failure. The useful question is whether the system delivers fuel as required under the correct test conditions.
If the engine only runs with partial choke after warming up, a lean mixture is a possible direction for diagnosis. Restricted delivery and intake leaks are examples of causes worth checking. That response does not establish which part has failed, and leaving the choke partly applied is not a durable repair.
Check What Was Disturbed Recently
Inspect the accessible spark-plug leads, air-filter installation and visible connectors with the engine off. A plug cap left loose during maintenance can create a no-start or rough-running condition. A filter fitted incorrectly can also introduce a new problem immediately after a service.
Use the engine identification when selecting plugs and filters. Do not substitute a part solely because it screws in or resembles the old one. Plug reach, heat range and specified gap matter, while an incorrect air filter may seal poorly even if its outside dimensions seem close.
If those checks are satisfactory, ignition, compression and fuel-system tests can narrow the remaining causes. Avoid replacing a carburetor and ignition components together unless testing justifies both. Otherwise a successful restart does not tell you which problem existed, while an unsuccessful one leaves several new variables.
Engine Stalls When the Mower Is Engaged
The way the engine stops is important. A clean, immediate cutout as a control moves can fit an interlock or electrical interruption. An engine that labors, slows and then stops can fit excessive deck load or inadequate engine output. These patterns guide testing but are not proof by themselves.
Confirm the operator position and correct engagement procedure first. If the engine cuts when you shift your weight or move a control, have the relevant safety circuit inspected. Do not hold a switch down or disconnect it to keep mowing.
Next inspect the stopped deck for packed debris, a displaced belt or signs of an impact. A binding spindle or idler can place abnormal demand on the engine. Any check requiring belt removal or blade rotation should follow the isolation and support instructions in the manual.
Heavy, wet grass can also overload a deck that is otherwise mechanically sound. Try a higher cutting height and slower travel in suitable conditions after basic checks are complete. Use the specified mowing throttle setting; reducing engine speed while retaining a heavy grass load may make the cut and power complaint worse.
If the tractor stalls whenever the deck is engaged even in an already cut area, grass volume is a less convincing explanation. That result points attention back toward deck resistance, engagement operation or an engine unable to support normal mowing demand.
It Stops When Reversing
The reverse-operation safety arrangement can explain a shutdown that appears only when reversing with the mower engaged. Review the exact operator procedure and the purpose of the reverse implement option before treating this as a carburetor or transmission fault.
Avoid mowing in reverse whenever possible, check behind you and keep bystanders away. Do not disable the safety system for convenience. A procedure intended for a controlled reverse operation does not remove the need to look for people and obstacles.
If the engine stops while reversing with the mower disengaged, or the behavior differs from the manual, the safety circuit and controls need further investigation. Describe the exact combination of travel direction and mower position to the technician; “dies in reverse” leaves out a critical detail.
Engine Runs Well but the Tractor Will Not Move
Check the Freewheeling or Bypass Control
If the tractor was pushed by hand, transported or moved during maintenance, check the transmission bypass control first. A bypass left in the freewheeling position can imitate a major drive failure. Restore it exactly as described in the manual before testing on level ground.
Do not tow the tractor at road speed or force it to move with the bypass incorrectly positioned. The ability to push a machine for positioning does not mean its hydrostatic system is designed for unrestricted towing.
If correcting the bypass position restores drive, verify normal forward and reverse response in a clear level area. A control that will not stay in its proper position still needs attention. Do not regard intermittent engagement as a satisfactory repair.
Inspect the Drive Path
The engine drives the transmission through a belt system separate from the mower-deck belt. A deck that cuts normally therefore does not prove the drive belt is healthy. Likewise, a tractor that moves normally can still have a deck-belt problem.
With the engine stopped and all motion isolated, inspect accessible belt condition and routing. A belt can be present yet slip because it is worn, contaminated, incorrectly routed or inadequately tensioned. An idler or tensioning problem may cause symptoms even when the belt itself is relatively new.
Keep oil and belt dressing off the belt unless the manufacturer explicitly specifies a product. A coating that briefly changes grip can hide a mechanical problem and contaminate surrounding components. Correct the cause of any oil leak before installing another belt.
If a belt was recently replaced, confirm the exact part and routing before assuming the transmission failed at the same time. A near-match belt can create incorrect tension or engagement behavior. Use the model-specific diagram rather than memory from a different lawn tractor.
Remember Recent Rear-Wheel Work
If loss of drive began immediately after rear-wheel removal, check that all required drive hardware was reinstalled correctly. A missing or displaced wheel key can allow an axle to turn without transmitting drive properly to the wheel. This is a particularly useful clue because it can mimic a much more expensive failure.
The inspection must be done with the tractor safely secured and supported according to the manual. Do not look for a rotating axle while someone operates the pedals beside an unsupported machine. If the hardware arrangement is unfamiliar, have the wheel installation checked professionally.
Drive Becomes Weak After Warming Up
Separate engine speed from ground speed. If the engine also slows or misfires, investigate engine output and mowing load. If the engine sounds steady while the tractor gradually loses travel response, the belt, transmission input, cooling and hydrostatic system become more relevant.
Inspect the transmission’s external cooling areas and fan where accessible with the machine shut down. Packed grass and debris can interfere with cooling. A damaged fan or obstructed airflow deserves correction rather than repeated hot-running tests.
Do not immediately add oil to the transmission. Serviceability, fluid specification and the correct procedure depend on the installed unit. A plug or opening that appears convenient is not proof of an owner-service fill point. Guessing fluid type or level can make the problem worse.
A dealer or qualified repairer can distinguish belt slip, linkage travel and internal hydrostatic wear. Give them the warm-up time, whether both directions are affected and whether the engine speed changes. These observations help establish a repeatable test without deliberately overloading the tractor.
Avoid testing on a steep slope to prove that drive is weak. Use a clear level area within the operating instructions. A tractor that loses predictable drive or braking response should be repaired before returning to work near hazards.
The Blades Will Not Engage
The standard S120 uses a manual mower engagement system. Start with the lever, cable or linkage, tensioning mechanism and belt route applicable to the machine. Advice centered on an electric PTO clutch coil can send an S120 owner toward a component their tractor does not use for deck engagement.
A manual system can still include an electrical safety switch. “Manual engagement” does not mean every associated problem is mechanical. The distinction is between how the belt is engaged and how the safety system monitors the control position.
With the tractor isolated, check whether the engagement mechanism moves through its intended travel and whether anything is visibly disconnected or damaged. Do not reach into the mechanism while someone moves the lever unless the procedure explicitly provides a safe method.
If the lever moves unusually freely, suspect a disconnected or failed part of the mechanical path before buying an engine component. If the lever feels abnormally stiff, stop forcing it and investigate binding. Either symptom is more informative than simply reporting that the blades do not work.
If the blades turn but stop in grass while the engine keeps running normally, belt slip or excessive deck resistance may be involved. If the engine dies at engagement, return to the stalling diagnosis. The same operator complaint can therefore point toward different systems depending on what the engine does.
Uneven Cutting, Strips and Scalping
Check Tire Pressures Before Adjusting the Deck
The deck is suspended from the tractor, so unequal tire conditions can change its relationship to the ground. Check cold tire pressures against the specified values for the installed tires and tractor. Do not assume the maximum number on a tire sidewall is the operating target.
Inspect for a slow leak or a tire with a different size or profile after replacement. Adjusting the deck to compensate for an underinflated tire may make the cut wrong again as soon as the tire is corrected.
Then assess the cut on reasonably level ground. A single uneven patch does not prove the deck is misadjusted; terrain and wheel position can affect the result. Look for a repeatable side-to-side difference under comparable conditions.
Inspect Blades and Deck Condition
Dull, damaged or incorrectly installed blades can produce poor results even when the deck is level. Stop and isolate the machine before inspection. A blade damaged by an impact may need replacement rather than sharpening, and the mounting hardware must be checked as part of that assessment.
Use the correct blade design for the deck and intended discharge, bagging or mulching arrangement. A blade that physically fits is not necessarily suitable. Confirm orientation and tightening requirements from the matching instructions rather than relying on appearance.
Packed grass beneath the deck restricts the space needed for effective cutting and discharge. Clean it using a safe method after isolation. Do not reach into the discharge opening with the engine running or attempt to clear a blockage by hand while parts can move.
Set the Deck Only After the Basics Are Right
Use the S120 deck-leveling procedure and its specified measuring points. Side-to-side level and front-to-rear pitch are different adjustments. Copying a generic measurement from another deck can create a poor cut even if the adjustment is carried out neatly.
A strip of uncut grass may involve blade condition, overlap, travel speed or a deck fault. Check whether it appears consistently in the same part of the cutting width. A repeatable pattern is more useful than a general impression that the mower “misses bits.”
For tall grass, reduce the amount removed in a pass and choose appropriate dry conditions. Travel speed should suit the crop being cut. A tractor can be mechanically healthy and still leave a poor finish when asked to remove too much wet growth at once.
Vibration, Squealing or New Mechanical Noise
Stop promptly if vibration begins after striking an object. Inspect blades, mounting points and the deck for damage using the required isolation and support procedure. Continuing to mow can worsen a bent or loose component and create a thrown-object hazard.
Notice whether vibration is present with the deck disengaged. If it begins only when the mower runs, the deck and its drive deserve attention. If it exists with the deck off, the engine, mounts or ground-drive system may need investigation instead.
A squeal is not proof that a belt merely needs tightening. A seized or rough idler, contamination or incorrect routing can also be involved. Replacing the belt without correcting a damaged pulley can leave the new belt exposed to the same problem.
Do not attempt to straighten a damaged blade or run an intentionally loose assembly to locate a noise. Professional inspection is appropriate when there is uncertainty about a spindle, shaft or structural mounting point.
Oil, Easy Change and Overheating Confusion
The S120’s Easy Change arrangement is an engine-oil service system. It should not be confused with transmission maintenance. Replacing its canister is also not the same operation as draining the entire crankcase and refilling from empty.
Check which system is actually fitted, especially on a used tractor that may have been converted. Follow the correct procedure for that arrangement. Adding the engine’s full dry capacity after a partial exchange can overfill it, so the final level check matters more than an assumed refill quantity.
Park level and use the specified dipstick method. Investigate an unexpected rise or fall in oil level, visible leakage or oil that smells strongly of fuel. Repeatedly correcting the level without identifying the cause may leave a serious problem unresolved.
The engine is air cooled. Keep the cooling intake and accessible cooling areas clear as instructed. A radiator-flushing solution copied from a liquid-cooled tractor does not apply. Avoid forcing water into electrical or intake areas while trying to remove grass and dust.
Heat-related loss of power needs more than a quick oil top-up. Consider airflow, oil level, mowing load and the engine’s running condition. If the engine knocks, smokes heavily or repeatedly loses power after warming, stop and obtain a diagnosis before continuing strenuous use.
A Controlled Test Saves Time
After correcting an identifiable issue, test under safe, repeatable conditions. Begin on level ground with the mower disengaged, then assess the repaired function according to the manual. Do not make the first test a return to the steepest slope or deepest grass on the property.
| Observation after a safe test | What it suggests checking next | What to avoid concluding |
|---|---|---|
| Engine is smooth until the deck engages | Deck load, engagement and interlocks | That the transmission must be failing |
| Engine stays steady but travel fades | Drive belt, linkage, cooling and hydrostatic diagnosis | That more throttle fixes every drive issue |
| Correct tire pressure improves the cut | Tire condition and remaining deck setup | That a deck adjustment was necessarily required |
| New fuel changes starting behavior | Remaining fuel-system condition | That every ignition component is proven healthy |
| Problem starts immediately after maintenance | Recently disturbed parts and installation | That the timing is automatically coincidental |
| A replaced part makes no difference | Reassess the diagnosis with measurements | That the next expensive part must be the answer |
Record the result honestly. “Better for five minutes” is different from a repair verified over normal operating conditions. If the symptom returns, that information can help a repairer investigate heat, vibration or load dependence without repeating the whole parts-replacement sequence.
Maintenance and Parts Decisions
Use the schedule for the actual machine and its operating conditions. Keep a record of hours, dates, oil work, filters and blade service. Dusty mowing and heavy debris require particular attention to cleaning and inspection, even when a calendar service is not yet due.
For parts, use the product identification number through the John Deere parts catalogue. Confirm the relevant assembly and any serial-number distinctions. A seller’s broad compatibility title should not override the manufacturer’s identification information.
Before a service visit, prepare:
- A clear description of what stops and what continues operating.
- The cold-versus-warm pattern and approximate time before the symptom appears.
- Recent repairs, parts fitted and whether each made any difference.
- Photographs of visible damage or an incorrect assembly, taken with the tractor stopped.
For procedures such as belt replacement, lifting, deck leveling and safety-system checks, use the 100 Series operator manual that matches the tractor’s identification. If the online viewer does not open, obtain the correct edition through Deere’s owner-support page or a dealer.
Frequently Asked Questions
Why Does My S120 Click but Not Start?
First establish whether the engine actually turns. A click without cranking directs attention toward battery performance, connections and the starting circuit. Working headlights do not settle the battery question. Test before replacing the starter, and stop repeated attempts if cables heat or the starter stalls.
Why Does the Engine Run but the Tractor Will Not Move?
Check whether the bypass was left in the pushing position, particularly after transport or maintenance. Then inspect the correct drive belt and related mechanism. If rear wheels were recently removed, verify the required drive hardware. These checks can prevent a premature transmission replacement.
Does the S120 Have an Electric PTO Clutch?
The standard S120 mower engagement is manual. Its engagement and safety components should be identified from the correct diagram before applying repair advice. A manual deck system may still use electrical interlock switches, so the word “manual” does not eliminate the safety circuit from diagnosis.
Why Is the Cut Uneven After I Adjusted the Deck?
Recheck tire pressures, tire condition, blade condition and the ground used for measurement. Then verify that the adjustment followed the specified measuring points and front-to-rear requirements. An adjustment performed before correcting a low tire can leave the deck wrong once the tire is reinflated.
Can I Add Oil to Fix a Weak Hydrostatic Transmission?
Do not assume that is the correct or permitted service. First distinguish engine weakness from loss of drive and check external causes such as the bypass, belt and cooling. Fluid access and service procedures depend on the installed transmission. Incorrect fluid or level can create additional damage.
When Should I Stop Using the Tractor?
Stop for unreliable brakes or steering, fuel leakage, severe vibration, damaged blades, smoke from an electrical fault or recurring mechanical noise. A machine that cannot be controlled predictably should not be used to finish the lawn. Repair the cause and verify safe operation before returning it to work.