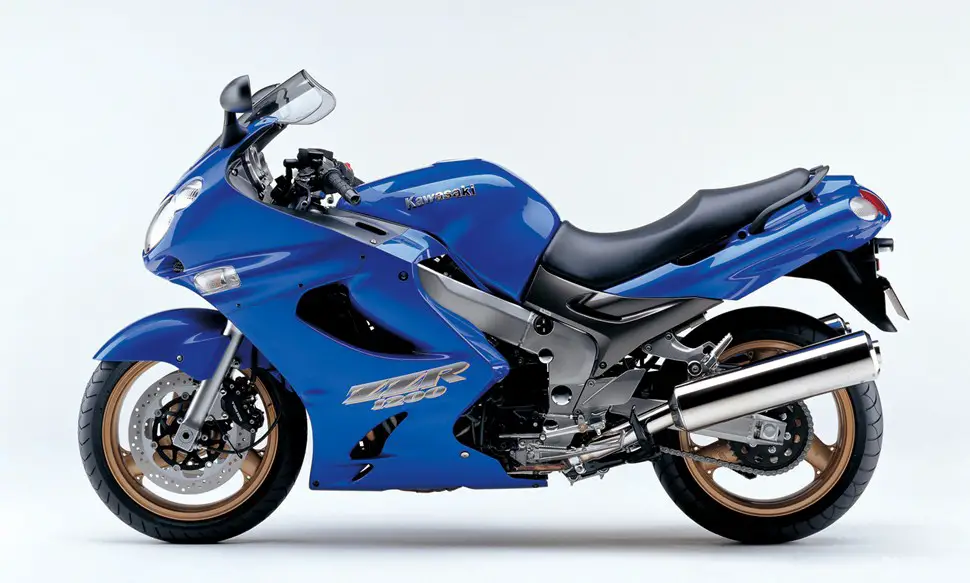
The Kawasaki ZZR1200 represents a unique moment in sport-touring motorcycle history: the most powerful production carbureted motorcycle ever built. Produced from 2002 through 2005, this 1,164cc inline-four delivered 158 horsepower while maintaining the proven simplicity of carburetion when competitors rushed toward fuel injection. For owners and prospective buyers, understanding the ZZR1200’s specific problem patterns, preventive maintenance requirements, and solutions proves essential to maximizing this machine’s considerable 100,000-mile-plus longevity potential.

The ZZR1200 succeeded the legendary ZX-11 and preceded the fuel-injected ZZR1400, positioning itself as a high-performance sport-tourer capable of sustained triple-digit speeds while carrying two-up luggage. All model years utilize four Keihin CVKD40 constant-velocity carburetors, a hydraulic clutch system, and liquid cooling. The engine produces 145 horsepower at the rear wheel with 87 pound-feet of torque, propelling 595 pounds to a 186-mph electronically limited top speed.
Kawasaki maintained remarkable consistency across the four-year production run, with models C1 through C4 sharing virtually identical specifications and no documented technical service bulletins or safety recalls—suggesting fundamental engineering soundness despite specific recurring issues that demand attention.
This comprehensive guide examines seven critical problem categories affecting the ZZR1200, drawing from extensive owner forum discussions, technical service experiences, and long-term reliability reports. Understanding these patterns and implementing proper preventive maintenance enables owners to extract maximum value and reliability from these increasingly appreciated sport-touring machines.
Table of Contents
Engine and Performance Problems
The ZZR1200’s inline-four engine, derived from the ZRX1200R powerplant with ZX-12R reinforced pistons and rebalanced crankshaft, generally delivers exceptional reliability when properly maintained. However, several specific issues emerge with sufficient frequency to warrant careful attention.
Valve Clearance Adjustment Requirements
Valve clearance issues represent the most critical scheduled maintenance item for ZZR1200 longevity. The engine utilizes shim-under-bucket valve adjustment with specifications of 0.10-0.20mm for intake valves and 0.20-0.30mm for exhaust valves. Kawasaki recommends inspection every 7,500 miles, though many owners report stable clearances extending 20,000 miles after initial adjustment.
The symptom pattern typically manifests as valve tapping or ticking noise varying with engine RPM. One experienced owner reported: “All but two of my intake valves, along with 3 of my exhaust valves, were out of spec at 15,000 miles.” Most commonly, valves tighten over time as valve seats wear deeper into the head—a normal wear pattern that demands correction. Neglecting valve adjustments creates cascading problems: excessively tight valves prevent proper seating, causing compression loss, valve burning, and potential catastrophic piston-valve contact in severe cases.
Troubleshooting requires removing the valve cover—time-consuming due to upper fairing removal but mechanically straightforward once accessed. Measuring clearances with feeler gauges identifies which of the 16 valves require new shims. Individual OEM shims cost approximately $3-10 each, with most adjustments requiring 6-10 shims. Complete aftermarket shim kits range from $70-80. Professional valve service typically costs $260-300 including parts and labor. DIY costs drop to $20-60 for shims plus several hours of careful work.
The solution involves calculating required shim thickness changes based on measured clearances, ordering correct replacement shims, and installing them under the valve buckets. One owner noted the labor-saving reality: “Getting the tank, airbox, coils, and some plumbing out of the way is the hard part. Checking and adjusting the valves is easy peasey.” Critical prevention strategy: perform the first check at 7,500-15,000 miles without exception. After initial adjustment, most engines stabilize for extended intervals.
Oil Leakage from Gaskets and Seals
Oil seepage affects high-mileage ZZR1200s with predictable patterns, primarily manifesting at the valve cover gasket, spark plug well seals, and pulsar cover. The most problematic failure point involves the figure-8 spark plug well gaskets that prevent oil migration into plug wells—these deteriorate predictably and cost only $5-10 for a complete set yet cause significant operational issues when failed.
Symptoms include oil residue accumulating on the left side of the engine block, oil visible on side panels, and critically, oil pooling in spark plug wells causing misfires. One owner described the discovery: “I currently have my 04 ZZR1200 stripped down to repair the plastics on it and have noticed the left side of my engine block has significant oil buildup to the point that it was leaving residue on my side panel.”
Root causes center on gasket compression over time and heat cycling degrading rubber components. The valve cover gasket requires particular attention during installation—applying thin silicone sealant at corners and cam cutouts prevents weepage at high-stress points. The complete cam cover gasket set costs approximately $60-80, with labor adding $150-300 if professionally installed.
Solutions involve systematic gasket replacement when evidence of leakage appears. Replace spark plug well gaskets preventively during any valve cover removal. Replace valve cover gasket sets completely rather than attempting reuse. One owner noted solving persistent oil consumption: “I was suspicious of my cam cover gasket for the amount of oil I seemed to be getting through. However I was also coming across some weepage at the top of the pulsar cover after a longer run. Having replaced that gasket I do not seem to be getting any of the high oil consumption I was getting before, the level has stayed put the last 1500 odd miles.”
Cam Chain Tensioner Noise and Adjustment
The ZZR1200 employs an automatic cam chain tensioner that occasionally sticks or fails to maintain proper tension, creating rattling or tapping sounds from the left engine side during startup. This differs acoustically from valve noise and typically dissipates as the engine warms. Importantly, the cam chain itself rarely requires replacement even at 95,000+ miles—the tensioner adjustment mechanism represents the actual issue.
A simple reset procedure resolves most cases without removal: with the engine cold, loosen the two tensioner mounting bolts 1/4 to 1/3 turn (not more or complete reset occurs), lightly tap the center bolt with a wrench handle or dead-blow hammer to free the stuck mechanism, then retighten mounting bolts. Multiple owners report immediate noise reduction: “I used the BradleyRAS method and the noise from the engine was cut in half. Great tip.”
Aftermarket manual cam chain tensioners from APE provide superior adjustability for those desiring more control, though the automatic system works reliably when functioning properly. The more problematic related issue involves the starter/alternator chain tensioner on the right side—this component can fail catastrophically, allowing the chain to strike the clutch basket. Evidence appears as dings or impact marks visible on the clutch basket through the oil filler cap. The aftermarket “Tensioner Tamer” modification (approximately $15) prevents this costly damage pattern.
Camshaft Pitting in Early Models
Early 2002 model ZZR1200s, specifically those built before February 2002 with serial numbers below 5000, experienced camshaft pitting issues—a metallurgical defect in cam lobe hardening rather than an oiling problem. This manifested as visible pitting on intake cam lobes, particularly affecting cylinder #1, discovered during valve clearance inspections.
One owner at 7,452 miles reported: “I am doing the 7500 mile valve clearance check when I found that the #1 cylinder intake cam lobes (two) were gauled and pitted. The #2 cylinder intake cams show early signs of wear.” Kawasaki replaced cams and rocker arms under warranty for affected early bikes, with many international markets honoring coverage even outside normal warranty periods.
Critically, the consensus among high-mileage owners distinguishes between cosmetic surface pitting (which many describe as harmless “acid etching” from the metallurgical process) and severe pitting requiring replacement. A UK courier with extreme mileage stated: “I am a long distance motorcycle courier in the UK, I ride the ZZR1200 C1H every day, all day. I have had a few of these bikes. All have had pitted cams. No issue. Do not worry about it.” Another experienced owner confirmed: “I would bet that 90% of the early model ZEDs are still running today with pitted cams and no issues. My 03 has pitted cams and still runs fine at over 100K miles.”
The solution depends on severity. Minor pitting requires monitoring but typically does not progress. Severe pitting with material loss demands cam replacement, typically costing $500-900 in parts plus $500+ labor. Buyers examining 2002 models should remove the valve cover for inspection, understanding that minor pitting represents normal aging rather than impending failure.
Power Loss at High Mileage
ZZR1200s experiencing power degradation after 50,000-55,000 miles typically suffer from accumulated wear rather than specific component failure. Symptoms include reduced top-end power, black exhaust smoke indicating rich running or oil burning, and hesitation during acceleration. One source notes: “ZZR1200 has an incredible engine to get high mileage on the move. Typically, you may not face any power loss or changes in this bike. However, some users have found that their bikes lose power after 50-55K miles.”
Troubleshooting begins with compression testing across all cylinders—normal readings fall between 109-170 PSI with minimal variation between cylinders. Check oil condition and level, inspect air filter restriction, verify fuel quality and delivery, and examine exhaust for blockages. Carburetor synchronization and jetting issues frequently masquerade as engine wear.
Solutions range from simple maintenance—oil change with proper viscosity, air filter replacement ($20-40), carburetor cleaning and synchronization—to major service including valve adjustment, piston ring replacement, or complete engine overhaul ($1,000-2,000+). Many high-mileage engines respond dramatically to carburetor cleaning and proper synchronization, restoring lost performance without mechanical intervention. Prevention centers on religious oil changes every 3,500 miles maximum, using motorcycle-specific MA/MA2-rated oil exclusively, and addressing carburetion issues promptly rather than allowing lean or rich conditions to persist.
Fuel System and Carburetion Problems
The ZZR1200’s quartet of Keihin CVKD40 carburetors represents both a strength—proven technology with straightforward troubleshooting—and a vulnerability requiring specific maintenance attention. Understanding carburetor circuit operation and common failure patterns proves essential for reliable operation.
Pilot Jet Circuit Blockage and Cleaning
Pilot jet circuit problems represent the single most common ZZR1200 fuel system issue, particularly affecting bikes subjected to storage with ethanol-containing fuel or those sitting unused for extended periods. The pilot circuit controls idle and low-RPM operation, and its small passages gum readily with varnished fuel deposits.
Symptoms present distinctively: the engine will not idle without choke applied, rough running below 4,000 RPM that smooths at higher revs, popping and surging at low throttle openings, and in severe cases, only certain cylinders firing. One frustrated owner described: “2002 ZZR1200. Just got back from Iraq… I got the bike started, but could not take the choke off because it would die. It would not keep running without the choke on. I reached under while it was running to see if the four pipes were hot. Only 1 and 4 were hot.”
Root causes center on varnish deposits blocking the tiny pilot jet orifices and passages. Ethanol-blended pump gasoline absorbs moisture and degrades rapidly during storage, leaving sticky residue that hardens into obstructions. Additionally, the pilot air adjustment screw o-ring deteriorates, the float needle valve wears developing grooves allowing flooding, and water contamination creates corrosion in circuits.
The pilot jet “shotgun” cleaning procedure offers a shortcut without complete carburetor removal: lay paper towels beneath carburetors, carefully unscrew pilot jet assemblies, spray carburetor cleaner forcefully up the passages while applying compressed air, listen for proper flow through the carburetor body, and reinstall with new o-rings. However, complete carburetor removal and ultrasonic cleaning provides superior results for severely gummed systems.
Full cleaning involves removing all rubber components before chemical cleaning, spraying carb cleaner through every passage while verifying flow exits at expected points, inspecting float needle valves for worn grooves on the sealing tip, checking spring-loaded pin operation, and measuring float height (specification: 13mm from gasket surface). The idle air adjustment screw assembly—consisting of o-ring, washer, spring, and needle jet—requires particular attention as deteriorated o-rings cause vacuum leaks.
Solutions begin with carburetor synchronization using vacuum gauges (CarBtune or Motion Pro units cost $50-150) after any cleaning work. Install carburetor rebuild kits ($50-100) including all gaskets and o-rings. Replace float needle valve sets ($20-30 for five needles) preventively during major service. Many owners implement the common needle shim modification: install 0.020-inch shims under needles and adjust pilot screws 2.5-3.0 turns out rather than the factory 1.5 turns, dramatically improving low-RPM operation.
Professional carburetor overhaul costs $300-500 but provides comprehensive service including jet kit installation if desired. Factory Pro and 6Sigma Racing offer jet kits ($100-150 DIY, approximately $300 installed) that resolve many running issues while improving power delivery. One owner summarized the value proposition: “The zed carbs have a lot of tricky nuances. I have said it 50x here.. Send them to Raul and or someone similar… $300 later with factory pro jet kit installed.. NEVER had one fueling issue. 60k miles on the zed.”
Fuel Pump and Delivery System Failures
The ZZR1200’s dual electric fuel pump system maintains approximately 3 PSI pressure to gravity-assist the carburetors. Pump failures typically manifest as intermittent running problems, sudden stalling during operation, inability to maintain speed, or no-start conditions despite proper cranking. The pumps emit an audible clicking during operation—absence of this sound during key-on indicates pump or electrical failure.
Testing procedures include listening for pump activation during key-on, measuring fuel pressure at the pump outlet (should achieve 3 PSI), checking for steady fuel flow from the petcock (should shoot out 2-3 inches rather than dribble), verifying pump relay operation, and inspecting wiring connections for corrosion. The vacuum-operated petcock can fail, blocking fuel delivery even with functioning pumps.
One owner described persistent issues: “I am still randomly losing power to my fuel pump where it is not priming and at this point I have literally replaced almost everything…I can ride the bike all day with zero problems but the next day the fuel pump will only work 50% of the time or less.” This pattern often indicates electrical connection problems rather than pump failure.
Solutions involve replacing failed fuel pumps ($50-150 each), cleaning all electrical connections with contact cleaner, testing and replacing the fuel pump relay ($20-40), and rebuilding or replacing the vacuum petcock if fuel flow testing indicates restriction. The electric fuel cut-off valves on carburetor bottoms—designed to prevent fuel flow if the bike tips over—occasionally stick and require testing. Fuel filter replacement ($10-20) should accompany any fuel system work, as contamination patterns indicate upstream tank condition.
Carburetor Synchronization Requirements
Carburetor synchronization—balancing the vacuum draw of all four carburetors—proves essential for smooth operation, particularly after any carburetor service or cleaning. Symptoms of out-of-sync carbs include rough idle, vibration at specific RPM ranges, uneven power delivery, and poor throttle response.
The procedure requires vacuum gauge tools designed for four-cylinder applications, with either mercury columns or dial gauges connected to vacuum ports on intake manifolds. With the engine at full operating temperature, balance all four carburetors to identical vacuum readings at 1,000-1,100 RPM idle. The adjustment screws between carburetor bodies alter throttle plate opening to equalize airflow. Professional synchronization costs $75-150 and typically accompanies major service intervals.
Fuel Starvation and Flooding Conditions
Sudden stalling during operation, hard starting after the engine reaches operating temperature, wet spark plugs, and in extreme cases, dramatic shotgun backfires indicate fuel delivery extremes requiring attention. One owner reported: “Guys n girls I got a Kawasaki zzr1200 and she has run superb until last week when it felt like it was running out of fuel and stopped had plenty of fuel so changed the fuel filter ran ok after for about 100 miles then it started again and finally died.”
Troubleshooting distinguishes between starvation (insufficient fuel) and flooding (excessive fuel). Check fuel tank vent hoses for blockage, test petcock flow volume, inspect fuel lines for deterioration or collapse, examine float needle seating and float height, and verify carburetor bowl gaskets seal properly. Stuck float needles allow continuous fuel flow, overfilling carburetor bowls and causing rich running or flooding.
Transmission and Clutch Issues
The ZZR1200’s six-speed transmission and hydraulic clutch system generally provide reliable service but experience specific recurring problems requiring systematic troubleshooting and maintenance.
False Neutral and Shifting Difficulties
False neutrals between gears represent the most commonly reported transmission complaint, particularly between first and second gear but also occurring between fourth-fifth and fifth-sixth under load. Symptoms include the shifter feeling loose or in a “dead zone” between gears, missed shifts when not shifting firmly, and clunky engagement from neutral to first gear (though the latter represents normal ZZR1200 characteristics rather than a defect).
One frustrated owner described: “Having issues when shifting from 1st to second. Getting a lot of neutral hits as of late. Plus it is clunky sometimes from first to second and second to first. The neutral issue seems to happen most when she is hot and at higher RPMs.”
Root causes include weak shift detent springs (part #92144-1856) from the factory, worn or bent shift forks, rounded engagement dogs on second and third gears from improper shifting technique or clutchless shifting, incorrect shifter lever position preventing full engagement, and improper oil viscosity affecting shift quality. Importantly, the ZZR1200 incorporates an intentional neutral lockout feature—the transmission shifts between first gear and neutral only when moving below 5 mph or stopped, designed to help novice riders but confusing experienced operators.
Troubleshooting begins with adjusting shifter lever position lower by 1-2mm increments, verifying complete clutch disengagement, changing to proper motorcycle-specific oil (10W-40 or 20W-50, never automotive oil with friction modifiers), testing with firm positive shifts rather than incomplete movements, and inspecting shift detent spring condition. Many false neutrals result from incomplete shift lever travel rather than worn internal components.
The Factory Pro shift kit provides a comprehensive solution for $60-200, including stronger detent spring, upgraded roller arm, and machined shift star for more positive gear engagement. Installation requires 2-3 hours and clutch cover removal but dramatically improves shift quality. One owner confirmed: “The factory pro shift kit will eliminate missed shift problems. I have one in my 2007 ZZR. 30,000 miles so far no problems.” For severe cases involving worn shift forks, repair requires engine case splitting at $400-800 parts and labor—fortunately relatively rare with proper maintenance and shifting technique.
Hydraulic Clutch System Failures
The ZZR1200’s hydraulic clutch actuation proves more problematic than the clutch friction components themselves, with master cylinder and slave cylinder seal failures creating progressive clutch disengagement problems. All model years 2002-2005 utilize identical hydraulic systems with DOT 4 brake fluid.
Progressive symptoms develop over several thousand miles: the clutch lever must be pulled progressively farther to disengage, downshifting becomes increasingly difficult especially into first gear, finding neutral becomes problematic, and the bike creeps forward even with clutch fully pulled. One high-mileage owner described: “Over the last couple of months (say 5,000 miles) I have had to pull the lever further and further in to disengage the clutch and now it will not disengage completely when I pull the lever in. Downshifting is very difficult, especially into first.”
The most common root cause involves slave cylinder piston seal failure—a small tear prevents fluid from returning to the master cylinder, progressively building pressure in the system. The master cylinder presents different failure patterns: the small transfer hole (approximately 0.5mm diameter) becomes blocked with crystallized brake fluid preventing proper pressure release, internal seals deteriorate allowing bypass, and corrosion creates internal binding.
Troubleshooting distinguishes between components: bleed the clutch system thoroughly and monitor for immediate problem return, crack open the slave cylinder bleed nipple when the clutch is not engaged—if fluid shoots out under pressure, the hydraulic system is inappropriately pressurized, remove and inspect the master cylinder focusing on the tiny transfer hole in the bottom of the fluid reservoir (clear this carefully with a 0.5mm drill or fine wire), and examine slave cylinder piston seal condition for tears or degradation.
The solution pathway typically begins with comprehensive bleeding using fresh DOT 4 fluid and preferably a vacuum bleeder (MityVac or similar). If problems persist, install slave cylinder rebuild kit ($20-40 from eBay or aftermarket suppliers) replacing the critical piston seal. Master cylinder rebuild kits ($30-50) address most remaining issues. One owner’s experience validates the stepped approach: “So it seems it was the clutch slave cylinder piston seal. I replaced it yesterday and rode today with no problems. Glad to have it sorted out… though, as usual, it was the THIRD thing I replaced and I spent almost $250 to figure it out.”
Upgrading to braided stainless steel clutch line ($80-120) improves lever feel and prevents internal expansion common with rubber lines. Complete new master cylinders cost $120-180, while new slave cylinders run $65-90. Total DIY repair costs range $20-150 depending on component replacement needs, while shop repair typically costs $200-400.
Clutch Slippage and Friction Plate Wear
Clutch slippage—engine RPM rising without corresponding acceleration, most noticeable above 6,000 RPM under hard acceleration—indicates friction plate wear or improper oil type. The problem typically worsens as the bike heats up, starting acceptably cold but slipping after 20-30 minutes of operation.
Incorrect oil type represents the most overlooked cause of clutch slip on ZZR1200s. The wet multi-plate clutch shares engine oil with the transmission and engine internals. Automotive oils containing friction modifiers (designated “Resource Conserving” or “Energy Conserving” on the API label) cause clutch plates to slip dramatically. One owner discovered: “After the engine transplant, I put in the STP brand 10-30 oil… It may well be inferior in some way to the Rotella or specialty motorcycle oils and causing the slippage. I changed to Rotella 15W40 and after 100 miles the slippage is gone.”
Normal friction plate wear occurs at 30,000-60,000 miles depending on riding style. Symptoms include measurable plate thickness below service limits, glazed or burnt friction material surfaces, and warped steel separator plates. Weak clutch springs (another potential cause) reduce clamping pressure allowing slippage even with adequate plate thickness.
Troubleshooting begins with verifying oil type—it must be MA or MA2-rated motorcycle-specific oil without friction modifiers. Recommended brands include Rotella T-6 15W-40, Motul 7100, and Shell Advance. Test for hydraulic pressure buildup by cracking the slave cylinder bleed nipple when hot—unexpected pressure release indicates master cylinder problems rather than clutch wear. Measure friction plate thickness against service manual specifications and inspect steel plates for warping using a straightedge.
Solutions begin with the simplest: change to proper motorcycle oil ($30-50) and monitor for one week. If slippage persists, replace friction plates ($80-150 for OEM or EBC units) and inspect clutch basket for wear grooves—file these smooth if present. Complete clutch kits including Kevlar friction plates, steel plates, and heavy-duty springs (EBC SRK series) cost $200-250 and reset the entire clutch pack. Heavy-duty springs alone ($40-60) sometimes resolve slippage without plate replacement.
Installation requires removing the right side engine cover and clutch cover gasket ($15-25), draining some oil, and careful torque specifications during reassembly. Total DIY rebuild costs $300-400, while professional service adds $200-400 labor. Critical tip: soak friction plates AND steel plates in engine oil overnight before assembly to ensure proper initial lubrication and prevent juddering during break-in.
Electrical and Starting Problems
The ZZR1200’s electrical system design—with separate rectifier and regulator components and a robust 607-watt alternator—generally provides adequate charging capacity but experiences specific failure patterns requiring systematic diagnosis.
Stator and Regulator-Rectifier Failures
Charging system component failure represents the most significant electrical problem affecting ZZR1200s, typically manifesting after 30,000-50,000 miles. Symptoms progress from battery requiring frequent charging, voltage dropping below 13.5V at higher RPMs, intermittent charging that works cold but fails when hot, complete battery drain if the bike sits five days, and lights dimming when revving.
The stator (alternator) generates three-phase AC power through coils wound on the left engine cover. Testing requires disconnecting the three-wire stator connector and measuring resistance between each pair of wires (specification: 0.2-1.0 ohms) and each wire to ground (should read infinite resistance/open loop). Dynamic testing with the engine running at 3,000-5,000 RPM should produce 60-70+ volts AC between any two stator wires.
The regulator-rectifier converts AC to DC and regulates voltage to 13.5-14.7V. Testing involves measuring battery voltage while running at 5,000 RPM—proper voltage should remain in specification. The ZZR1200’s unique separate rectifier and regulator design creates additional failure points compared to combined units.
Root causes include stator coil insulation breaking down from heat cycling, regulator-rectifier overheating from poor mounting location with inadequate airflow, corroded connections between components creating resistance and heat, and poor grounding causing voltage regulation issues. Shunt-type regulators generate significant heat, which accelerates both regulator and stator deterioration.
Solutions involve replacing both stator and regulator-rectifier together ($200-500 DIY for aftermarket components; $600-1,000+ at dealers) since failure of one typically damages the other. Upgrade options include MOSFET-type regulators producing less heat and greater efficiency, relocating the regulator-rectifier to improve airflow, running dedicated ground wires from the R/R directly to the battery negative terminal, and upgrading wiring with heavier gauge wire for reduced resistance.
Preventive maintenance includes cleaning all electrical connections annually with electrical contact cleaner, applying dielectric grease to connection points, inspecting for melted or discolored connectors indicating excessive resistance, and monitoring charging voltage regularly. Rick’s Motorsport Electrics and Roadster Cycle provide quality aftermarket components with improved designs addressing OEM limitations.
Starter Motor and Starter Clutch Problems
Starter system issues present as grinding sounds during cranking, the starter spinning without engine turnover, weak cranking despite good battery condition, clicking without cranking, or intermittent operation. One owner described: “I was leaving the grocery store and tried to start it and just got an ugly sound from starter if it was a car I would say the starter drive was not engaging.”
The starter motor itself rarely fails but brushes wear eventually. The starter clutch—a one-way bearing allowing the starter to spin the engine while preventing the running engine from spinning the starter—represents the more serious failure point. Critically, starter clutch replacement requires splitting engine cases at $800-1,500+ labor plus $150-300 parts, making this one of the more expensive potential repairs.
Troubleshooting distinguishes between components: verify battery voltage exceeds 12.6V at rest and remains above 10V during cranking, test voltage at the starter motor terminal during button press (should receive 12V), jump the starter relay connections directly to test relay function, remove and bench-test the starter motor checking brush length and free spinning, and if all tests pass but grinding persists, suspect starter clutch failure.
Solutions include replacing the starter motor ($100-250) if brushes are worn below service limit, replacing the starter relay ($20-40) if clicking occurs without cranking, and addressing the starter clutch only if diagnosis confirms failure—the expense often leads owners to rely on push-starting capability as a practical alternative to engine case splitting.
Battery Drain and Parasitic Draw
Battery death after 3-5 days of sitting indicates parasitic electrical draw exceeding the normal 2-3 milliamp standby current. Testing requires disconnecting the battery negative terminal, inserting an ammeter in series, and measuring current draw with all systems off. Systematically removing fuses isolates which circuit creates excessive draw.
Faulty regulator-rectifier components commonly create 15+ milliamp draws. Corroded connections create resistance paths draining power. Aftermarket accessories improperly wired without relay or fuse protection contribute significantly. Solutions include replacing failing electrical components, installing a battery tender for storage ($30-60), cleaning all battery terminals and grounds, and replacing aged batteries (typical lifespan 3-5 years, cost $80-150).
Ignition System and Spark Delivery
No-spark conditions, misfiring, stumbling during acceleration, and hard starting indicate ignition system problems often confused with carburetion issues. Testing begins with checking all ignition fuses (30-amp fuses behind left side cover), verifying spark by grounding plugs and cranking, measuring spark plug condition and gap specification, and testing ignition coil resistance against specifications.
Solutions include replacing spark plugs every 7,000-10,000 miles (NGK CR9E specified, $20-60 for a set of four), replacing deteriorated plug wires ($40-100), cleaning corroded ignition fuse box connections, and replacing failed ignition coils ($80-150 each). Some owners upgrade to ZX-10 coil packs (approximately $100) reporting improved mid-range performance and starting reliability.
Cooling System and Overheating Problems
The ZZR1200’s liquid cooling system with dual electric fans and 2.3-liter capacity provides adequate cooling for sustained high-speed operation when properly maintained. However, specific problems create overheating conditions requiring systematic diagnosis.
Engine Overheating Causes and Solutions
Overheating symptoms include temperature gauge rising above halfway, uncomfortable heat for the rider, performance degradation when hot, and coolant bubbling in the overflow reservoir. One source notes: “The problem often presents itself when you reach a certain mileage or speed” due to accumulated cooling system deterioration.
Air trapped in the cooling system represents the most common cause of mysterious overheating despite full coolant levels. The system requires careful bleeding at multiple points—the radiator cap, the water pump bleed valve, and through patient burping procedures. One owner described discovering this: “Mine developed an overheating issue after a highside a few years back…Then one day when I had the plastics off I opened the radiator cap to check the coolant level again. Then with the cap still off I gave the radiator hose a good squeeze. A huge air bubble came belching out.”
Additional causes include low coolant level from small leaks, faulty thermostat stuck closed preventing coolant circulation or stuck open preventing proper warm-up, dirty or leaking air filter (one of multiple causes), wrong coolant mixture ratio, dirty or insufficient engine oil, inadequate oil viscosity for temperature conditions, and clogged or damaged radiator fins restricting airflow.
Troubleshooting systematically checks coolant level in both reservoir and radiator, inspects for visible leaks at hoses and water pump weep hole, verifies thermostat opens at correct temperature by feeling upper and lower radiator hoses for temperature difference during warm-up, confirms both cooling fans activate at proper temperature (204-212°F), checks oil level and condition, and inspects radiator fins for debris or damage.
Solutions involve bleeding the cooling system thoroughly using the proper procedure: park on a hill with front wheel elevated, remove radiator cap, start engine and allow warming while squeezing radiator hoses to force air bubbles out, add coolant as level drops until no bubbles appear, rev engine gently to circulate coolant through all passages, and top off reservoir to the FULL line when complete. Replace thermostats ($80) preventatively during major service since failure causes dramatic symptoms. Flush and refill with proper 50/50 coolant mixture ($20-40) every two years prevents corrosion. Clean or replace air filters ($20-40), change engine oil with appropriate viscosity (10W-40 standard, 15W-50 or 20W-50 for desert/hot climate operation), and carefully straighten bent radiator fins or install protective screens.
Cooling Fan Operation Problems
The ZZR1200’s dual electric cooling fans should activate at 204-212°F but failures prevent operation causing traffic and idle overheating. Symptoms include fans never activating despite high temperature, only one fan functioning, or fans running continuously. The stock 10-amp fuse proves inadequate for dual fan operation—upgrading to 15-20 amp prevents nuisance failures.
Testing involves checking the fan fuse, applying 12V directly to fan motors to verify function, testing the temperature sensor/switch operation, inspecting wiring connections for corrosion and secure grounds, and bleeding the cooling system since air pockets prevent sensor contact with coolant creating false readings.
Solutions include replacing failed fan motors ($50-150 each), replacing temperature switches ($30-80), upgrading to 15-20 amp fuses for dual fan setups, and installing manual override switches in parallel with sensors for emergency operation. Fan motors cost $50-150 each while temperature switches run $30-80.
Water Pump and Thermostat Failures
Water pump seal failure typically occurs around 30,000-33,000 miles, evidenced by coolant leaking from the weep hole—a telltale indicator of impending seal failure designed to prevent coolant from entering engine oil. Additional symptoms include no coolant circulation despite full system, overheating despite proper coolant level, and unusual noise from the water pump area.
Solutions require complete water pump replacement ($150-400 for part #49044-1062 or #49044-1080) since rebuilding proves impractical. Installation labor adds $200-400 professionally. Replace all O-rings during installation ($20-40) using proper lubrication during assembly to prevent pinching and immediate re-failure. Simultaneously replace the thermostat (part #490540003, approximately $80) during water pump service since both components affect cooling performance and labor overlaps significantly.
Coolant Hose Deterioration
Rubber coolant hoses deteriorate predictably with age, developing soft spongy texture, visible cracks or bulges, leaks at connections, or collapse under vacuum during operation. Preventive replacement of all cooling hoses at 50,000+ miles or at first sign of deterioration prevents roadside failures. Complete hose sets cost $80-150 with clamps adding $20-40—relatively modest insurance against cooling system failure.
Undercarriage, Chain-Drive and Wear Issues
The ZZR1200’s 530-series O-ring chain and sprocket drive system requires consistent maintenance but provides excellent longevity when properly serviced. Understanding wear patterns and maintenance requirements prevents premature component failure and potential safety hazards.
Drive Chain Maintenance and Wear Patterns
Chain maintenance represents the highest-frequency service requirement with Kawasaki specifying lubrication every 400 miles (600 km) and slack adjustment checks every 600 miles (1,000 km)—more frequently after rain or wet conditions. However, owner practices vary dramatically from every 200 miles to 6,000-7,000 miles, with corresponding chain life variations.
Proper slack measures 25-35mm vertical movement at the tightest point midway between sprockets with the bike on the centerstand. Excessive slack indicates stretch and wear. Tight spots rotating through the chain reveal uneven wear or damaged rollers. Visual inspection should check for rust, dry appearance, damaged rollers, loose pins, and kinked links.
Chain replacement intervals depend entirely on maintenance quality. Well-maintained chains achieve 15,000-25,000 miles; neglected chains fail at 8,000-12,000 miles. One meticulous owner with auto-oiler reported: “My ZZR has more than 62,000 miles and is now wearing its 4th chain and second set of Sidewinder sprockets. 20,000 miles from a chain is more than acceptable, especially if the chain maintenance drudgery is all but eliminated.”
Lubrication application technique matters significantly: ride the bike briefly to warm the chain, place on centerstand, clean with kerosene and brush if dirty, spray lubricant on the inside of the chain (sprocket side) while slowly rotating the wheel, allow 5-15 minutes penetration before riding, and wipe excess to prevent fling onto the rear wheel. Recommended lubricants include Motul Chain Lube, Bel-Ray SuperClean, DuPont Chain Wax, and Sidewinder synthetic—never WD-40 as a primary lubricant since it penetrates and thins the O-ring internal grease.
Auto-oiler systems (Scottoiler $100-150, Pro Oiler $120-180) provide constant lubrication extending chain life dramatically to 20,000+ miles while reducing maintenance to near-zero. The investment proves worthwhile for high-mileage riders.
Chain replacement costs $80-180 depending on quality (RK X-Ring XSOZ1 premium $150-180, DID VX Series $120-150, EK ZVX3 $100-130). Always replace chain and both sprockets together—mixing new chain with worn sprockets causes rapid wear and accelerated failure of the new chain.
Chain Adjustment Procedures and Specifications
Proper adjustment requires loosening the rear axle nut (32mm socket, substantial breaker bar required), loosening adjuster lock nuts on both swingarm sides, turning adjuster bolts equally on both sides while monitoring alignment marks stamped on the swingarm, setting slack slightly looser than specification to account for axle nut tightening compression (adds approximately 1/4-inch tension), torquing the axle nut to specification (98 N-m / 72 ft-lb), and installing a new cotter pin.
Critical error: failing to adjust both sides equally creates misalignment causing accelerated chain and sprocket wear plus potential chain derailment. The axle nut tightening effect catches many novice mechanics—the swingarm compresses inward when torqued, significantly tightening the chain beyond the slack measured before tightening.
Adjuster bolts can seize in swingarm threads from corrosion. Apply anti-seize compound to threads during every adjustment. Broken adjusters require careful drilling or aftermarket Pro Tek Swingarm Buddy replacement systems.
Sprocket Wear and Replacement
Sprocket teeth should maintain symmetrical profiles. “Hooking” or “shark fin” shapes indicate excessive wear demanding replacement. Step wear at tooth bases similarly indicates replacement necessity. Inspect teeth carefully for symmetry and wear patterns, comparing all teeth around the circumference.
Stock steel rear sprockets cost $40-60 and last 40,000+ miles with proper chain maintenance. Aluminum alternatives (Renthal, Vortex $60-90) weigh 66% less but wear faster—approximately 12,000 miles versus 40,000+ for steel. Hard anodized aluminum versions provide extended wear approaching steel while maintaining weight savings.
Common gearing modifications include adding one tooth to the rear sprocket (45T) for improved acceleration while maintaining stock chain length. More aggressive changes (minus one front or plus two rear) require longer chains.
Wheel Bearing and Swingarm Bearing Maintenance
Rear wheel bearing failure manifests as rumbling or grinding noise from the rear wheel, wheel not spinning freely on the centerstand, and excessive side-to-side play when grabbing the tire and attempting to rock it. Testing involves lifting the rear wheel and checking for smooth rotation and lateral play.
Rear wheel specifications include two 6304G shielded bearings plus seals (BJN28525: 28mm ID, 52mm OD, 5mm thick). The drive hub (sprocket carrier) uses one 6006G bearing plus seal (PJN40556: 40mm ID, 55mm OD, 6mm thick). Front wheels use two 6005UU shielded bearings. All Balls bearing kits provide complete replacement sets ($40-50 for rear), with individual bearings costing $15-25 each.
Bearing replacement requires proper bearing drivers—PVC pipe ground to appropriate sizes works adequately for home mechanics. Installation time: 2-3 hours. Total DIY cost: $50-80. Typical bearing life: 40,000-60,000 miles.
Swingarm bearing wear creates clunking during acceleration and deceleration plus loose feeling in the rear end. Testing involves placing the bike on the centerstand and attempting to lift the rear wheel up and down—any swingarm pivot movement indicates worn bearings. Replacement requires swingarm removal, with bearings costing $40-60 and seals $15-25. Professional service runs $400-600; DIY costs $150-300 including special tools for bearing installation.
Maintenance-Related Failures
Understanding the consequences of neglected maintenance versus the relatively modest costs of preventive service proves essential for avoiding catastrophic repairs on the ZZR1200.
Critical Valve Clearance Service Consequences
Neglected valve clearances represent the highest-risk maintenance omission potentially causing valve burning ($300-600 for valve job), bent valves from piston contact (requiring head removal and valve replacement), complete loss of compression in affected cylinders, and worst-case catastrophic engine damage from valve-piston collision during high-RPM operation. The cascade from tight valves to burnt valves to complete failure can cost $1,500-3,000 in repairs versus $200-300 for regular valve clearance service.
Early warning signs include progressively louder ticking or tapping noise varying with RPM, difficult starting, and power loss. Immediate action when symptoms appear prevents progression to severe damage.
Clutch Hydraulic Fluid Maintenance
Neglecting clutch hydraulic fluid changes every two years allows moisture absorption degrading performance and crystallized fluid blocking the master cylinder transfer port. The progression leads to pressure buildup in the system causing clutch slippage when hot, complete clutch disengagement failure creating dangerous inability to shift, and potential need for complete clutch replacement ($500+) if slipping damages friction plates. Master cylinder rebuild kits cost $20-30 versus these potential cascading failures.
Carburetor Maintenance and Storage Preparation
Storing the ZZR1200 with ethanol fuel without stabilizer virtually guarantees pilot jet blockage requiring complete carburetor disassembly and cleaning ($150-400 professionally). Extended neglect causes multiple jet blockages, deteriorated o-rings throughout the carburetor bodies, stuck float needles creating flooding, and potential for dramatic backfires during attempted restart—one owner noted these sound “loud as a shotgun” in enclosed spaces.
Prevention requires either draining carburetors completely before storage or adding fuel stabilizer and running until circulated. Installing inline fuel filters prevents tank debris from reaching jets. Using non-ethanol fuel when available extends carburetor cleanliness.
Coolant Change Importance
Two-year coolant change intervals prevent internal corrosion that leads to water pump seal failure ($150-400 pump plus $200-400 labor), blocked cooling passages reducing efficiency and causing overheating, radiator deterioration from acidic old coolant, and head gasket failure from overheating ($1,000-2,000 repair). Fresh coolant costs $20-40 plus one hour of labor—trivial compared to these potential failures.
Oil Change Frequency and Quality
The ZZR1200’s wet clutch design demands motorcycle-specific MA/MA2-rated oil without friction modifiers. Using automotive oil with friction modifiers causes immediate clutch slippage requiring friction plate replacement ($200-400 repair). Extending oil changes beyond 3,500-4,000 miles risks cam lobe pitting and wear, particularly at high mileage. Rare but documented cases show flattened cam lobes around 47,000 miles from extended oil change intervals. Cam replacement costs $1,500-3,000 versus $40-60 oil changes.
The ZZR1200 utilizes two drain plugs—one at the crankcase rear, one forward under the right cowl—and both must be opened during oil changes. Using only one plug leaves contaminated oil in the system defeating the change purpose. Replace both crush washers every change to prevent seepage.
Chain Lubrication and Inspection
Neglected chain maintenance causes O-ring seal failure accelerating wear, sprocket teeth hooking requiring replacement of both sprockets and chain ($250-400 versus $10 chain lube), and worst-case chain breakage causing potential engine case damage if the chain penetrates the cover, rear wheel lock-up creating crash potential, and catastrophic drive system failure. Owners report seeing dry, rusty chains as early warning requiring immediate attention.
Brake Fluid Service Intervals
Two-year brake fluid replacement prevents moisture absorption reducing boiling point and causing brake fade during hard use (particularly dangerous on a 595-pound sport-tourer with luggage and passenger), corroded calipers leading to seized pistons and potential rear brake lock-up, and complete caliper rebuilds ($150-300) versus simple fluid changes ($15-20 DIY, $60-100 professionally).
Preventive Maintenance Schedule
Establishing and maintaining a rigorous service schedule maximizes ZZR1200 reliability and longevity while minimizing repair costs through early intervention.
Every 400-600 Miles
Lubricate drive chain thoroughly, inspect chain slack and adjust if exceeding 25-35mm specification, check tire pressures (42 PSI cold front and rear), and visually inspect for fluid leaks or damage.
Every 3,500 Miles (or 6 Months)
Change engine oil using 3.6 liters (3.8 quarts) of MA/MA2-rated 10W-40 or 15W-50 motorcycle oil, replace oil filter every other oil change, clean and gap spark plugs (NGK CR9E specified, gap per manual), inspect and clean air filter (replace if damaged), check brake pad thickness and fluid level, verify clutch fluid level and condition, inspect all lights and switches for function, check battery voltage and connections, and lubricate all cables and pivot points.
Every 7,500 Miles (or 12 Months)
Perform all 3,500-mile services plus replace oil filter if not changed at previous service, check and adjust valve clearances (intake 0.10-0.20mm, exhaust 0.20-0.30mm), synchronize carburetors using vacuum gauges, thoroughly inspect and clean spark plugs or replace if electrode wear visible, deep clean and re-oil air filter, measure and record chain wear and sprocket tooth condition, inspect all coolant hoses for deterioration, check fork seals and suspension operation, inspect and lubricate swingarm and linkage pivot points, verify steering head bearing adjustment, and measure brake pad remaining thickness.
Every 15,000 Miles (or 2 Years)
Perform all previous services plus replace brake fluid in all three systems using fresh DOT 4, flush and replace clutch hydraulic fluid with fresh DOT 4, flush and replace coolant system with proper 50/50 mixture (2.3 liters capacity), change fork oil (KAYABA 01, 350ml per leg), inspect and clean carburetor float bowls and jets if any running issues present, replace air filter, replace spark plugs with fresh NGK CR9E, inspect wheel bearings for roughness or play, and perform comprehensive safety inspection of all systems.
Every 20,000-25,000 Miles
Replace drive chain and both sprockets together as a set, rebuild clutch hydraulic master and slave cylinders with fresh seals preventively, inspect and potentially replace wheel bearings if roughness detected, replace brake lines if original rubber lines show age deterioration, consider carburetor rebuild and jet kit installation if never performed, and replace all coolant hoses preventively if original equipment.
Every 30,000-40,000 Miles
Replace clutch friction plates if slippage begins, replace swingarm bearings, perform valve adjustment with careful measurement and record-keeping, consider fork and shock rebuild or upgrade, replace steering head bearings if notchiness detected, and perform comprehensive electrical system inspection with contact cleaning.
Conclusion: Maximizing ZZR1200 Reliability and Value
The Kawasaki ZZR1200’s reputation as the ultimate carbureted sport-tourer stems from proven engineering fundamentals—a ZRX-derived inline-four reinforced with ZX-12R components, hydraulic clutch for smooth operation, and consistent specifications across four production years. The absence of factory recalls and technical service bulletins confirms fundamental design soundness. However, specific recurring issues demand informed attention: valve clearance maintenance proves non-negotiable for longevity, carburetor systems require understanding and periodic service, hydraulic clutch components need preventive replacement before failure, and charging system components warrant monitoring and eventual replacement.
High-mileage success stories dominate owner forums, with 100,000+ mile examples common among maintained examples. One European owner summarized: “I myself am a ZZR1200 owner for 8 years. Bought the bike used and am riding it without any problems ever since. I have made 80.000 km since I have it, traveling round the Europe. The bike has now 125.000 km and there are no major problems.” Such longevity requires religious adherence to maintenance schedules, particularly valve adjustments every 7,500-15,000 miles, oil changes every 3,500 miles maximum using proper MA/MA2-rated motorcycle oil, chain lubrication every 400-600 miles, carburetor attention when symptoms emerge, and two-year fluid changes for cooling, brake, and clutch systems.
The financial equation favors prevention dramatically. Regular maintenance totaling approximately $300-600 annually prevents catastrophic repairs ranging from $1,000-3,000. Understanding the difference between normal aging characteristics—minor cam pitting, typical valve clearance tightening, progressive clutch seal wear—and critical failures requiring immediate intervention separates successful long-term owners from those experiencing premature major repairs.
For prospective buyers, 2003-2005 models avoid the early 2002 porous head casting and camshaft metallurgy issues while maintaining identical specifications. Service records documenting valve adjustments, oil changes, and carburetor maintenance indicate responsible ownership. Testing clutch operation throughout temperature ranges, verifying smooth carburetor operation across RPM ranges, and checking charging voltage under load reveal current condition better than mileage alone.
The ZZR1200’s greatest strengths—carbureted simplicity enabling DIY maintenance, proven mechanical components with excellent parts availability, strong aftermarket support including jet kits and performance upgrades, and robust engine design capable of extreme mileage—position it as an increasingly appreciated alternative to complex modern sport-tourers. Armed with knowledge of specific problem patterns, proper preventive maintenance schedules, and systematic troubleshooting approaches, owners extract exceptional value and reliability from these final examples of high-performance carbureted sport-touring motorcycles.