
Table of Contents

TL;DR
- The John Deere 3032E is a fundamentally sound and popular economy-grade compact utility tractor, but it has a well-defined set of recurring problems, led by front-axle seal leaks, fuel shutoff solenoid and fuel-starvation stalls, loader leak-down, instrument-cluster and electrical failures (several caused by improper jump-starting), PTO solenoid failures, sticking hydrostatic pedals and three-point hitch valves, and overheating from neglected radiator cleaning.
- The large majority of these issues are either preventable or repairable by a mechanically inclined owner: installing the vented front-axle dipstick and running rear ballast prevents most axle leaks, keeping a spare fuel shutoff solenoid (M810324) and clean fuel addresses the most common no-start, careful jump-starting protects the expensive cluster, and disciplined fluid, filter, and cleaning service prevents overheating and premature wear.
- Repairs that require splitting the transmission (internal PTO clutch or hydrostatic failures), high-pressure fuel-system service, and diesel particulate filter recovery regenerations should be left to a dealer; when the tractor is matched honestly to its workload rather than overloaded, it rewards its owner with many years of dependable service.
Key Findings
- The engine and drivetrain are proven. The 3032E uses a Yanmar 3TNV88C-NJT 1.642-liter three-cylinder diesel rated at 30.7 gross horsepower and 25.5 PTO horsepower, paired with a two-range hydrostatic transmission. These core components are reliable; most complaints involve peripheral systems.
- Front-axle seal leaks are the signature problem. They are driven by internal axle pressure (worsened by the early non-vented plastic dipstick) and by heavy loader work performed without rear ballast.
- Fuel delivery causes most no-start and stall complaints. The fuel shutoff solenoid's hold-in coil, clogged fuel filters and separator, and algae-plugged tank screens produce the classic "runs a while, dies, restarts after cooling" pattern.
- Electrical failures can be expensive and are often self-inflicted. Improper jump-starting back-feeds the fuel circuit and can destroy the solenoid, relay fuses, and the instrument cluster, which doubles as the machine's control computer.
- Loader leak-down is partly by design. John Deere's own leak-down chart reportedly permits up to 7.5 inches of drop per hour with no load, so some bucket drift is considered "within spec."
- The tractor punishes neglect and overloading. Owners with the most trouble almost universally deferred maintenance, skipped the ballast, or overloaded the machine.
Introduction and Overview
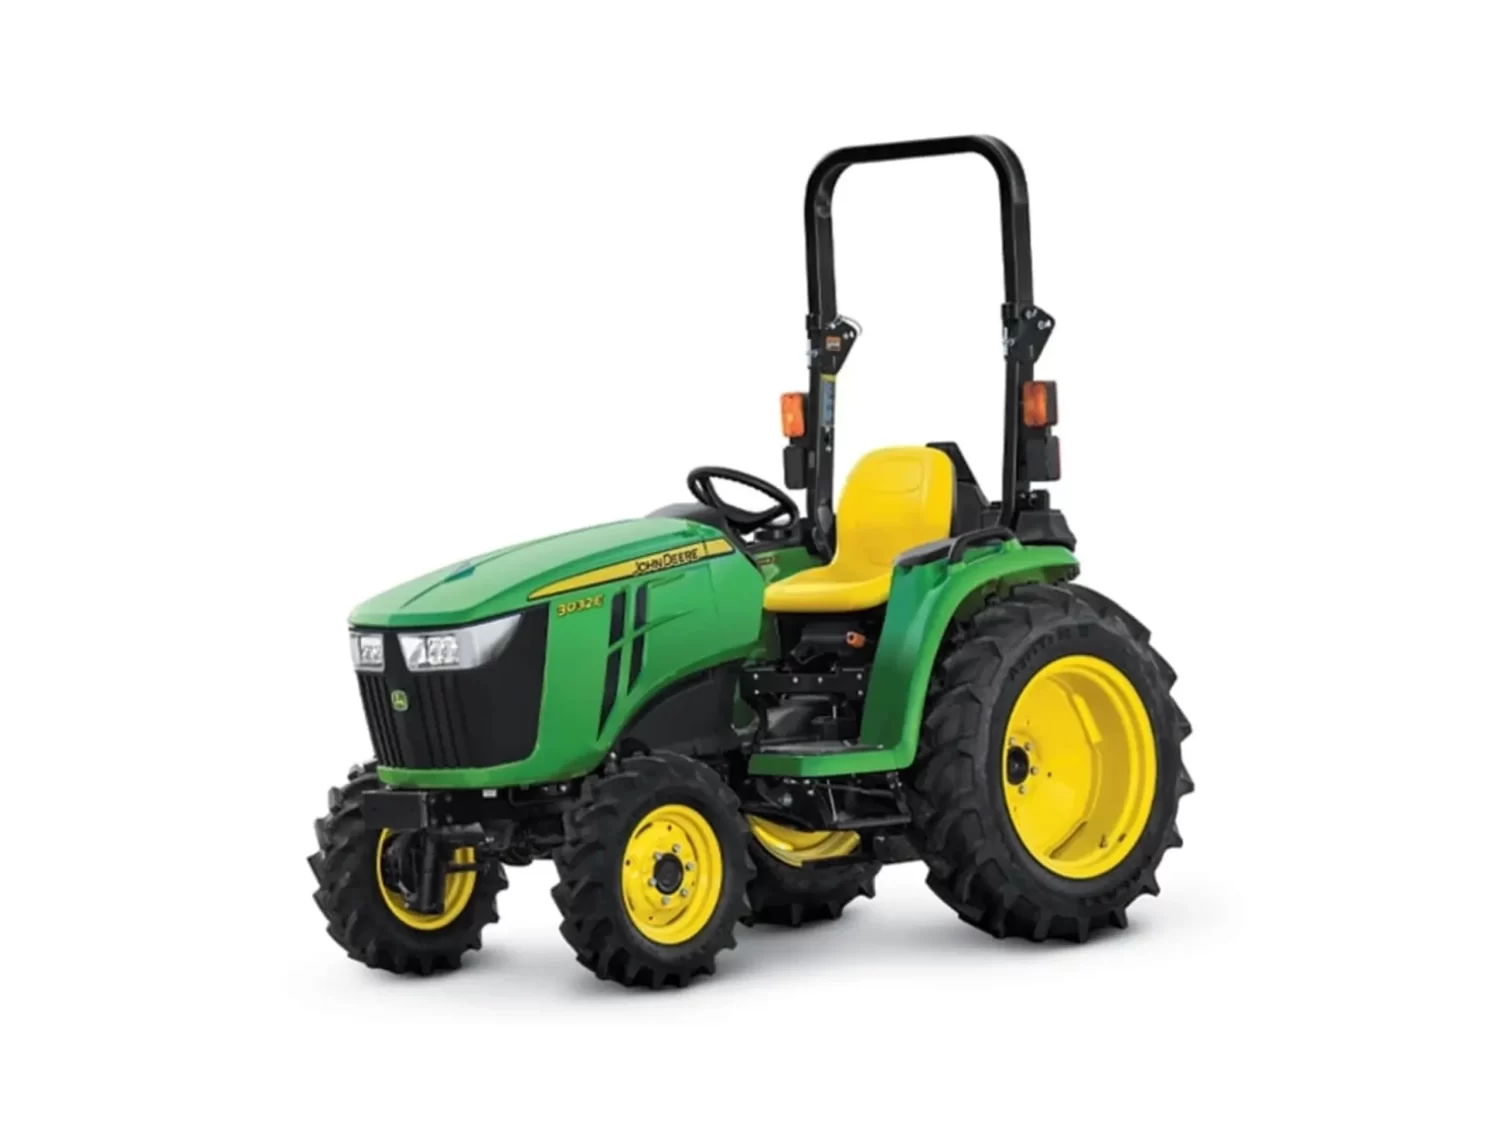
The John Deere 3032E is one of the most widely sold compact utility tractors in the United States. It occupies the sweet spot for small-acreage landowners, hobby farmers, horse and livestock operators, and landscape professionals who need a machine large enough to run a rotary cutter, box blade, or front-end loader, yet compact enough to fit through a standard seven-foot garage door with the folding Roll-Gard rollover protective structure lowered. It is the economy, or "E," member of John Deere's 3E Series, sitting between the 3025E and the turbocharged 3038E.
At its heart is a Yanmar 3TNV88C-NJT diesel: a 1.642-liter (100.2 cubic inch), liquid-cooled, three-cylinder, four-stroke, direct-injection engine producing 22.9 kilowatts (30.7 gross horsepower) at 2,500 revolutions per minute, with a Nebraska-tested rated power take-off output of 25.5 horsepower. The engine uses a high-pressure common rail injection system and an electronic control unit (ECU) that continuously monitors conditions and adjusts fuel delivery for performance and emissions. To meet Final Tier 4 standards, the engine carries an exhaust after-treatment system built around a diesel particulate filter (DPF) that captures particulate matter and periodically cleans itself.
Power reaches the ground through a two-range hydrostatic transmission (HST) housed in a die-cast aluminum case and operated by John Deere's Twin Touch foot pedals. A Sauer-Danfoss integrated pump and motor transmit engine power through a closed-loop circuit, giving infinitely variable ground speeds of 14.1 miles per hour (22.7 kilometers per hour) forward and 13 miles per hour (21 kilometers per hour) in reverse. Standard equipment includes four-wheel drive (mechanical front-wheel drive, or MFWD), hydrostatic power steering fed by a dedicated pump, wet-disc brakes, a Category 1 rear three-point hitch with a lift capacity of approximately 1,356 pounds measured 24 inches behind the lift arms, and an independent 540-revolution-per-minute rear power take-off.
The 3032E was built at John Deere's Augusta, Georgia, facility and was introduced in 2008 and has seen multiple production revisions. Across that long run there were meaningful running changes, the most important being a serial number break at 610000. Tractors below serial number 610000 (roughly 2008 through 2016) use certain parts, such as the LVA14586 instrument cluster and the M811032 fuel/water separator, that differ from those on later "worldwide edition" tractors carrying the 1LV3032E product identification number. Most 3032E tractors sold in the United States are equipped with a factory-installed front loader; loader models over the years include the D160, the 305, and the current 300E. Because the loader is bolted on rather than integrated, dealers frequently install it at the point of sale.
The 3032E has a generally solid reputation, but it is not without recurring problems. As one longtime dealer candidly told prospective buyers on the Green Tractor Talk forum, "Some of my customers love the tractor… on the other hand, I've had customers that were pretty unhappy." Because it is an economy model, John Deere made deliberate cost choices, and owners coming from heavier or older Deere tractors sometimes notice the difference in build. This article examines every major problem category reported by owners, technicians, and consumer forums, and provides structured troubleshooting steps and practical solutions, including approximate part numbers and clear guidance on when to attempt a do-it-yourself repair versus when to seek dealer service.
Engine Starting and Performance Problems
Symptoms
Owners report several distinct starting and running complaints: the engine cranks but will not fire; the engine starts then dies after a few seconds or minutes, often refusing to restart until it has sat for five to ten minutes; the dash shows a "fuel off" message; the engine is hard to start in cold weather; the engine runs rough or surges; and the engine emits black or gray smoke after warming. A separate and important failure mode is the tractor that will not crank at all and shows no dash lights.
Causes
The single most frequently reported culprit behind "starts then dies" and "cranks but will not start" is the fuel delivery system, and specifically the fuel shutoff solenoid together with fuel starvation from a clogged tank screen or fuel/water separator. The engine shutoff solenoid, mounted on the injection pump, controls fuel on and off; when you turn the key on it should energize with an audible click, and when you leave the seat it de-energizes to kill the engine. A common failure is the hold-in coil dropping out once the solenoid gets warm, producing exactly the "runs for a while, then quits, restarts after cooling" pattern. The relevant Deere part is the M810324 fuel shutoff solenoid.
A second very common cause of fuel starvation is debris, algae, or a clogged screen at the bottom of the fuel tank. Multiple owners have described the machine dying under load, such as when bush hogging or digging with the loader, then restarting once fuel slowly re-accumulates. One owner reported paying his dealer $650 to remove and clean the tank when the internal screen was plugged. On common rail tractors, blocked fuel filters and the fuel/water separator are frequent offenders; the separator has a water-sensing element that can swell shut if water is present.
Cold-starting difficulty is normal diesel behavior related to the intake air heater or glow plug system. Notably, the 3032E does not behave like a car; on many model years the glow plug indicator light flashes only briefly then extinguishes even though the plugs continue to heat. Owners moving from a 1025R have been startled by this and mistaken it for a fault. The no-crank, no-dash-lights failure is electrical rather than fuel-related and is covered in the electrical section below.
Troubleshooting Steps
- Read the dash display. A "fuel off" message points directly to the fuel shutoff circuit or a disturbed interlock (such as the range-shift neutral switch). One owner found that debris had jerked the neutral-switch connector loose while clearing property; reconnecting it restored starting immediately.
- Check fuel flow. Open the fuel/water separator drain and confirm clean fuel. Loosen a fuel filter and verify strong flow. The manual notes the sediment bowl should fill in roughly 10 to 15 seconds; markedly slower flow indicates a restriction upstream, typically the tank screen.
- Test the fuel shutoff solenoid. Remove it, apply 12 volts to one terminal and momentarily ground the other; it should click and the plunger should move. If it works cold but the engine dies once warm, suspect a failing hold-in coil.
- Inspect the water separator and fuel filters for a black, tar-like algae growth. Replace filters if in doubt.
- For cold-start complaints, turn the key to run and allow the intake air heater or glow plugs their full cycle. The manual specifies holding the key in the appropriate position roughly 10 to 15 seconds down to 0 degrees Fahrenheit, and 15 to 30 seconds below that.
- For rough running or smoke, inspect the air filter, confirm fresh fuel of the correct grade, and consider injector condition.
Solutions
For the classic warm-stall or intermittent no-start, replacing the fuel shutoff solenoid (M810324) is a well-documented and relatively inexpensive fix that many owners perform themselves; keeping a spare is reasonable given how commonly this part fails. If fuel flow is restricted, replace all fuel filters and the fuel/water separator element (M811032 for serial numbers below 610000, MIU802421 for later tractors). If the tank screen is clogged with algae, it can be cleaned by carefully blowing back through the supply line, though a thorough job requires tank removal, which is dealer-level work; treat stored diesel with a biocide to prevent recurrence. For cold weather, no repair is needed if the glow system tests good; follow the manual's procedure and consider the optional engine block heater below 0 degrees Fahrenheit. Never repeatedly spray starting fluid (ether) into a glow-plug diesel, as it can cause serious engine damage. Fuel injection pump and injector service should be left to the dealer, as Deere specifically warns against opening the high-pressure fuel system casually.
Hydraulic System Problems
Symptoms
Hydraulic complaints fall into three groups: sluggish or weak operation of the loader and three-point hitch; visible fluid leaks; and the loader bucket or boom drifting downward, commonly called "leak-down." Owners describe a bucket that "droops" and drops its load while being transported, or a loader that will not hold a pallet on forks in the air. Others report the loader raising more slowly than its rated speed and lifting less than it once did.
Causes
The 3032E uses an open-center hydraulic system with a gear pump rated at exactly 5.3 gallons per minute (20.2 liters per minute) and a main relief pressure of 172 bar (2,500 pounds per square inch), plus a separate steering pump. Sluggish operation is most often caused by low or degraded fluid, a clogged suction-side filter, or cold fluid that has not warmed. Leak-down of the loader is a well-known characteristic of the 3E-Series loaders, caused by internal fluid bypass either past worn cylinder piston packings or, more often, past the loader control valve spools. Importantly, John Deere considers a certain amount of leak-down to be within specification; the factory leak-down chart reportedly allows up to 7.5 inches per hour of drop with no load. Genuine external leaks arise at hose fittings, at the rear remote couplers, and at cylinder rod seals.
Troubleshooting Steps
- Check the hydraulic and transmission fluid level with the dipstick, and inspect the fluid for a milky appearance indicating water contamination.
- For sluggish performance, replace both the suction filter (LVA14703) and the charge filter (LVA16054) and change the fluid.
- To determine whether loader drift is in the cylinders or the control valve, load and curl the bucket, shut the engine off, and disconnect the quick-connect couplers. If the bucket then holds, the leak is in the valve; if it still creeps, the leak is in the cylinder. Owners can perform this at home.
- Measure the actual leak-down rate over an hour with an empty bucket and compare it against the dealer's chart before concluding the tractor is defective.
- Trace external leaks to their exact source, remembering that coolant, engine oil, diesel, and hydraulic oil can look alike once mixed with dust.
Solutions
Fluid and filter service resolves most sluggishness and is a straightforward do-it-yourself job; expect to add roughly 5.5 gallons of John Deere Low Viscosity Hy-Gard (TY22000) to refill the system, and be aware that the fill-port location makes topping off awkward and that not all of the old fluid drains out. For loader leak-down that genuinely exceeds specification, the fix is to rebuild or replace the affected cylinders or the loader control valve; this is warranty work on newer machines and should be documented with the dealer, though owners should temper expectations because Deere often deems modest drift "within spec." A practical operator workaround endorsed by many owners is to remove or lower the bucket when it is not needed, which reduces leak-down annoyance, improves visibility, and takes weight off the front axle. Do not use the folk remedy of adding STP or other viscosity modifiers, as it changes fluid viscosity and impairs cold-weather operation. Overtightened compression or flare fittings are a frequent cause of persistent leaks; snug plus a partial turn is generally sufficient.
Hydrostatic Transmission Problems
Symptoms
The most frequent hydrostatic complaints are Twin Touch pedals that stick or are slow to return to neutral; pedals that squeak, screech, or rub; a delayed response when releasing the pedal so the tractor continues to creep; and, in more serious cases, bucking, jerking, or a loss of drive. A related complaint is a seized hydrostatic fluid dipstick.
Causes
The sticking and slow-return complaints are usually mechanical rather than hydraulic. The pedal linkage runs through several pivot bushings and plastic-lined rod ends, and these dry out, collect dirt, and bind over time; a weak or fatigued return (compression) spring compounds the problem. Squeaking and screeching frequently originate at the interface between the pedal control plate and a speed or neutral sensor, or at dry linkage bushings. Bucking and jerking accompanied by a low fluid level is far more serious and points to internal wear, air in the system, or a failing charge pump. Loss of drive can also stem from low transmission fluid, a plugged suction filter, or cold fluid.
Troubleshooting Steps
- With the engine off, work the pedals by hand to feel where the binding occurs. Inspect the exposed linkage, pivot bushings, and rod ends.
- Clean the linkage with brake or carburetor cleaner, which leaves no residue, then lubricate with a dry-film lubricant that will not attract dust.
- Check the return spring for fatigue and replace it if the pedals no longer center crisply.
- Verify the transmission and hydraulic fluid level immediately if bucking or jerking is present; do not continue operating a tractor that bucks, as internal components may be moving out of position.
- If the tractor will not move at all, confirm the range lever is engaged, the parking brake is released, the operator is in the seat, and the fluid is at the correct level and warmed.
Solutions
For the common sticking and squeaking, thorough cleaning and lubrication of the linkage, plus replacement of the return spring and worn rod ends if necessary, resolves the issue and is well within a do-it-yourself owner's ability. Some owners have replaced the plastic-lined metric rod ends with all-steel equivalents for durability. Because the linkage is exposed, periodic cleaning and dry lubrication should be part of routine care, especially at the end of a dusty season. If low fluid is found, refill to the correct level and monitor for the source of loss. Any bucking, jerking, or loss of drive that persists after confirming a correct, warm fluid level requires dealer diagnosis, because internal hydrostatic repairs demand splitting or opening the aluminum transmission case. A seized dipstick should be freed gently with penetrating oil and a slight twist rather than brute force.
Power Take-Off and Three-Point Hitch Problems
Symptoms
On the power take-off side, owners report that the PTO will not engage even though the dash indicator light comes on; that the PTO engages but the shaft does not turn; that engaging the PTO drags the engine down and stalls it; and that the PTO makes excessive noise. On the three-point hitch side, owners report a hitch that will not lift, a hitch that lifts only to full up or drops fully down with no intermediate position, a hitch that drifts or jerks upward, a control lever that will not hold position, and, in rare but serious cases, a sheared rockshaft.
Causes
On the 3032E the rear PTO is engaged by an electro-hydraulic solenoid valve on the right side of the transmission over the axle. When the dash light illuminates but the shaft does not turn, the most common cause is a failed PTO solenoid; the widely cited replacement part is LVA17822 (John Deere lists this as a solenoid valve/electro-hydraulic proportional valve confirmed to fit the 3032E). A finicky, corrosion-prone PTO switch on the fender is another frequent culprit, as is a stuck solenoid on a machine that has sat unused. When the PTO drags the engine down and stalls it, the cause is genuinely mechanical inside the PTO clutch pack, which requires the case to be split. A safety interlock can also prevent engagement: the 3032E requires the operator to be in the seat, and if the operator leaves the seat with the PTO engaged, the interlock stops the engine.
On the three-point hitch, the "all the way up or all the way down" behavior is a known issue traced to a sticking or seized rockshaft control valve shaft, or to a dried, bound control lever and feedback linkage; Deere has replaced the entire valve assembly on some machines under warranty. A hitch that will not lift can be caused by low oil, a worn pump, a closed rate-of-drop valve, a plugged suction filter, or excessive load. The rate-of-drop knob is notorious for seizing if not exercised. A control lever that will not hold position is corrected by adjusting the friction lock nut on the rockshaft control valve, but overtightening this nut has been linked to broken or snapped shafts and must be done carefully.
Troubleshooting Steps
- For a non-engaging PTO, confirm the operator is seated and the machine is set up correctly, then check the fuses and relays; do not simply move fuses around, but test each one for continuity.
- Check for 12 volts at the PTO solenoid connector (look for the purple wire) with the PTO switch pulled and the light on. If voltage is present but the shaft does not turn, the solenoid is the fault. If no voltage is present, work back through the switch and wiring.
- Clean the fender PTO switch contacts with fine sandpaper if engagement is intermittent.
- If engaging the PTO stalls the engine, disconnect the implement and try again; if it still drags the engine down with nothing attached, the PTO clutch is failing internally.
- For a hitch stuck at full up or down, inspect the rockshaft control valve shaft and feedback linkage for binding; free a seized shaft with penetrating oil and gentle persuasion, and confirm the feedback rod actually moves the position feedback arm as the lever is moved.
- For a hitch that will not lift, verify fluid level, open the rate-of-drop valve, reduce the load, and allow cold oil to warm.
Solutions
Replacing the PTO solenoid (LVA17822) is a moderately involved but achievable do-it-yourself repair; the main difficulty is access to its two mounting bolts. Exercise the PTO periodically, as letting it sit can cause the solenoid to stick. A worn PTO switch can be cleaned or replaced inexpensively. A PTO clutch that drags the engine down is a dealer repair that can approach $1,600 because the transmission must be split. For the stuck three-point hitch, freeing and lubricating the control valve shaft often restores intermediate control; if the valve is internally defective, the dealer will replace the valve assembly. Owners should proactively keep the rate-of-drop knob and the lift lever mechanism lubricated with penetrating oil or a corrosion-preventive film, both because the knob seizes and because the plastic lift lever has been known to snap off in owners' hands. The rare sheared rockshaft is a dealer repair; note that out-of-warranty rockshaft repairs have reportedly exceeded $700, and the warranty situation is discussed under Recommendations below.
Electrical and Instrument Cluster Problems
Symptoms
Electrical complaints are among the most consequential on the 3032E: a completely dead tractor with no crank and no dash display; a dead or unresponsive instrument cluster, sometimes cloudy with visible internal moisture; a fuel shutoff solenoid or relay that gets hot and burns out, sometimes with melted fuse faces; a battery that repeatedly goes dead; a discharge indicator that stays illuminated while running; and, on one documented early tractor, glue melting from the wiring harness causing intermittent shorts.
Causes
The instrument cluster on the 3032E is also the instrument cluster control (ICC), performing the logic that reads the safety circuits and enables the start relay. When both constant power and key-on power reach the dash connector but the dash stays dead, the cluster itself has failed, a problem specifically noted on certain 3E-Series tractors and often triggered by improper jump-starting. A cracked or failed seal on the cluster lens allows moisture in, which can short the cluster and disturb the electrical system. The burned-solenoid failure has a specific, well-documented cause: jump-starting the tractor incorrectly can back-feed 12 volts into the fuel pull-in circuit before the key is on, which keeps the solenoid energized, overheats it, and melts the associated 30-amp relay fuses; in severe cases it damages the printed circuit board inside the cluster. A dead-battery complaint may be a genuine parasitic draw, a bad ground, a failing alternator, or, very commonly, a defective battery, because vibration cracks the internal plates of these small batteries. The dead-tractor-no-lights failure typically traces to a blown main fuse or fusible link near the battery or starter, a poor ground between battery, frame, and engine block, or a failed ignition switch.
Troubleshooting Steps
- For a completely dead tractor, first clean and tighten the battery terminals and the ground connections at the frame and engine block, then check the main fuse and fusible link near the battery for continuity, and inspect the large 250-amp fuse at the positive terminal, which has been documented to blow.
- Measure battery voltage: a fully charged 12-volt battery reads about 12.6 volts. Load-test the battery, as one only two years old can fail from vibration.
- Start the engine and measure charging voltage at the battery posts; a healthy system reads roughly 13.5 to 14.4 volts. The 3032E uses a 40-amp alternator. If voltage does not rise above the static battery voltage, suspect the alternator or its three-pin connector.
- If voltage at the battery is fine but does not reach the ignition switch, the fault is upstream in the fuse or fusible link. If power reaches the switch but not the run terminal, the ignition switch is defective. If both constant and key-on power reach the dash but it stays dead, the cluster has failed.
- Inspect the instrument cluster for internal fogging or moisture and inspect the fuse box for water intrusion.
- For the burned-solenoid problem, check whether the fuel pull-in circuit has power with the key off; if so, a wiring or relay fault is back-feeding the circuit.
Solutions
Battery and connection issues are simple do-it-yourself fixes: clean terminals, tighten grounds, and replace a battery that fails a load test with the correct Group 22NF unit. Charging faults usually mean replacing the alternator or repairing its connector. A failed instrument cluster must be replaced; the part is LVA14586 on tractors below serial number 610000 and LVA22032 on later machines, and a genuine cluster is expensive, with one owner quoted about $1,345. A more economical route for a failed cluster is a specialist circuit-board repair service, which typically rebuilds the unit for a fraction of dealer replacement cost and returns it with the hour meter unchanged. The single most important preventive measure is to jump-start the tractor correctly and sparingly, because improper jump-starting is directly responsible for the most expensive electrical failures on this model. If the fuse box shows water intrusion, seal and relocate it as needed, and address the cluster seal to prevent recurrence.
Front Axle and Steering Problems
Symptoms
Front-axle leaks are perhaps the most frequently discussed 3032E problem of all. Owners report oil weeping from the top of the front spindles or kingpins, running down the wheel rim, from the pivot points where the axle meets the housing, or from the pinion. In the worst documented cases the leak accompanies destroyed wheel bearings, and one owner discovered the end of the axle had broken off entirely. Steering complaints include stiffness, difficulty turning, and difficulty engaging four-wheel drive.
Causes
The front axle acts as an oil bath filled with Hy-Gard, so any seal failure leaks that fluid. The consensus among owners and technicians is that these seals fail prematurely because of two factors. First, the axle housing builds internal pressure as it heats, and early tractors were fitted with a non-vented yellow plastic dipstick or fill plug; the pressure pushes oil past the seals. Second, and most importantly, overloading the front axle by performing heavy loader work without adequate rear ballast is described by experienced owners as the number-one cause of front-axle seal leaks on these small tractors. Contributing to the severity, the original wheel bearings on some units are Chinese-made and have been found chewed out at as few as 750 hours. The seals themselves were redesigned by John Deere to a sturdier specification, and the correct seal differs by serial number, which complicates ordering. Steering stiffness can stem from low steering fluid, a worn linkage, or a leaking steering cylinder.
Troubleshooting Steps
- Identify the exact leak location: behind the wheel at the spindle or hub, at the kingpin, at the pivot where the axle meets the center housing, or at the pinion where the driveshaft enters.
- Check the front-axle oil level and top up with the correct fluid, Low Viscosity Hy-Gard (TY22035), before the level drops far enough to damage bearings.
- Determine whether the tractor has the yellow plastic dipstick or the metal vented dipstick, because the vented version relieves the pressure that drives leaks.
- Confirm the serial number of the axle before ordering seals, because early and late tractors use different seals despite sometimes sharing a part number.
- For steering complaints, check the power steering fluid, inspect the linkage for wear, and inspect the steering cylinder for leaks.
Solutions
The most effective preventive and corrective measure endorsed by owners is to install the John Deere vented metal dipstick in place of the original plastic one, which relieves internal axle pressure and, for some owners, stops the leak without further work; several owners have fabricated their own vents. When seals must be replaced, the job involves removing the wheel and hub, prying out the old seal, and installing the redesigned Deere seal, lubricating its lip on installation. This is achievable by a mechanically inclined owner with the service manual, and forum consensus is that it is "not a big job if you're prepared," though the snap ring and the sealant used in place of a gasket at the housing joint make it fiddly. Dealer quotes for this repair have run around $400 or more, with the seal itself around $140. Owners must run adequate rear ballast, such as loaded rear tires or a ballast box, whenever using the loader, as this is the single best way to prevent recurrence. A broken axle is a major repair; the complete axle assembly (LVA15986 on early tractors, TA13845 on worldwide-edition tractors) ran roughly $3,765 to $5,240 in the United States, so a careful seal-and-bearing rebuild is usually preferable if the housing is sound.
Regeneration and Diesel Particulate Filter Problems
Symptoms
Because the 3032E is a Final Tier 4 machine, it carries a diesel particulate filter and performs periodic exhaust filter cleaning, or regeneration. Symptoms of trouble include dash icons requesting a parked regeneration, reduced engine power when warnings are ignored, and, on at least one owner's 2017 tractor, a "stationary regen" feature that stopped working. Fault codes in the ECU 3719 and ECU 3251 families relate to soot level and DPF differential pressure.
Causes
The DPF captures particulate matter and cleans it by one of three processes: passive cleaning during normal hot operation, active cleaning managed automatically by the ECU, and parked cleaning, which requires the operator to initiate a stationary cycle. Deere's documentation is explicit that a parked cleaning is generally only needed when automatic cleaning has been disabled or interrupted for an extended period, or when the tractor is habitually used under light loads that never let the exhaust get hot enough for passive cleaning. In other words, the most common cause of DPF complaints on this class of tractor is chronic light-duty, short-duration use, exactly the usage pattern of many hobby owners. Repeated ignored warnings escalate to a required dealer recovery regeneration.
Troubleshooting Steps
- When a cleaning icon appears, do not ignore it; allow automatic cleaning to complete, or initiate a parked regeneration following the operator's manual procedure.
- Review the usage pattern; if the tractor is always used briefly and lightly, occasionally run it under load and at operating temperature to promote passive cleaning.
- If warnings escalate or power is reduced, retrieve the ECU fault codes. The diagnostic connector is a round nine-pin Deutsch connector, often found under the dash near the steering column, and a laptop with a J1939 adapter can read engine and DPF codes.
Solutions
Most DPF issues are resolved simply by allowing the machine to complete its cleaning cycles and by occasionally working the tractor hard enough to sustain passive regeneration. A parked regeneration performed per the manual clears a moderately loaded filter. Once soot accumulation or interrupted cleaning has progressed too far, only a dealer recovery regeneration will restore full function, and a filter that is physically damaged or a failed sensor will require dealer service. Owners are strongly cautioned against DPF "delete" kits and ECU tuning tools; while such products exist and are marketed for these engines, deleting emissions equipment is illegal for on- or off-road use under federal law, voids the warranty, can render the ECU non-functional, and can make the tractor difficult to sell or to have serviced by a dealer.
Maintenance-Related Failures
Symptoms
A distinct category of 3032E problems is not a design flaw at all but the direct consequence of deferred or improper maintenance. These present as overheating, hard starting, sluggish hydraulics, rough running, premature wear, and, in one striking early-ownership case, a rear wheel that fell off. Overheating shows as a rising temperature gauge and, in dusty conditions, can arrive quickly.
Causes
Overheating is most commonly caused by a plugged radiator screen, grille, and cooling fins clogged with dust, chaff, and grass clippings, followed by low coolant, a worn or loose alternator and fan belt, or a defective thermostat. Deere's manual specifically calls for cleaning the front and side screens plus the radiator, fuel cooler, and transmission oil cooler fins. Hard starting, rough running, and stalling frequently trace to neglected fuel filters and stale fuel. Premature bearing and seal failures often trace to running the front axle low on oil or to loader work without ballast. The wheel that fell off in one owner's first week was traced to lug bolts never re-torqued at the 10-hour mark specified in the manual, a required break-in check that is easy to overlook.
Troubleshooting Steps
- If the temperature gauge climbs, stop, reduce load, and let the engine idle to cool before shutting down; then inspect and clean the radiator screen and fins, always blowing compressed air from the clean side outward so debris is not driven deeper into the core.
- Check coolant level only when the engine is cool, and inspect for the discoloration or oil sheen that would indicate a bigger problem such as a head gasket.
- Inspect the alternator and fan belt for wear, glazing, and correct tension; the belt should deflect about three-eighths of an inch under moderate thumb pressure.
- Verify the thermostat and radiator cap if overheating persists with a clean radiator and correct coolant level.
- Re-torque wheel lug hardware at the interval the manual specifies, and periodically thereafter.
Solutions
The vast majority of maintenance-related failures are prevented outright by following the service schedule below and by cleaning the radiator screen daily in dusty conditions. Overheating that has already occurred warrants draining and flushing the cooling system and changing the engine oil, because a serious overheat can damage the head gasket and piston rings. Belts, thermostats, and radiator caps are inexpensive parts that should be replaced at the first sign of wear rather than waiting for an in-field failure. The broader lesson from the owners who have had the most trouble, including one who catalogued 15 separate repair incidents, is that the 3032E rewards diligent, on-schedule maintenance and punishes neglect and overloading.
Model-Year and Variant Differences
Across the 3032E's long production run, a few differences meaningfully affect problem prevalence. The most significant dividing line is the serial number 610000 break, roughly corresponding to the 2016–2017 transition and the move to the "worldwide edition" 1LV product identification number. Tractors below 610000 use the LVA14586 instrument cluster and the M811032 fuel/water separator; later tractors use the LVA22032 cluster and MIU802421 separator. Because the instrument cluster doubles as the machine's control computer and is a known failure point, the cluster part number matters when sourcing a replacement.
Early tractors are also far more likely to have shipped with the non-vented yellow plastic front-axle dipstick, which is directly implicated in the front-axle seal leaks that dominate owner complaints; the retrofit vented metal dipstick is the fix, and later machines benefited from redesigned, sturdier seals. Cold-start behavior also varies by serial range: owners report that the glow-plug indicator light stays illuminated for several seconds on some model years but flashes only briefly on others, and Deere's operator manuals describe different glow-plug operation depending on serial number range, so what looks like a fault on a newer tractor may simply be a different, normal behavior.
All 3032E tractors are four-wheel-drive (MFWD) with hydrostatic transmission; there is no two-wheel-drive or gear variant, so the drivetrain-related complaints apply across the board. The principal configuration variable is the loader. The 3032E has been paired over the years with the D160, the 305, and the current 300E loaders (the 300E is rated to lift up to 1,283 pounds), and the great majority of United States tractors are loader-equipped. Loader-equipped tractors show a distinctly higher incidence of front-axle seal leaks and of loader leak-down complaints, both because the loader imposes heavy front-axle loads and because the 3E-Series loaders have inherently fast factory leak-down specifications. Buyers of a loader tractor should therefore budget for ballast and expect some bucket drift as normal. Backhoe-equipped tractors add their own hydraulic maintenance burden.
Finally, owner sentiment itself varies. Many owners are highly satisfied; one Wyoming owner who tested the tractor across four seasons rated it a four out of five and called it affordable and dependable, and numerous forum members report flawless service for years. Others, particularly those coming from heavier Deere models, find the economy-grade build disappointing. A balanced reading of the forums suggests that most 3032E tractors give good service, that a minority have genuinely troublesome histories, and that the owner's maintenance discipline, ballast practices, and dealer quality strongly influence which camp a given tractor falls into.
Preventive Maintenance and Recommended Service Schedule
Diligent preventive maintenance is the single most effective way to avoid the problems described above. The following intervals and part numbers are drawn from John Deere's official filter overview and replacement parts documentation for the 3E Series. Deere's published intervals assume commercial-style daily use of four to eight hours; most compact-tractor owners accumulate hours far more slowly and should therefore also service on a calendar basis, at minimum annually.
Every 10 hours or daily: Check engine oil level with the machine parked on level ground and the engine cooled for at least five minutes; clean around the dipstick before removing it to keep dirt out. Check the transmission/hydraulic fluid level. Inspect the air filter. Check coolant level (when cool). In dusty conditions, clean the radiator screen and cooling fins, and inspect the engine bay for debris, at every refueling. Confirm steering, park brake, and service brakes function.
Break-in (first 50 hours): Although the 3032E operator's manual notably does not list a formal 50-hour service, John Deere ships the tractor with break-in oil and the broad recommendation is to change engine oil and filter early. Critically, re-torque the wheel lug hardware within the first 10 hours and check it again, as failure to do so caused at least one documented wheel-off incident. Change the transmission/hydraulic charge filter (LVA16054) after the initial 50 hours per the filter overview.
Every 50 hours: Inspect and inflate tires. Check and clean battery terminals. Check front-axle oil and top up. Check hydraulic fluid level. Lubricate the front-axle pivot and all grease fittings; the hydrostatic pedal pivot should also be greased. Grease fittings should be serviced every 10 to 15 hours in heavy use.
Engine oil and filter: Use John Deere Plus-50 II (TY26668, 10W-30). The engine holds approximately 4.5 quarts with the filter. The oil filter is part M806419. Deere's earlier documentation specified changing engine oil and filter every 200 hours or annually; the more recent worldwide-edition guide extends this to every 400 hours or annually. Given typical light use, an annual change is prudent regardless. Fuel system: Replace the fuel/water separator every 400 hours or annually; the part is M811032 on tractors below serial number 610000 and MIU802421 on later tractors. Replace the spin-on fuel filter on the same schedule. Drain water from the separator bowl routinely, and treat stored fuel with biocide to prevent the algae growth that plugs tank screens.
Air filters: Check or replace the primary air filter (M131802) and secondary air filter (M131803) every 600 hours or as required; service more often in dusty conditions.
Transmission and hydraulic system: The system holds approximately 5.5 gallons of John Deere Low Viscosity Hy-Gard (TY22000). Replace both the charge filter (LVA16054) and the suction filter (LVA14703) every 400 hours, and change the fluid on the same interval. Using genuine Hy-Gard is important because it is the fluid Deere specifies for the shared transmission, differential, and hydraulic reservoir; some literature notes the hydraulic oil service interval can be extended when Hy-Gard products are used. A complete filter kit (LVA21037 for later tractors, LVA21128 for early tractors) bundles the needed filters.
Front axle: Change the front-axle oil every 600 hours, using Low Viscosity Hy-Gard (TY22035); the axle holds approximately 4 quarts. Install the vented metal dipstick if the tractor still has the original plastic one, and always use rear ballast during loader work.
Cooling system: Use John Deere Cool-Gard II coolant. The 3032E cooling system holds approximately 1.3 gallons (4.9 liters). Clean the radiator screen and fins routinely, inspect hoses and clamps, and check the alternator/fan belt tension and condition. Flush and replace coolant per the manual, typically on a multi-year interval.
Battery and electrical: The tractor uses a Group 22NF, 12-volt battery. Keep terminals clean and tight, maintain the ground connections at the frame and engine block, and keep the battery charged during storage, as these small batteries fail from both discharge and vibration. Inspect the wiring harness and connectors, particularly the alternator's three-pin connector and the fuel-circuit relays, and never back-feed the system through improper jump-starting.
Safety switches and linkages: Periodically inspect and reseat the seat switch, the range-shift neutral switch, and the PTO switch connectors, cleaning contacts and checking for corrosion and bent pins. Exercise the PTO periodically so its solenoid does not stick. Keep the hydrostatic pedal linkage, the three-point rate-of-drop knob, and the lift lever mechanism clean and lubricated to prevent the sticking and seizing that are common on this model.
Recommendations
Immediate steps for any owner (first week):
- Verify the front-axle dipstick type. If it is the yellow plastic version, order and install the John Deere vented metal dipstick now; this is the cheapest and highest-value preventive action available for this tractor.
- Confirm you have adequate rear ballast (loaded rear tires or a ballast box) and use it for all loader work. This single practice prevents the majority of front-axle seal and bearing failures.
- Re-torque the wheel lugs if the tractor is new or recently serviced, and record the tractor's serial number and product identification number for parts ordering.
Stock these inexpensive spares: a fuel shutoff solenoid (M810324), a fuel/water separator element (M811032 or MIU802421 per serial number), and a set of fuel and air filters. These cover the most common roadside failures.
Escalation thresholds — when to move from do-it-yourself to dealer:
- Attempt yourself: fuel filter/solenoid replacement, battery and ground service, radiator cleaning, hydrostatic linkage cleaning and spring replacement, PTO switch cleaning, front-axle seal replacement (if mechanically confident), and hydraulic fluid/filter service.
- Go to the dealer immediately if: the tractor bucks or jerks in the hydrostatic drive (do not keep operating it); the PTO drags the engine down with no implement attached (internal clutch); the DPF requests repeated or recovery regenerations or power drops; or any high-pressure fuel injection component is suspected.
- Replace the instrument cluster only after confirming that constant and key-on power both reach the dash but it stays dead; prefer a specialist circuit-board rebuild over the roughly $1,345 genuine-cluster replacement when possible.
Warranty benchmark: The John Deere factory coverage is a 2-year/2,000-hour full warranty plus a 6-year/2,000-hour limited engine and powertrain warranty (whichever comes first). Document every dealer visit; if a component such as the rockshaft or loader valve fails near the boundary, a well-documented history strengthens a goodwill claim. If a tractor accumulates a long string of repairs, pursue a written warranty-hours extension in writing before the coverage lapses.
Buying guidance: A used 3032E with clean, documented maintenance and no front-axle leak history is a good value. Prioritize a later (post-serial-610000) machine with the vented dipstick and redesigned seals, inspect for oil on the front rims and around the loader cylinders, confirm the instrument cluster and all gauges function, and cycle the PTO and three-point hitch through their full range during inspection.
Caveats
- Forum and consumer-site evidence is anecdotal and skewed negative. Owners post far more often about problems than about trouble-free operation, so the prevalence of issues described here should not be read as the experience of the average owner. Many 3032E tractors run for years with only routine service.
- Some secondary "problem" websites recycle generic content. Several search results referred to the 3032E as gasoline-powered or repeated boilerplate applicable to any tractor; such claims were disregarded in favor of primary John Deere documentation, dealer specifications, and first-hand owner reports on established forums (TractorByNet, Green Tractor Talk, Heavy Equipment Forums, My Tractor Forum, and Tractor Forum).
- Part numbers and intervals changed over the production run. John Deere's 2019 filter overview and its later worldwide-edition guide disagree on some intervals (for example, engine oil at 200 versus 400 hours) and capacities. Always verify the exact part number and interval against the operator's manual and dealer parts lookup for your specific serial number before servicing.
- Some part-number attributions rely on owner reports. The PTO solenoid (LVA17822) is confirmed by John Deere as a solenoid valve fitting the 3032E, but Deere does not explicitly label it a "PTO solenoid"; treat that functional description as owner-sourced. The battery CCA rating (commonly cited as 500) could not be confirmed from a primary John Deere document.
- Emissions modifications are illegal. DPF-delete and ECU-tuning products are described here only because owners discuss them; installing them violates federal law, voids the warranty, and is not recommended.
- Repair cost figures are illustrative. Dollar amounts cited (for example, $650 for tank cleaning, $1,345 for a cluster, $400-plus for axle seals, and up to $1,600 for PTO clutch work) come from individual owner reports and will vary by region, dealer, and date.