
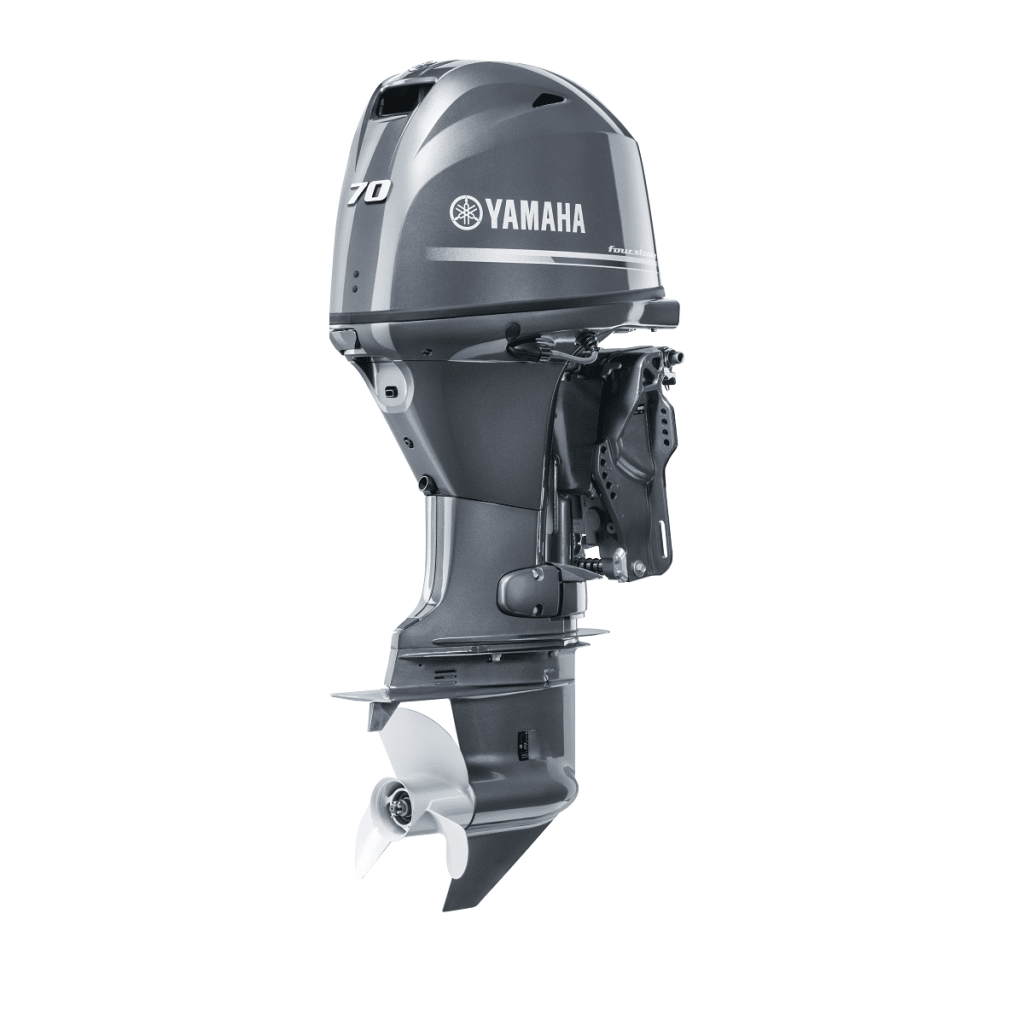
Yamaha F70 problems are easier to narrow down when you describe exactly what the engine does. A starter that only clicks needs a different investigation from an engine that turns normally but will not fire. Likewise, an outboard that loses revs under load presents a different problem from one that revs freely while the boat slows down.

This guide explains how to separate those symptoms, make sensible initial checks and recognise when a Yamaha technician needs to take over. It concerns the F70 four-stroke with electronic fuel injection, not an older Yamaha 70 hp two-stroke. It is a troubleshooting guide, not evidence that every F70 develops these faults or that any particular component has an unusually high failure rate.
The most useful starting point is a short record: when the problem began, whether the engine was cold or warm, what the gauges showed and what changed recently. Fuel purchases, battery work, winter storage, a propeller strike or a recent service can provide a much better lead than buying the first part named in an online discussion.
Identify Your F70 Before Ordering Parts
Find the identification label on the outboard and record the complete model designation and serial number. Use these details in Yamaha’s owner’s manual lookup. Manuals shared between several Yamaha engines contain information that may apply to only some models, so check the applicable headings rather than treating every paragraph as an F70 instruction.
Yamaha’s current US F70 specifications describe a 1.0-litre, four-cylinder, fuel-injected engine with a full-throttle operating range of 5,300–6,300 rpm. That is a useful reference, but the manual for your engine and market controls the specification you should use. Do not substitute an F60 figure, a two-stroke 70 specification or advice intended for a different control system.
Record the installation as well as the engine. A remote-control boat with a built-in fuel tank has additional hoses, connections and control components that a different installation may not share. Shaft length, propeller, boat loading and engine mounting also affect performance. Two boats with F70s can behave differently without either engine being defective.
- Keep the model and serial number with your service records.
- Note the propeller markings and whether the boat has a portable or built-in tank.
- Identify the instruments actually fitted; not every boat displays the same alerts or measurements.
- Check replacement part numbers against the engine identification, including filters, plugs and water-pump components.
A Quick Guide to the Main Symptoms
Use this table to choose an investigation, not to declare a component faulty. Several causes can produce the same symptom, and more than one fault may be present on an older boat.
| What you notice | Start by separating | Most useful next step |
|---|---|---|
| No crank or a clicking sound | Battery supply from starter/control faults | Check neutral selection, battery condition and connections |
| Normal cranking but no start | Starting permissions from fuel and ignition faults | Check stop-switch clip, fuel supply and recent changes |
| Starts, then stalls | Cold-only behaviour from a persistent fault | Record time to stall and inspect the accessible fuel supply |
| Hesitation or falling revs under load | Power loss from an active engine warning | Read the instruments before investigating fuel or ignition |
| Revs rise but speed falls | Engine output from propeller grip or drive | Reduce throttle and inspect the propeller when safely stopped |
| Overheat warning or lost cooling stream | Cooling failure from a blocked indicator outlet | Stop and check accessible water inlets; investigate before continuing |
| Oil-pressure warning | Oil quantity from actual pressure | Stop, check the level correctly and obtain diagnosis if unresolved |
| Battery repeatedly goes flat | Battery health from charging and accessory demand | Test the battery and charging system rather than guessing |
| Trim motor runs but engine will not lift | Electrical command from hydraulic movement | Inspect for leaks and obtain a trim-system assessment |
Before removing the cowling or working near the propeller, shut the engine down and prevent accidental starting. Work on a stable boat, keep people away from the propeller and follow the isolation instructions in your manual. Fuel leaks, burning wiring, severe vibration and engine warnings take priority over a performance test. A boat that cannot be controlled reliably should not be taken out to reproduce a fault.
1. The Engine Will Not Crank
Begin with the simplest distinction: is the engine actually turning over? A click from the engine, a dimming dashboard or silence when the key is turned are useful descriptions. They are not interchangeable. A clicking starter circuit may still have an inadequate power supply; it does not prove that the starter motor needs replacement.
Confirm that the control is fully in neutral and that the battery switch is in the normal operating position. Do not bypass a neutral-start interlock to test it. If moving the control to its proper neutral detent changes the symptom, report that observation to the technician. The control, cable adjustment or start circuit may need attention, but the observation alone does not identify the failed part.
Check the Battery and Its Connections
Inspect accessible battery terminals and cable connections for looseness, corrosion, damaged insulation or heat marks. An apparently clean terminal can still have a poor connection between mating surfaces. Follow the boat’s electrical isolation procedure before cleaning or tightening anything, and avoid allowing tools to bridge terminals or a live terminal and metalwork.
Yamaha’s electrical guidance emphasises secure, clean connections and proper battery testing. A voltage reading with everything switched off cannot establish that a battery can supply starting current. If charging does not restore dependable starting, have the battery load-tested and the circuit checked under load. Replace the battery when testing establishes that it is faulty or unsuitable, rather than solely because the engine failed to start once.
Consider the sequence of events. If starting deteriorated after a battery replacement, check the installation before assuming an unrelated engine failure. If the dashboard resets during the start attempt, tell the technician. If the starter operates normally only after charging but the problem returns, continue to the charging and accessory-demand investigation later in this guide.
When the Starter Circuit Needs Diagnosis
An accessible fuse can be checked using the correct manual procedure, but never substitute a higher rating or bridge the fuse. A replacement that blows again indicates a fault needing investigation. Repeated replacement does not make the circuit safe.
Once the battery and supply connections are verified, a technician can distinguish control-switch, relay, wiring and starter faults. Ask for the test result that supports the proposed replacement. This is especially valuable with intermittent faults: a starter that works during a workshop visit can still have a problem, but a symptom history and measurements are stronger evidence than a speculative parts list.
2. It Cranks Normally but Will Not Start
If the engine turns at its normal starting speed, move away from a no-crank diagnosis. Confirm the engine stop-switch clip is properly attached and follow the starting procedure for the fitted controls. Avoid repeated long cranking attempts; use the starter operating and cooling limits in the correct manual.
Next, establish that usable fuel can reach the engine. Check the actual fuel supply rather than relying entirely on a gauge. Inspect the accessible hose route for a pinched section, a disconnected fitting or a connection disturbed during recent work. Operate any tank vent according to that tank’s instructions. Do not improvise changes to a sealed or pressure-managed fuel system.
The F70 uses electronic fuel injection. Instructions to clean its carburettor jets or adjust a carburettor mixture screw are therefore inappropriate. Equally, a generic recommendation to replace an automotive-style air filter is not a diagnosis. Check the actual intake arrangement and look for obvious obstructions rather than buying a component because a general engine article mentioned it.
If the fault appeared immediately after refuelling, preserve that detail. If it appeared after months of storage, document the age of the fuel and the storage preparation. Neither proves fuel is responsible, but both make fuel assessment more relevant than an unexplained ignition-switch replacement.
Beyond these checks, a technician may need to test fuel delivery, ignition and engine condition. Do not loosen pressurised fuel lines to see whether fuel comes out, or create an exposed spark near fuel vapour. Hearing a pump operate also does not prove that the fuel system is delivering the required pressure and volume.
3. It Starts, Then Stalls or Idles Roughly
A useful description includes how long the F70 runs before stopping. Does it die almost immediately, after several minutes, only when warm, or only when shifted into gear? Does it restart immediately or require a wait? Those differences help a technician choose the next test and prevent an idle fault from being confused with a propeller-load problem.
Check whether the problem followed a service. A loose connection, disturbed hose or incorrectly fitted service item deserves attention before an assumption of major internal wear. Do not change several things at once: if the symptom disappears, you need to know which correction made the difference.
Yamaha advises checking spark-plug condition and using the specified plug type. Plug inspection can support a diagnosis, but appearance alone does not establish the condition of an injector, coil or cylinder. If one plug looks markedly different from the others, retain its cylinder identification and show the technician rather than mixing the plugs and losing the comparison.
Separate Intake, Fuel and Ignition Checks
Look for obvious nesting material or debris around accessible air-intake passages after storage. This is a visual inspection, not permission to spray cleaning fluid into the intake or dismantle the injection system. Keep loose items away from the engine, and reinstall the cowling and any disturbed covers correctly before normal operation.
For continuing roughness, professional checks can compare cylinder contribution, ignition behaviour and fuel delivery. A clean fuel filter does not establish that every downstream component is clean. Conversely, a rough idle does not justify replacing all injectors. Ask what observation or measurement led to the diagnosis and whether the fault was reproduced after the repair.
If the engine stalls only when engaging gear, record whether it idled normally beforehand. Do not compensate by altering stops or increasing idle settings without the specified procedure. A setting that masks stalling can create harsh engagement and make docking less predictable. Resolve the underlying fault before relying on the boat in confined water.
4. The F70 Bogs Down or Loses Power Under Load
First look at the gauges and listen for warnings. Power reduction accompanied by an overheat or oil-pressure alert belongs in the warning-system investigation, not a trial of fuel additives. Stop as directed by the manual and resolve the warning. Do not disconnect a sensor or silence a buzzer to regain normal revs.
Without an active warning, compare the present behaviour with the boat’s previous performance under similar conditions. A boat carrying more passengers, additional equipment or a fouled hull is not performing the same test as a lightly loaded boat with a clean bottom. Record engine speed and boat speed together; either number on its own leaves important uncertainty.
Decide Whether the Engine or Installation Changed
A sudden loss on a previously satisfactory setup makes a recent change particularly valuable. Think about fuel, service work, a propeller impact, an added accessory or a different propeller. A boat that has never reached the correct operating range needs an installation and propeller assessment as well as an engine check.
Do not choose a new propeller solely to force the tachometer into the desired range while the engine is misfiring or struggling for fuel. That can conceal the symptom without fixing it. Establish that the engine is healthy, the hull is reasonably clean and the load is representative before making propeller decisions.
A technician investigating power loss should reproduce the relevant load safely. An engine that idles happily at the dock has not passed a full performance test. Ask whether fuel supply was assessed when the symptom occurred, whether the ignition remained consistent and whether any recorded engine faults were considered alongside physical checks.
Make the Comparison Repeatable
Record the approximate load, propeller, trim position, water conditions and engine temperature state. For example, “loses power after ten minutes with three adults aboard” provides a much clearer starting point than “sometimes slow.” Do not continue a failing run just to complete the record; observations already made can be enough to direct a workshop test.
After repair, use a controlled comparison rather than expecting an exact speed copied from another boat online. Boat design, loading and conditions differ. The useful question is whether this installation now operates smoothly and within its specified limits under normal use.
5. Fuel Contamination, Filters and Primer-Bulb Clues
Yamaha recommends appropriate fuel/water separation and inspection of hoses and connections. Water or debris reaching the engine can cause running problems, but changing a filter alone will not solve a contaminated tank that immediately supplies more contamination. The investigation should consider where the contamination came from and how far it travelled.
Visible leakage or a strong unexpected fuel smell is a reason to stop starting attempts and deal with the leak. Fuel-system work needs ventilation, control of ignition sources and proper collection and disposal of fuel. If you lack the equipment or confidence to do this safely, leave sampling and filter replacement to a marine technician.
What the Primer Bulb Does and Does Not Prove
Before starting, a bulb that will not prime warrants inspection of the supply path and connections. Its behaviour is a clue, not a complete fuel-pump test. Tell the technician whether it can be primed before starting and whether its behaviour changed after a hose or filter replacement.
Avoid diagnosing an expensive injection component from the feel of the bulb alone. The boat-side supply and the engine’s injection system perform different jobs, and a fault in either can affect running. A technician can separate them with controlled tests using correctly rated equipment and fittings; improvised fuel containers on a moving boat create unnecessary risk.
Yamaha’s fuel-system maintenance guidance warns that additives do not restore stale fuel or remove water. It also warns against emptying a used filter and reinstalling it, because captured contamination can reach the clean side. Injector screens and internal fuel-system components require the appropriate service procedure, not random solvent treatment.
Ethanol and Fuel Choice
The current US F70 specification permits gasoline containing up to 10 percent ethanol. Do not assume that every problem after refuelling proves E10 is incompatible, and do not use a higher ethanol blend. Follow the octane requirement for your engine and region; US pump-octane numbers and RON numbers are different rating systems.
Keep a record of fuel purchases when investigating a recurring issue. A date, supplier and approximate quantity can help distinguish a single suspect fill from a problem that persists across fresh fuel supplies. Adding more fresh fuel to an unidentified contaminated supply is not the same as confirming the tank is clean.
6. Overheating or a Weak Cooling-Water Stream
An overheat alert calls for stopping the engine and checking the cause. The F70 manual describes warning indications and protective speed reduction, but reduced speed is not permission to continue operating an overheated engine. Check that the water inlets are submerged and not obstructed once it is safe to inspect them.
The telltale stream is a useful observation, but it is not a complete cooling-system test. An outlet obstruction can affect the visible stream, while a visible stream does not prove that every internal passage is clear or that temperature regulation is correct. Do not dismiss an overheat warning because you can still see water coming out.
Start with What You Can Observe
Note whether overheating occurred at idle, after sustained running, in shallow water or after collecting weed. With the engine stopped, inspect accessible intake openings and the telltale outlet. Do not push hard tools deep into an outlet or dismantle hot cooling components. If the cooling stream is absent, stop and investigate rather than running the engine while waiting for an alarm.
Water-pump condition, cooling restrictions and temperature-control components may need inspection. Yamaha explains that the rubber water-pump impeller relies on water for lubrication, so even brief dry running can damage it. Tell the technician if the engine was started without a proper water supply, even if the incident seemed too short to matter.
Check the Cause Before Replacing the Pump
A pump replacement may be appropriate, but it should follow inspection rather than serve as a universal answer. If an impeller has deteriorated, the repair assessment should also consider where missing material may have gone. If the pump is serviceable, the investigation still needs to explain the overheating instead of declaring it fixed because one part was changed.
Record whether any previous repair changed the conditions under which the alert appears. A fault that now occurs only during a turn, for example, gives different information from overheating at every idle. This is a reason for a proper cooling and installation assessment, not repeated high-speed experiments by the owner.
7. Flushing Mistakes That Can Create More Problems
The built-in freshwater flush connection and lower-unit flushing muffs are different methods. When using the built-in connection, leave the engine off. Yamaha’s flushing guidance describes a 15-minute flush using hose pressure for this method. Reconnect the attachment correctly afterwards according to the manual.
Running on muffs is a separate procedure and should be used only where the manual permits it, with the correct adapter and sufficient water supply. Yamaha specifies idle speed for muff flushing and removal of the propeller for safety. Never use a stationary hose test to reproduce a full-throttle performance problem.
Make the chosen method unambiguous to anyone helping you. “The hose is connected” does not say which connection is being used or whether the pump has the required supply. A second person who assumes the engine should be started can turn routine cleaning into a dry-running incident.
After flushing, include a quick visual check for anything left disconnected or unsecured. A consistent finishing routine is useful: water supply removed, fittings restored, cowling secured and the engine positioned as the manual requires. This also makes the next outing easier to prepare for because the engine is left in a known condition.
8. Oil-Pressure Alerts and Unexpected Oil Levels
The oil-pressure warning does not measure the quantity of oil in the sump. If it activates while running, stop the engine and check the oil level correctly. An adequate level does not prove adequate pressure. An unresolved warning with the correct oil quantity requires diagnosis; replacing the pressure switch without verifying the cause is not a sound shortcut.
Use a consistent oil-checking method. Yamaha’s general guidance calls for a level outboard, an appropriate settling period and a wiped, fully reseated dipstick. Follow the exact procedure in your model’s manual. Do not start an engine with an unresolved pressure warning simply to warm it for a routine measurement.
Avoid Chasing Inconsistent Dipstick Readings
A reading taken with the engine tilted and another taken vertically are not a useful trend. Before deciding that oil is disappearing or increasing, repeat the check under the same specified conditions and record the result. After an oil change, establish a correct baseline rather than assuming that emptying a bottle guarantees the right level.
Overfilling and underfilling both matter. Use the specified oil type, viscosity and filter for the engine, and distinguish refill quantities with and without filter replacement. If you are uncertain about the correct amount, confirm it from the manual instead of borrowing a capacity from another Yamaha model.
If a properly checked level continues to rise, the oil appears contaminated or there is an unexplained loss, stop treating it as a simple top-up issue. Document the change and arrange an assessment. Smell or colour alone cannot establish a specific internal failure. A technician may need to examine the oil and engine condition before deciding what repair is justified.
Keep engine oil and lower-unit gear oil separate in your records. They serve different assemblies, use different specifications and point to different investigations when contaminated. “The oil was milky” is incomplete information unless you say which oil was inspected and when.
9. The Battery Goes Flat or Electrical Faults Return
A repeatedly discharged battery does not automatically mean the F70’s charging system has failed. Separate battery condition, charging performance and the electrical demand of the boat. A battery that has been deeply discharged may need assessment even after an unrelated charging problem is corrected.
Yamaha lists 15 amps at wide-open throttle for the current US F70. That is not a promise of 15 amps available to accessories while trolling or idling. Consider how the boat is used: long periods operating electronics with short engine runs create a different charging situation from sustained cruising. Have an installer assess the actual system and loads before adding batteries or changing wiring.
Give the Electrical Test a Clear Question
Ask whether the battery can retain a charge, whether the engine charges it correctly and whether an unexpected load remains when the boat is parked. These are separate questions. A single reading at the dashboard cannot settle all three, particularly if a connection or instrument is faulty.
Corrosion can occur away from the battery, including switches, fuse holders and cable connections. Have damaged or overheated wiring repaired using suitable marine components. Do not disconnect a battery from a running engine as an improvised alternator test, and do not defeat circuit protection to keep an accessory working.
For an intermittent failure, write down what was operating at the time: trim, lights, sounder or other equipment. Also note whether the engine stumbled, instruments restarted or only one accessory stopped. That distinction helps separate a shared supply problem from a fault isolated to a particular circuit.
10. Rising Revs, Poor Thrust and Vibration
If engine speed suddenly rises while boat speed falls, reduce throttle. This is a different symptom from an engine that cannot gain revs. A propeller losing grip, a damaged hub or another drive issue may be involved, and repeated acceleration can make the situation worse.
Note whether it happens during turns, in rough water, with a particular trim position or during straight-line acceleration. These observations help distinguish an installation or propeller-grip issue from a problem present under every condition. Do not raise the engine on its mounting or change several setup variables without a qualified assessment.
With the engine safely disabled, inspect the propeller for obvious damage. Yamaha notes that bent, nicked or cracked blades can reduce performance and create vibration, and worn blade edges can affect performance even when the propeller looks broadly intact. A propeller workshop can assess repairability and balance more reliably than reshaping a blade by eye.
Take New Vibration Seriously
New vibration after an impact warrants more than a cosmetic inspection. Tell the technician what was struck, the approximate operating conditions and whether the vibration began immediately. The visible propeller damage may not describe the entire problem; the shaft and gearcase may need assessment as well.
Fishing line behind the propeller can damage shaft seals. If line is found, include seal inspection in the follow-up rather than assuming removal completes the repair. When a propeller is removed and refitted, use the correct hardware, tightening specification and retention method for that installation.
Avoid judging a repair only at idle. Once any damage has been addressed, a controlled on-water check should confirm that the original vibration or loss of thrust has gone under the conditions that previously produced it. Stop if it returns, and report the result without repeatedly pushing through the vibration.
11. Difficult Shifting or Suspected Lower-Unit Trouble
Describe the shift problem precisely. Is the control stiff, is there a delay engaging gear, does the engine stall, or is there persistent grinding? A normal brief engagement sound is different from repeated grinding or a new mechanical noise. If engagement is unreliable, the boat needs attention before it is used where dependable forward and reverse are essential.
Yamaha’s guidance identifies cable adjustment as one possible explanation for hesitation or grinding on mechanically shifted installations. It is not the only explanation. Increasing force on the control or adjusting the cable until one gear works can leave the other gear or neutral incorrectly positioned. A qualified check should cover the complete range of operation.
Water in Gear Oil Needs an Explanation
Milky lower-unit lubricant can indicate water entry and calls for investigation of the sealing system. Yamaha recommends a dealer pressure test where appropriate. It also cautions that oil checked immediately after operation may contain fine air bubbles that resemble milkiness, so describe how the sample was obtained rather than diagnosing from a photograph alone.
Replacing contaminated lubricant without finding the entry point can leave the same fault in place. Record whether fishing line, impact damage or previous seal work is involved. The repair should establish the source and confirm that the assembly seals correctly, not simply deliver fresh-looking oil.
If lubricant is leaking, the gearcase has suffered an impact or mechanical noise has developed, avoid continuing the trip as a test. Lower-unit work and oil-level procedures should follow the correct manual. A guessed refill method or unsuitable lubricant introduces another variable into an already uncertain diagnosis.
12. Power Trim and Tilt Stops Working Properly
Separate three symptoms: no response to the switch, a running trim motor without normal movement, and an engine that moves but will not hold position. Record whether the problem affects one direction or both and whether it occurs from every fitted trim switch. This information is more useful than describing the entire system as dead.
Yamaha explains that the electric pump moves hydraulic fluid to operate trim and tilt. External fluid leakage or an engine that will not remain in position can therefore require seal or valve inspection. Adding fluid may change the symptom temporarily, but it does not explain why fluid was lost or why the unit will not hold.
Inspect accessible areas for wetness and damage without placing yourself beneath an unsupported engine. Never rely solely on hydraulic pressure while working where a lowering engine could trap you. Follow the specified support and servicing procedure, or have a technician perform the work. Do not open a release or filling screw on the assumption that all Yamaha systems use the same arrangement.
For a silent system, start with the electrical supply and controls rather than pouring in fluid. For a running motor with poor movement, give the technician the leak and movement history. Use only the fluid specified for the system; engine oil is not a universal substitute.
A Maintenance Record That Helps Prevent Repeat Faults
Use the schedule for your exact F70 and record both engine hours and calendar dates. An engine used infrequently still spends time exposed to moisture, fuel ageing and corrosion. “It has only done a few hours” is not a complete maintenance plan, and a generic interval should not replace the model’s service chart or the initial service requirements.
Make the record practical enough to maintain. A dated note and a photograph of the hour meter are more useful than an elaborate spreadsheet that is never updated. Keep invoices, part numbers and findings alongside the service entry so a later technician can see what was inspected and what was actually replaced.
- Record oil and filter services, fuel-filter work and cooling-system inspections separately.
- Note the first appearance of any warning, leak, hard starting or change in performance.
- Record propeller damage, fishing-line removal and lower-unit repairs.
- Include battery tests, charging repairs and changes to electrical accessories.
- Keep storage preparation and the first checks after storage in the same history.
Inspect sacrificial anodes as part of corrosion care and keep them unpainted. A deteriorated protective component deserves attention, but surface corrosion should also prompt a look at nearby connections and fittings. Cosmetic cleaning alone may leave the functional problem untouched.
For extended storage, follow the engine and fuel-system instructions for that installation. Do not borrow a carburettor-storage procedure for an EFI engine or assume that a last-minute additive makes old fuel suitable. On recommissioning, plan enough time to check the boat near the launch area before committing to a long trip.
What to Ask a Technician Before Approving Repairs
A useful repair recommendation connects a symptom to a test result. Ask which test failed, whether the problem occurred during testing and what will confirm the repair. This does not mean every intermittent fault can be reproduced immediately; it means the uncertainty should be clear before several expensive parts are replaced.
| Reported problem | Evidence worth asking about |
|---|---|
| No crank | Battery test and assessment of the starting circuit under load |
| Cranking without starting | Results separating fuel delivery, ignition and mechanical condition |
| Rough idle or power loss | Conditions used to reproduce the fault and relevant cylinder/fuel checks |
| Overheating | Cooling-supply inspection and temperature-related findings |
| Oil-pressure warning | Verified oil level and investigation of actual pressure versus indication |
| Repeated battery discharge | Battery condition, charging output and unwanted electrical demand |
| Contaminated gear oil | Evidence of water entry and results of seal testing |
Give the workshop your observations before suggesting a replacement part. Saying “it stalls after warming up, then restarts after waiting” leaves the diagnostic question open. Saying “replace the injector” can steer the conversation towards a repair you have not established is necessary.
After collection, keep the written findings and ask what checks remain for normal use. If the boat needs an on-water assessment, arrange it deliberately rather than treating the next family outing as the test. The goal is a dependable result and a useful service history, not merely an engine that starts once in the workshop.
Questions Owners Ask About Yamaha F70 Problems
Does a Running Engine Prove the Fuel System Is Healthy?
No. Starting and idling are only part of operation. A fault may appear after warming up or when demand increases. Describe the complete operating pattern so the technician can select a relevant test instead of treating a successful start as proof that the original complaint has disappeared.
Can I Keep Running If the Warning Clears After Restarting?
A cleared display does not explain why an alert appeared. Stop and identify the warning and its cause using the manual. In particular, do not continue with unresolved overheating or oil-pressure concerns. Record the indication and operating conditions before they are forgotten.
Should I Replace the Fuel Pump First?
Only when diagnosis supports it. Similar running symptoms can arise from the supply upstream of the engine, contamination, ignition or other faults. Establishing where delivery fails avoids buying a pump that cannot correct a blocked supply or another unrelated problem.
Is a Higher Top Speed the Best Proof of a Repair?
No. Smooth operation, dependable starting, absence of the original fault and operation within the correct limits matter more. Compare performance under similar loading and conditions. An isolated speed figure can change with conditions and can distract from a fault that still needs attention.
Are These Problems Unique to the F70?
The symptoms covered here also occur on other outboard installations. Their inclusion is not a claim of a model-wide defect. The F70-specific starting point is its fuel-injected four-stroke design, followed by the exact engine identification, installed controls and the boat’s own history.
The most effective approach is to identify the symptom, make the appropriate basic checks and preserve the evidence needed for the next decision. Fix the cause that testing supports, then confirm the original problem has gone under normal operating conditions.