
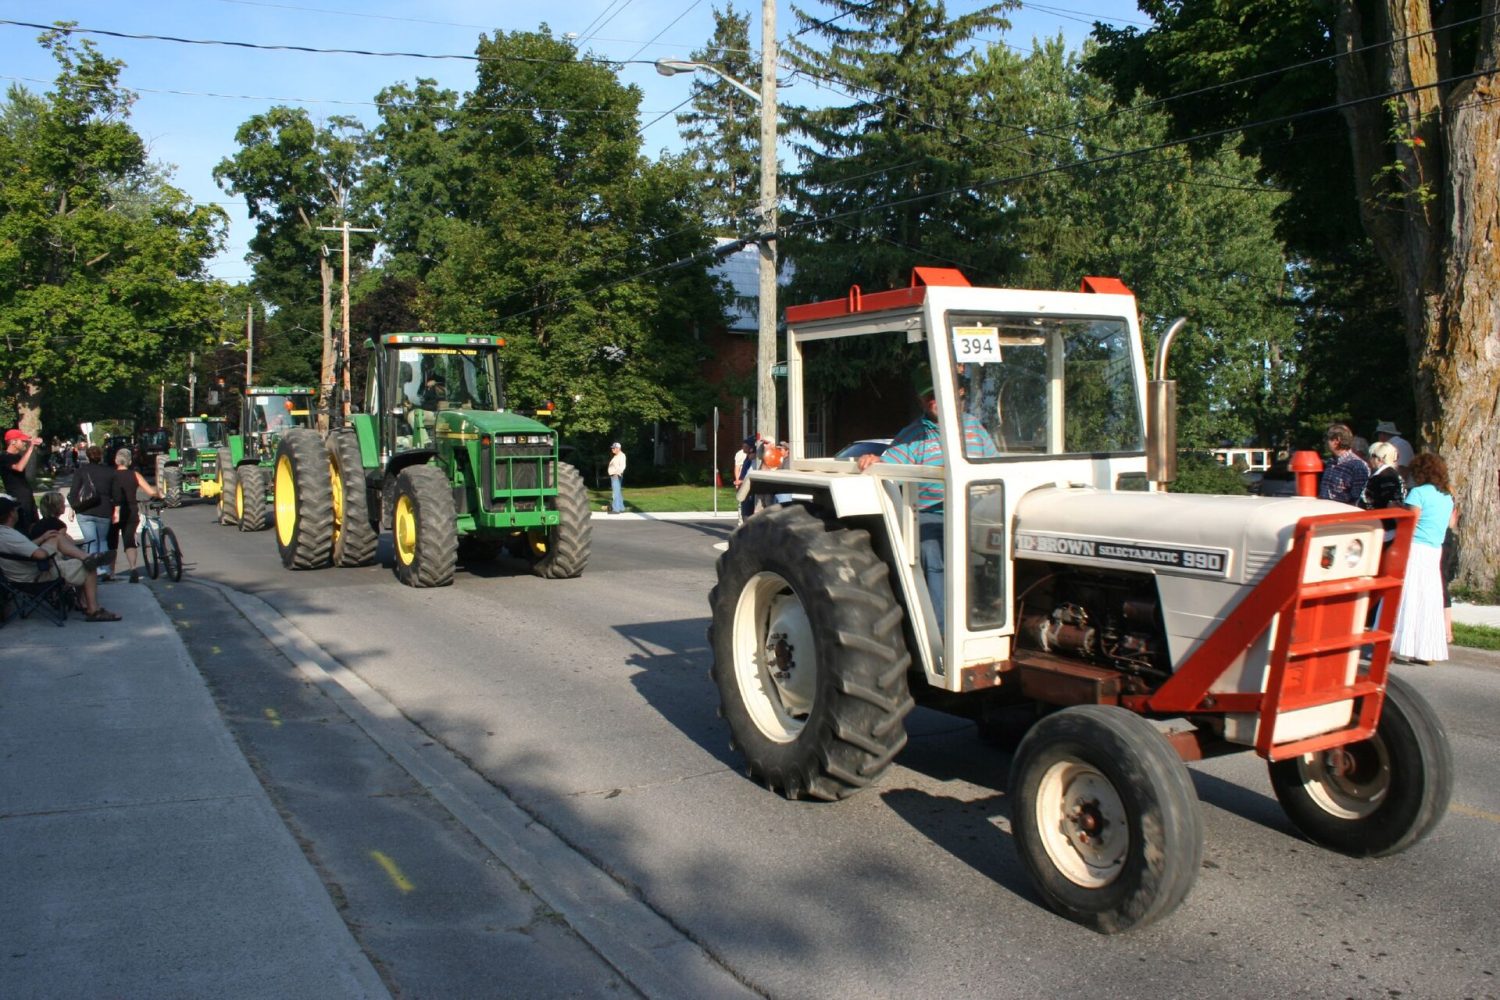
The David Brown 990 is one of the most enduring British utility tractors of the twentieth century, produced at the Meltham Mills factory in Huddersfield, Yorkshire, from 1961 until 1980. Across its long life it appeared as the 990 Implematic (1961 to 1965), the 990 Selectamatic (1965 to 1971), and the 990 Synchromesh (1971 to 1976 and later, under Case ownership after the Tenneco acquisition of David Brown in 1972). According to the David Brown Tractor Club, as reported by Farmers Guide, more than 67,000 990s were built at the Meltham works, making it numerically the most popular David Brown tractor ever built; the David Brown Tractors history records that in just over four years the early 990 alone reached 40,600 units and "at one stage accounted for 50% of the current production at Meltham Mills." Because so many survive in working order today, owners continue to seek reliable guidance on the faults that appear most often and on how to diagnose and repair them.

This article examines the major problem categories reported by owners, mechanics, and the classic tractor community. It draws on technical documentation from the David Brown Tractor Club, the manufacturer's own instruction books, specialist parts suppliers, and the collective experience recorded on forums such as Yesterday's Tractors, Tractor Forum, The Farming Forum, Smokstak, TractorByNet, and the David Brown Tractor Club forum. For each category the discussion is organised under the headings Symptoms, Causes, Troubleshooting Steps, and Solutions, so that an owner or mechanic can move logically from observation to repair.
A note on the fundamental architecture of the tractor is useful before proceeding. The 990 uses a David Brown four-cylinder diesel engine; the earliest 990 Implematic and early Selectamatic examples used the wet-liner AD4/47 unit of 3,045cc (bore 3.625 inch by stroke 4.50 inch, or 92 by 114 millimetres, per TractorData), while later Selectamatic and Synchromesh tractors used the direct-bored AD4/49 unit. The transmission and hydraulic system share a single oil reservoir, which is a critical point for understanding many of the faults described below. The Selectamatic hydraulic system, introduced in 1965, relocated the control valves into the right-hand side of the rear axle bundybearsshed and is the single most discussed component in the ownership community.
Engine Starting and Performance Problems
Symptoms
Owners report a range of engine complaints. The most common are prolonged cranking with heavy white or grey smoke and failure to fire in cold weather, a tractor that starts readily once warm but is very reluctant when cold, misfiring and lack of power under load, excessive exhaust smoke, and an engine that "slobbers" or wet-stacks when run under light load for long periods. One owner on the Yesterday's Tractors forum described his 990 as labouring in the field with "more exhaust than usual, and a lack of power," adding that "it misfires when I throttle up." Another reported that his tractor "just sits there and the starter keeps turning the motor, it smokes bad, and it will not start," yet "when it starts it runs just fine."
Causes
Cold-starting difficulty is most often traced to the cold-start assistance system rather than to a fundamental engine fault. The 990 diesel is a direct-injection engine with the combustion chamber formed in the piston crown, and its fuel injection equipment was supplied by CAV (later part of Roto-Diesel, and latterly badged Delphi). Early tractors relied on an ether plug in the inlet manifold, while later tractors used a CAV Thermostart glow-plug system with a dedicated "HEAT" position on the ignition switch and a small fuel feed line. Failure of the Thermostart element, a leaking Thermostart that allows fuel to seep into the manifold, or maladjustment of the injection-pump cold-start retard screw are all frequent contributors.
Persistent hard starting in mild temperatures, accompanied by heavy smoke, more often indicates worn or glazed cylinder bores and low compression. As one experienced contributor observed, a healthy 990 "should start at 30 degrees even without the glow plug," so failure to do so points to "glazed bores from never getting hot from any real use." Misfiring and power loss usually indicate fuel-delivery faults: air in the fuel system, blocked fuel filters, a faulty lift pump, a blocked injector return line, or worn or sticking injectors. The tendency to slobber is characteristic of these engines when under-worked, because the combustion temperature never rises enough to burn fuel cleanly.
Troubleshooting Steps
Begin with the fuel system, since it accounts for the majority of running faults. Confirm that the fuel tap is open and that clean fuel is reaching the filters, then bleed the fuel system thoroughly to expel air, because the instruction book itself lists air in the system as a cause of misfiring. Renew the fuel filter elements and check the glass sediment bowl on early tractors. For cold-starting complaints, cycle the Thermostart and confirm that the element coil glows; the factory instruction book (David Brown Tractors Ltd, Publication 9-5102, October 1974) directs holding the key in the pre-heat position "not less than 10 seconds, nor more than 25 seconds" before engaging the starter, noting that "little or no advantage is gained if the pre-heat position is held for less than 10 seconds." Verify that the injection-pump cold-start retard control (the small stem with a T-bar on the underside of the pump) is screwed fully in for normal running and only backed out for cold starts. Smokstak® Antique …
If fuel delivery is sound but the engine still cranks excessively and smokes, carry out a compression test. Confirm that the cold-start device is not leaking fuel into the manifold by removing the hose at the inlet manifold and checking whether the interior is wet. For power loss under load, inspect the injectors and the injector return line for blockage.
Solutions
Replacement Thermostart elements are inexpensive and readily available, and fitting a new element is a simple first remedy for cold-start trouble. Where the retard screw or its seal is at fault, a low-cost seal kit restores correct operation. Bleeding the system and renewing filters resolves most misfire complaints; where two injectors are found faulty, they should be removed and serviced by a diesel injection specialist, as CAV pumps and injectors can be rebuilt economically by any competent pump shop. Where compression is low from glazed or worn bores, the remedy is more substantial: de-glazing and a ring set may suffice, but a full overhaul with new pistons, rings, and, on the AD4/47, new wet liners and seals may be required. The most important preventive measure, repeatedly emphasised by owners, is to work the engine hard enough to reach full operating temperature, because chronic light-load running is what glazes the bores in the first place.
Selectamatic Hydraulic System Problems
Symptoms
Hydraulic complaints dominate the David Brown 990 ownership experience. Typical symptoms include a three-point hitch that will not lift at all, a hitch that lifts only when engine revolutions are raised well above idle, a hitch that lifts slowly or lowers slowly, a hitch that rises to full height regardless of the control-lever position, a hitch that will not hold a raised implement and sinks under load, and continuous "twitching" or hunting of the lift arms during work. One forum contributor summarised the consensus succinctly: "The lift not raising or not lowering is the most common complaint I hear from David Brown owners, and it is usually caused by neglect." Another owner acquired a tractor on which the transmission oil "looked much like a mint milk shake," and on which "the 3 point would not do anything."
Causes
The single most important cause is contamination of the shared transmission and hydraulic oil, and in particular the ingress of water. A widely respected summary on the Smokstak forum states plainly that if hydraulic trouble is encountered "it is almost always due to the ingress of water into the gearbox, and is usually a stuck valve in the valve chest." Smokstak® Antique … Water most commonly enters through torn or missing gear-lever boots. Because the transmission and hydraulic system share one reservoir, water and debris circulate through the Selectamatic valves and can cause the small spool and control valves to seize. In cold weather the consequences are worse, because, as one Canadian owner explained, "ice crystals clog the hydraulic oil screen and can shut off the oil supply." Smokstak® Antique …
The design of the Selectamatic system explains the specific faults. Oil is delivered by a pump mounted in front of the power take-off, and the control valves sit in the right-hand side of the rear axle. According to the David Brown Hydraulic Engineering account, a cam on the end of the ramshaft provides height-control feedback, while a sensing unit on top of the power take-off relays depth-control signals through a cable to a spool valve. A dump valve, bundybearsshed adjustable for rate of drop, allows rapid lowering. Common failure points therefore include a stuck latching or bypass valve in the valve chest, a worn spool in the control chest, worn ram piston seals, perished O-rings, a worn copper feed pipe, a maladjusted or broken draft-control cable, a clogged filter screen, and, less commonly, a genuinely worn hydraulic pump. A hitch that will lift only at higher engine speed generally indicates internal wear that has reduced pump efficiency or increased internal leakage.
Troubleshooting Steps
First, check and change the shared transmission and hydraulic oil and inspect it for a milky appearance that betrays water contamination. Inspect the gear-lever boots and renew them if they are split or missing. Clean or renew the gauze suction screen and the filter, since a blocked screen alone can prevent the lift from working correctly. If a filter warning lamp is fitted, note whether it illuminates, because that indicates the full-flow element is bypassing. Scribd
To isolate the fault, use the three-way selector or the ram isolation function: as one contributor on The Farming Forum explained, "flick the three way selector on the left of the seat into either 1 or 2, this will isolate the ram; if it holds up under weight then the ram seal is good," and the fault then lies in the O-rings, the copper pipe, or the valve chest. Maximum permissible "corrections" in height control, with the oil at working temperature, should be one every six seconds or longer; more frequent twitching indicates a leak between the valve chest and the ram cylinder, a worn ram seal, or a worn spool. Where a loader is fitted and the three-point hitch loses power only when the loader circuit is connected, investigate the three-way valve and its plumbing, because an incorrectly plumbed or open-centre loader valve can rob the rear hitch of pressure. For a hitch that rises fully regardless of lever position, check the mechanical linkage beneath the quadrant cover, counting the threads showing past the adjuster nut, before condemning the valves.
Solutions
Many faults are inexpensive to cure once diagnosed. A stuck valve in the valve chest is described by experienced owners as "a low dollar fix (some gasket material and 1500 grit paper)," although it takes at least three to four hours because the valve chest must be removed. Removing the dump valve and turning the spool a quarter turn can bring an unworn part of the spool into the bore and effect a temporary cure of a leaking control valve. Worn ram seals and the two large O-rings at the lift arm are common leak points and are addressed with a seal kit. A broken or maladjusted draft-control cable should be renewed and set according to the manual procedure.
Removing the Selectamatic valve chest is a substantial job: as one contributor cautioned, "it is a big job to pull the selectamatic valve box. Pull sensing unit, drop lower links, rockshaft, quadrant, parking brake handle, and lots of little fiddly bits. Cabbed tractors are much worse." Cleanliness is paramount; the work area around the kidney-shaped cover must be cleaned before opening, small parts must be captured in a container, and no grit must be allowed to enter, because the small filter screen can be blocked by a tiny amount of dirt. Where water contamination has been severe, the only complete cure is to split the tractor between the rear axle case and the transmission housing and to mop out the fluid that is trapped in the internal bays of the castings, since flushing alone will not remove all of it. Hydraulic pumps, valve components, seals, and complete top covers remain available from specialist suppliers such as Agriline Products and David Brown Parts.
Clutch and Transmission Problems
Symptoms
Clutch complaints include a clutch that will not disengage so that gears are difficult to select, a clutch that slips, difficulty engaging the power take-off with the clutch depressed, and grinding of the power take-off when it is engaged. Transmission complaints include noisy operation, particularly a whining or growling from the rear end, jumping out of gear, and grinding when shifting on synchromesh tractors. Oil contamination of the clutch, evidenced by a clutch assembly "black with oil residue," Smokstak® Antique … is also reported.
Causes
The 990 was offered with a single-stage dry clutch on earlier tractors and a two-stage (dual) clutch on many later and industrial tractors. On the two-stage arrangement the disc nearest the flywheel drives the transmission and the rear disc drives the power take-off, and a long cardan shaft runs through the transmission to the power take-off box at the rear. When such a clutch will not release, the usual cause is incorrect adjustment between the two stages, which causes one stage to wear faster than the other, or wear in the pressure-plate towers where the operating fingers pivot. As one specialist explained, "excessive wear in the pivot pins and holes will use up all your free travel and make it hard to disengage both clutches." Smokstak® Antique … Oil contamination of the clutch is generally caused by a failed rear main oil seal or a leaking transmission input-shaft seal and O-ring.
Regarding the gearbox, an important point is that noise is not necessarily a fault. As one long-standing owner cautioned, "all David Brown sliding mesh boxes are noisy, it is a characteristic of the box, not a fault," whereas the synchromesh boxes are much quieter. Genuine rear-end noise, however, is frequently traced to low oil in the final-drive reduction housings rather than to the transmission proper. Difficulty engaging the power take-off with the clutch depressed is commonly caused by clutch maladjustment or by wear in the clutch-pedal bushes and cross-shaft that prevents the pedal from fully disengaging the power take-off clutch.
Troubleshooting Steps
For power-take-off engagement complaints, first test whether the clutch is fully releasing. With the engine off, the power take-off in gear, and an assistant depressing the clutch, attempt to turn the power take-off shaft by hand; if it turns freely, the clutch is releasing correctly. A single quick grind as the power take-off engages is normal, because a spinning gear must mesh with a stationary one, whereas prolonged grinding and fighting indicates that the clutch needs adjustment. Adjust the clutch linkage, following the shop manual procedure, and check the power-take-off clutch bellcrank arm clearance. Inspect the clutch-pedal bushes and cross-shaft for wear.
For a noisy rear end, check the final-drive reduction oil levels at the pipe plugs before assuming transmission damage. For gear-selection complaints on synchromesh tractors, shift deliberately rather than quickly, because it is possible to force the synchromesh and cause it to grind. Where oil is found on a clutch that has been split for inspection, trace the source to the rear main seal or the transmission input-shaft seal.
Solutions
Replacing the clutch requires splitting the tractor, and owners should be prepared for this; a family with several David Browns confirmed that "you do have to split yours to fix" the clutch. On the two-stage clutch, the power-take-off adjustment screws are reached through three holes in the cover plate and must be set to the specified clearance of 0.070 inch; the recommended method is to screw the adjuster in until it contacts the separator plate, then back it out one and one half turns. Worn pressure-plate towers justify a reconditioned pressure-plate assembly. Where oil contamination is found, renew the rear main oil seal, taking particular care with the rope-type seal, and renew the input-shaft seal and O-ring, which on the 995 and similar tractors can be reached by removing the transmission top cover rather than fully dismantling the gearbox. Clutch discs, pressure plates, release bearings, pilot bearings, and alignment tools remain available; complete clutch kits are supplied by firms such as Agriline Products and MKH Machinery. Low final-drive oil is corrected simply by topping up with the correct grade.
Power Take-Off and Three-Point Hitch Problems
Symptoms
Power-take-off complaints include a shaft with excessive in-and-out play accompanied by rattling, a power take-off that shakes and then disengages itself when a load is applied, a lever that will not stay engaged, grinding and vibration on engagement, and rough running in one speed range but not the other. Three-point hitch symptoms overlap substantially with the hydraulic faults described above, since the hitch is operated by the Selectamatic system, but they also include a hitch that will not lower without the arms being pushed down by hand, and a hitch that creeps down under load.
Causes
The 990 power take-off is a two-speed unit, offering 540 and 1000 revolutions per minute, housed in a bolt-on box behind the rear axle. Broken or worn internal gears and bearings are a common cause of rattling and self-disengagement, frequently the result of a shock load, such as a rotary cutter riding up on cut material and failing to shear the shear pin. As one owner recounted, he "heard a noticeable pop sound underneath the seat in the gear box, and the PTO shaft started rattling, moving in and out," having found the outer snap ring broken. Rough running in one speed range only, for example a shaking 540 setting while the 1000 setting is smooth, typically indicates a broken gear specific to that ratio, whereas roughness in both suggests a bearing.
A lever that will not stay engaged, particularly under heavier load, is commonly caused by worn cross-shaft splines or, as on related David Brown models, by wear in the clutch-pedal bushes and shaft that prevents full engagement. For the three-point hitch faults, the causes are the Selectamatic causes already discussed: failed ram seals for a hitch that will not hold, and the lowering-rate control knob for a hitch that will not descend.
Troubleshooting Steps
Check for play by grasping and shaking the power-take-off shaft; noticeable movement or splines that permit rocking indicate internal wear. Establish whether roughness occurs in one speed range or both, since this distinguishes a broken gear from a bearing fault. Remove the small rear cover plate to inspect for a broken or displaced snap ring. For a hitch that will not lower, locate the lowering-control knob on the front of the selector section: as one specialist advised, "screw in clockwise and this will stop the lowering altogether, and screw anti clockwise and the implement will drop at a fast rate," and confirm also that the carry lock on the left rear of the lift mechanism Tractor Forum is not engaged. For a hitch that will not lift a mounted implement but lifts the bare arms, suspect the rear lift-ram piston seals.
Solutions
The power-take-off box can be removed and rebuilt without major dismantling of the tractor; experienced owners report the job takes little more than one to two hours once the oil is drained, though the box weighs approximately 200 pounds. A valuable practical tip is to cut the heads off two long bolts, thread them into opposite sides of the housing, and use them as guide rods to align and slide the box on and off so that the hydraulic-pump gears mesh correctly; bumping the starter helps to align the pump gears on reassembly. Care must be taken not to chip or break the pump gears during this operation. Replacement gears, bearings, and complete used power-take-off assemblies are obtainable, and interchangeability with the 885 differs by bearing type, so the correct variant must be identified. For the hitch, renewing the ram seals cures a hitch that will not hold, and adjusting the lowering-rate knob resolves descent complaints.
Brake Problems
Symptoms
Brake complaints include brakes that will not release so that a wheel is locked or dragging, brakes that are seized after the tractor has stood with the handbrake applied, excessive and unequal pedal travel between the left and right pedals, a pedal that is unusually stiff, and a parking-brake pawl that will not hold. One owner found "a lot of play in the R Brake … like 4 inches travel," while the left brake "is not hooked to anything."
Causes
The 990 uses mechanically operated, internal expanding shoe drum brakes on each rear half-shaft, located within the final-drive reduction housings. Several contributors regard the braking arrangement as one of the tractor's weaker design features; as one put it, "the brakes on David Browns are one of the few bad ways of doing things they designed." Seizure after standing is caused by the shoes rusting to the drum. A dragging brake is frequently caused by a dry, unlubricated brake camshaft where it passes through its bushing, the seal having failed, or by oil contamination of the shoes from a failed half-shaft oil seal. Excessive and unequal travel is simply a matter of adjustment and worn linkage, and a parking brake that will not hold is caused by a worn pawl or ratchet.
Troubleshooting Steps
For a brake that will not release, first disconnect the brake operating rod and tap the operating arm back, then attempt to free the shoes. Where the tractor will not move at all, confirm that the parking brake and the separate emergency or hand mechanism are fully released. Where a brake drags, loosen the brake adjustment rod and tap back the arm at the end of the rod beneath the axle; if this does not free it, the brake is binding internally. To inspect the shoes, remove the wheel, undo the ring of bolts holding the reduction housing, and withdraw the housing complete with its half-shaft, which exposes the brake fully. A critical safety and assembly point applies here: before withdrawing the half-shaft, tie down or secure the differential-lock pedal, because the fork collar can otherwise drop out of place and be very difficult to reposition.
Solutions
Shoes that have rusted to the drum can sometimes be freed by placing the tractor in low gear and forcing it to turn, but seized or contaminated shoes ultimately require the reduction housing to be withdrawn for access. A dry brake camshaft should be freed with penetrating oil, cleaned, and lubricated, and the failed camshaft seal renewed to prevent recurrence. Because the underlying cause of oil-contaminated shoes is a failed oil seal, new seals should be fitted whenever the housing is opened. Excessive pedal travel is corrected by adjustment, and the two pedals should be balanced so that they operate equally, which is essential for safe braking and for the brakes to function as steering aids. Brake shoes, springs, pawls, camshafts, and slave-cylinder and master-cylinder kits for the later hydraulically actuated systems are available from David Brown Parts and Agriline Products. Where a hydraulic brake or clutch cylinder is rebuilt, the system must be fully flushed with clean fluid to remove contaminants, and only the specified mineral oil should be used.
Cooling System Problems
Symptoms
Cooling complaints include overheating and a temperature gauge climbing toward the red mark, coolant being expelled from the overflow, persistent need to top up coolant, and, in the most serious cases, coolant contaminating the engine oil or oil being pushed out of the dipstick or sump. A recurring and characteristic 990 issue is that the engine air intake is routed through the top of the radiator area.
Causes
The cooling system comprises a radiator, a belt-driven water pump, a thermostat, upper and lower hoses, a fan, and the coolant itself. Overheating is caused by a blocked or furred radiator core, a build-up of rusty sludge restricting flow in the block, a collapsing bottom hose, a failed thermostat, a slipping fan belt, or a failed water pump. Where coolant is lost with no external leak and the oil is contaminated, the cause is usually a failed cylinder-head gasket allowing combustion gases into the coolant or coolant into the cylinders. Owners should note that these early engines had, in the words of one supplier, a tendency to be "particular about their cooling systems working together," Sutterbros so the water pump and thermostat must both be functioning correctly. It is also important not to mistake a normal running temperature for overheating; a gauge reading of 225 degrees Fahrenheit is "not necessarily overheating," and a reliable thermometer should be used to confirm a genuine problem. A minority of survivors run with a cracked block, which one owner reported causes only slight coolant loss.
Troubleshooting Steps
Confirm first that the radiator is full and that the coolant is clean rather than rusty; rusty coolant indicates internal sludge and the need for a chemical flush. Start the engine with the radiator cap removed and observe whether coolant circulates at the top of the radiator once the thermostat opens; if coolant does not circulate or is pumped out of the filler, suspect a blockage, a collapsing bottom hose, or a failed thermostat. Check the fan belt tension. If overheating persists after the radiator, thermostat, and water pump have been addressed, carry out a cooling-system pressure test to detect an internal leak, and inspect for combustion gases in the coolant, which points to a head-gasket failure.
Solutions
A furred or blocked radiator should be removed, cleaned, and, if necessary, re-cored, or replaced with one of the copper-and-brass reproduction radiators available for the 990. The entire cooling system should be flushed to remove sludge before fresh coolant is added. Failed thermostats, hoses, clamps, fans, and water pumps are all readily available; care is required when ordering a water pump, because several different pumps were fitted to the 990 according to engine type and serial number, with distinct pumps for the AD4/47, the flat-backplate Selectamatic, and the later recessed-impeller type. Where a head-gasket failure is confirmed, the head must be removed, checked for flatness, and a new gasket fitted. A slipping belt is corrected by adjustment to the specified deflection of three-eighths of an inch, or ten millimetres.
Steering, Front Axle, and Wheel Bearing Problems
Symptoms
Steering complaints include heavy or hard steering, a steering wheel that turns without moving the wheels, a power-steering reservoir that expels oil when the wheel is turned, and leaks at the steering box or hydrostatic steering valve. Front-axle complaints centre on worn or collapsed front wheel bearings, sometimes accompanied by a damaged spindle.
Causes
The 990 was offered with manual steering, power-assisted steering, and later hydrostatic steering. Heavy steering and a wheel that turns without effect are caused by wear in the steering box, loss of ball bearings from the box, or, on power systems, a failed pump or leaking Orbitrol valve. Leaks arise from perished seals at the steering sector or at the top of the steering shaft. Front wheel-bearing failure is a straightforward consequence of age, load, and inadequate greasing, and is aggravated where a loader is fitted. Owners have found that the 990 used three different spindle heights with correspondingly different bearing sizes, which complicates parts ordering.
Troubleshooting Steps
For heavy or vague steering, inspect the steering box for wear and for lost ball bearings, and check the fluid level and condition in the power or hydrostatic system. For a reservoir that overflows when the wheel is turned, investigate the steering pump and relief arrangement. For leaks, identify whether the source is the sector, the shaft top, or the Orbitrol valve. For front wheel bearings, jack up the front and check each wheel for play and roughness, and inspect the spindle for wear before ordering parts, confirming the spindle height and bearing size fitted.
Solutions
A worn steering box may be rebuilt with new bearings and, where the ball-race tube is damaged, repaired by a competent engineer, or the complete steering shaft assembly may be renewed. A leaking Orbitrol hydrostatic valve can be resealed with a kit, and some owners choose to fit a manual box and drag link as a simpler alternative. Power-steering pump rebuild kits are available. Front wheel bearings, races, seals, and spindles are obtainable both from Case International dealers and from independent suppliers, and owners are advised to compare prices, as one found dealer pricing considerably higher than independent sources.
Electrical System Problems
Symptoms
Electrical complaints include a complete loss of electrical power, a battery that will not charge, non-functioning lights and gauges, warning lamps that do not illuminate correctly, and a tangle of redundant or damaged wiring inherited from previous owners or from fire damage.
Causes
The 990 uses Lucas electrical equipment, which the community regards with well-worn scepticism; one Case service veteran of more than forty years remarked that Lucas "never used a simple switch and a wire when a switch, 3 relays and 14 wires could be used in their place." Early tractors used two six-volt batteries and a dynamo, and later tractors used a single twelve-volt battery. Total loss of power is most often a bad earth, a corroded connection, or a burnt fuse link in the small wire doubled under the positive battery-cable stud at the starter solenoid. A battery that will not charge is caused by a failed dynamo or, on later tractors, a failed alternator or its internal regulator. Warning lamps that do not work correctly are caused by faulty bulbs, senders, or wiring to the alternator excite circuit. It is important to note that the electrical system has no bearing on whether the diesel engine runs, since it has no ignition system; a running fault must be sought in the fuel system, not the electrics.
Troubleshooting Steps
For total loss of power, work systematically with a multimeter or test lamp from the battery outward, tracing power to the starter solenoid and then along the feed wire to the ammeter and the rest of the system until the point of failure is found; inspect the fuse link, and if it is burnt, look for a shorted wire. Clean all connections in the starting system and confirm a good earth, since a poor earth alone can cause a no-crank condition. For charging faults, test the dynamo or alternator output. For warning-lamp faults, test the bulb and the sender and check the excite-circuit wiring.
Solutions
Many owners simplify and improve reliability by converting the charging system to a modern alternator. A Lucas alternator of suitable diameter, or a car-type or Delco unit, may be fitted; the conversion involves connecting the heavy output wire to the starter and the smaller wire to the ignition through the warning light, and dispensing with the original regulator box. Some owners fit a one-wire alternator for simplicity, accepting the loss of the charge-warning light, while others fit a three-wire unit to retain it. Burnt or chaotic wiring is best addressed by rewiring to a known diagram, and reproduction wiring harnesses are available, although the correct harness depends on the serial number, colour scheme, and whether a dynamo or alternator is fitted. Damaged bulbs and senders are inexpensive to renew.
Water Contamination in the Transmission and Hydraulic Oil
Symptoms
The tell-tale symptom is transmission and hydraulic oil that has turned milky, likened by owners to a "mint milk shake," accompanied by hydraulic malfunction and, in winter, intermittent loss of hydraulic function as ice crystals block the oil screen.
Causes
Because the transmission and hydraulic system share one reservoir, any water that enters affects both. The principal entry point is through torn or missing gear-lever boots, but water may also enter past worn seals, through a poorly sealed dipstick or filler, or, in tractors that have stood outdoors or been flooded, through the breathers. Water is drawn into the internal bays of the castings, where it becomes trapped and is difficult to remove by draining alone.
Troubleshooting Steps
Inspect the oil for a milky appearance and check the gear-lever boots for splits or gaps. Establish whether the tractor has been stored outdoors or subjected to flooding. Where the hydraulics fail only in cold weather, suspect ice crystals blocking the screen.
Solutions
Drain the contaminated oil while it is warm and renew it, then clean the gauze screen and change the filter. Renew the gear-lever boots to prevent recurrence, since this is the most common entry point. Flushing the reservoir reduces the water content but, as owners repeatedly stress, will not remove all of it; where contamination has been severe or prolonged, the only complete cure is to split the tractor between the rear axle case and the transmission housing and to mop out the trapped fluid from the internal bays by hand. Storing the tractor under cover and, in cold climates, using a block heater before starting further reduce the risk. The correct refill is a transmission and hydraulic oil of the specified grade rather than a heavy gear oil, because a heavy oil will not pass through the filter and will damage the hydraulic pump.
Maintenance-Related Failures
Symptoms
A distinct category of problems arises not from design weakness but from deferred or incorrect maintenance. These manifest as the hydraulic and clutch faults already described, as premature wear of rear wheel bearings, as engine bore glazing, as oil leaks from the rear-end castings, and as the general deterioration of tractors that have stood unused for long periods.
Causes
The community consensus is that the 990 is a durable machine whose most problematic areas fail chiefly through neglect. Rear wheel bearings "need regular greasing to avoid premature wear, but are often neglected and thus wear out faster than they should." The hydraulic system fails principally through contaminated oil and torn boots. Engine bores glaze through chronic light-load running. Oil leaks from the rear-end castings were a known factory issue: according to the David Brown Hydraulic Engineering account, the paper gaskets between the power-take-off case, the axle, and the mainframe were found to extrude under the twisting loads imposed by heavy mounted ploughs, causing capillary oil leaks and loss of bolt torque, a problem the factory eventually addressed with liquid gasket sealant. Tractors that have stood for years commonly seize valves in the Selectamatic chest and rust the cylinder bores, sometimes to the point of hydraulic lock.
Troubleshooting Steps
Establish the service history where possible, and inspect the condition of the oils in all three systems, the state of the gear-lever boots, the greasing points, and the rear-end castings for leaks. For a tractor that has stood, expect stuck hydraulic valves and possible bore corrosion, and check the engine turns freely before attempting to start it.
Solutions
The remedy for this category is disciplined preventive maintenance, set out in detail in the next section. Extruded rear-end gaskets are addressed on rebuild with modern gasket sealant. Seized valves in a long-idle tractor are freed by careful cleaning and polishing as already described. The overarching lesson from the ownership community is that a well-maintained 990, with clean oils, intact boots, and regular greasing, "can go for many years with good service."
Preventive Maintenance and Recommended Servicing Schedule
Preventive maintenance is the single most effective way to avoid the problems described above, and the David Brown factory set out a clear schedule in the instruction book for the 990, 995, and 996. The routine service tasks are organised by running hours, and the intervals below are drawn from that official instruction book (Publication 9-5102, October 1974).
A first service should be carried out by a dealer at 50 to 100 hours to remove the contaminants that build up during running-in. This first service includes changing the fuel filter, changing the engine oil and filter, flushing the transmission gearbox, cleaning the wire-mesh and magnetic filters and fitting a new paper filter before refilling, changing the final-drive reduction oil, and checking the cylinder-head bolts and valve clearances. The factory stressed that it is essential to drain the transmission oil and refill with new oil at this first service.
Thereafter the schedule proceeds on the following intervals. Daily, and more frequently in dusty conditions, the air cleaner should be checked; in dusty conditions the oil-bath air cleaner should be serviced every 8 hours, with the aim of preventing more than one quarter of an inch, or 6 millimetres, of dirt accumulating in the oil bath. Every 60 hours (Service Task A) the air cleaner should be serviced and the full list of grease points lubricated with a good-quality lithium-based or multi-purpose grease. These grease points include the king pins and front-axle trunnion, the front and rear hubs, the steering-box cross-shaft, the steering-column top bearing, the clutch, brake, and power-take-off clutch pedals, the sensing unit and cable, the hydraulic ramshaft, and the lift rods and levelling levers. The rear hubs should be given only two shots of the grease gun to avoid over-greasing. Every 125 hours (Service Task B) the engine oil should be changed while hot, and the final-drive oil levels should be checked and topped up. Every 250 hours (Service Task C) the engine oil filter element should be renewed while the oil is being drained. Every 500 hours (Service Task D) the transmission and hydraulic filter should be changed and the wire-mesh filter and magnet cleaned, the fuel filter elements renewed, the valve clearances and injectors checked, the fan belt adjusted to a deflection of three-eighths of an inch, or 10 millimetres, the power-steering filter changed at its first interval, and the handbrake grease fitting given one shot of SAE 140 oil. bundybearsshed The factory noted that it may be necessary to change the transmission and hydraulic filter before 500 hours, and that the yellow filter warning lamp will indicate when this is required. bundybearsshed Every 1000 hours (Service Task E) the transmission and hydraulic oil should be drained from both plugs, at the mainframe and the rear axle, and renewed, and the final-drive reduction oil should be drained and renewed.
Regarding lubricant grades and capacities, the factory specified for the United Kingdom and Ireland a multi-purpose oil of SAE 20/20W viscosity for the engine and air cleaner, a multi-purpose oil of SAE 80 for the transmission and hydraulic system, the steering box, and the belt pulley, SAE 140 gear oil for the final-drive reductions, king pins, and front trunnion, and a hydraulic mineral oil of SAE 10W viscosity, and not brake fluid, for power-assisted and hydrostatic steering. bundybearsshed Modern owners commonly substitute a good-quality multi-grade diesel engine oil such as 15W40 for the engine and a universal tractor transmission oil or equivalent for the shared transmission and hydraulic system, and the community is clear that a heavy 80-90 gear oil must never be used in the shared sump because it will not pass through the filter and will damage the hydraulic pump. The engine sump holds approximately 7.5 litres, and the shared transmission and hydraulic reservoir holds approximately 7 imperial gallons, as one owner noted: "IIRC it takes 7 gallons of oil for the trans/hyd"; the exact figure should be confirmed against the dipstick and the manual for the specific tractor. The cooling system holds approximately 14 litres and should be filled with an ethylene-glycol antifreeze meeting the appropriate British Standard, renewed at least every two years.
For the fuel, the factory specified farm diesel to the appropriate national standard, and owners should keep the fuel clean and never run the tank dry, because doing so admits air to the system, which is difficult to purge. Beyond the scheduled tasks, the practical preventive measures most emphasised by the ownership community are to keep the gear-lever boots intact to exclude water from the shared oil, to store the tractor under cover, to work the engine hard enough to reach full operating temperature so as to avoid bore glazing and slobbering, to grease the rear wheel bearings regularly, and to keep the Selectamatic oil clean, since, as one experienced owner put it, once the valve chest is cleaned and working, "you should never have to touch it again, so long as you keep the oil clean, and a filter in place."
Model-Year and Variant Differences
The 990 changed considerably over its long life, and the variant affects both the likelihood and the nature of the problems an owner will encounter. The 990 Implematic (1961 to 1965) used the wet-liner AD4/47 engine and the older Implematic hydraulic system, in which the lift and lower valves were mounted on the pump in front of the power take-off and operated mechanically by linkage, with height control from a cam on the ramshaft and depth control from a cable on a spring-loaded top link. The factory's own hydraulic engineers acknowledged that on the Implematic "depth control was a little jerky and the cable on the top link could be vulnerable to damage," and that "height control was not that efficient and could cause the oil to overheat." Owners of Implematic tractors are therefore more likely to encounter these control and overheating issues, but the mechanical simplicity of the system means there is no complex valve chest to seize.
The 990 Selectamatic (1965 to 1971) introduced the valve chest in the rear axle and the sensing unit on the power take-off, giving markedly better control but introducing the stuck-valve fault that dominates modern ownership discussion. The earliest Selectamatic tractors retained the AD4/47 wet-liner engine, while, according to the David Brown serial-number records, the direct-bored AD4/49 engine was fitted from serial number 800001 in 1968. This engine distinction matters greatly for overhaul: the AD4/47 has replaceable wet liners, whereas the AD4/49 has cylinders bored directly into the block and must be re-bored to oversize or fitted with repair sleeves. Owners are cautioned to specify the engine type, not merely the model, when ordering parts, because, as one specialist warned, "it still seems some suppliers do not know that the 990 had 2 types of engine."
The 990 Synchromesh (from 1971) introduced the quieter synchromesh gearbox, with synchromesh acting between second and third gears in each range, in place of the noisier sliding-mesh box. It also fell within the Case era after the 1972 acquisition, and later tractors adopted Case colour schemes and the "Case David Brown" branding. Across all variants the two-speed power take-off, the shared transmission and hydraulic reservoir, the Lucas electrics, and the drum brakes remained broadly similar, so the water-contamination, brake, and electrical problems described above apply throughout the range. Power steering and hydrostatic steering were options fitted to many later tractors, adding the steering faults described earlier to the list of possibilities.
Parts Availability Today
A significant advantage of the David Brown 990 is that parts remain widely available more than four decades after production ended, which is a direct consequence of the model's popularity and the interchangeability of many components across the David Brown and Case David Brown range. As one long-standing owner observed, "the 990 was David Brown's best-selling tractor in the UK, and parts are currently easy to get." Specialist United Kingdom suppliers including David Brown Parts, Agriline Products, and DB Worldwide Parts carry engine, hydraulic, clutch, brake, cooling, and electrical components, and North American suppliers including Cross Creek Tractor, All States Ag Parts, Abilene Machine, and Case International dealers such as Messicks supply both new and salvaged parts. The David Brown Tractor Club is an invaluable resource for technical advice and manuals, and free downloadable operator and repair manuals are available online through sites such as dbtractors.co.uk and Bundy Bear's Shed. Owners should always identify the serial number and engine type before ordering, because the 990 changed substantially over its production life and many components differ by date.
Conclusion
The David Brown 990 has earned its reputation as a strong, economical, and repairable tractor, and the great majority of the problems reported by owners fall into a small number of well-understood categories. Engine complaints are usually fuel-related or the consequence of light-load running rather than fundamental weakness. The Selectamatic hydraulic system, for all its sophistication, is reliable when its shared oil is kept clean and free of water, and most of its faults are cheap to cure once the valve chest is understood. Clutch, power-take-off, brake, cooling, steering, and electrical faults are all documented and remediable, and parts remain available. The recurring theme across every category is that the 990 rewards disciplined preventive maintenance, above all the exclusion of water from the transmission and hydraulic reservoir through intact gear-lever boots and regular oil changes. An owner who follows the factory servicing schedule, keeps the oils clean, greases the tractor regularly, and works the engine properly can expect the same long and dependable service that has kept so many of these tractors working for more than half a century.
Featured photograph: Robert Taylor / Wikimedia Commons, licensed under CC BY 2.0.